Proxmox Backup Verification – Part 3: Running It Live
// Table of Contents
Disclaimer: This is an unofficial personal passion project, not an official Veeam product, and it isn’t supported or endorsed by Veeam in any way. I’m also not a professional developer, so treat this as a demonstration of the “art of the possible” rather than production-ready code, much of which was written with AI assistance. Use it with caution and test thoroughly in your own environment before relying on it for anything important.
Welcome back! In Part 1 I covered why I built this, and in Part 2 I went through how it works, the isolated networking, the gateway VM, the boot proof and the health checks.
Now for the fun part. No more talking about it, I’m running the whole thing end to end on my real three node Proxmox cluster, against real Veeam backups, manual step and all, and I recorded the lot so you can watch it happen rather than just take my word for it.
If you’d sooner read along than watch, here’s the same run written out step by step.
What We’re Verifying
I could have done this with a single VM and made my life easy but where is the fun in that? It wouldn’t be me if I didn’t overcomplicate things and that also wouldn’t prove anything interesting, after all this is all about pushing the art of the possible, so I’m doing the harder case: a proper multi-tier application, two VMs, sitting on two completely different subnets, that need to be able to talk to each other.
+---------------------+-------------------+---------+---------------+
| VM                  | Role              | Subnet  | Real IP       |
+---------------------+-------------------+---------+---------------+
| lab-dc-01-restored  | Domain Controller | VLAN 20 | 192.168.20.51 |
| lab-app-01-restored | App Server        | VLAN 22 | 192.168.22.51 |
+---------------------+-------------------+---------+---------------+
This was the real test, because in the real world I’m sure not all your VMs live on the same subnet, they’re scattered all over the place across different zones so we had to test that scenario.
Both of those VMs keep their real production IP addresses throughout. Nothing inside either guest gets touched or reconfigured at any point, which is what makes this a real test rather than a nicely staged demo.
Here’s the application group config the run uses:
{
  "name": "lab-dc-demo",
  "members": [
    { "vm_name": "lab-dc-01-restored", "subnet_id": "labtest", "ip": "192.168.20.51", "mac": "bc:24:11:dd:61:42", "health_checks": ["system-running"] },
    { "vm_name": "lab-app-01-restored", "subnet_id": "vlan22", "ip": "192.168.22.51", "depends_on": ["lab-dc-01-restored"], "health_checks": ["system-running", "ad-connectivity"] }
  ],
  "networks": [
    { "subnet_id": "labtest", "cidr": "192.168.20.0/24", "gateway": "192.168.20.1" },
    { "subnet_id": "vlan22", "cidr": "192.168.22.0/24", "gateway": "192.168.22.1" }
  ]
}
The bit to notice is depends_on on the app server. That’s me telling the tool the app server is useless without the domain controller, so don’t bother verifying it until the DC is actually up. Everything else is just naming the two VMs and the two networks they live on.
Step 1 – Publish
One command starts the whole thing:
pmx-lab publish lab-dc-demoStraight away it gets on with everything that doesn’t need Veeam. It builds an isolated network for each of the two subnets, and connects the gateway VM to both of them so it can act as each subnet’s gateway on the inside:
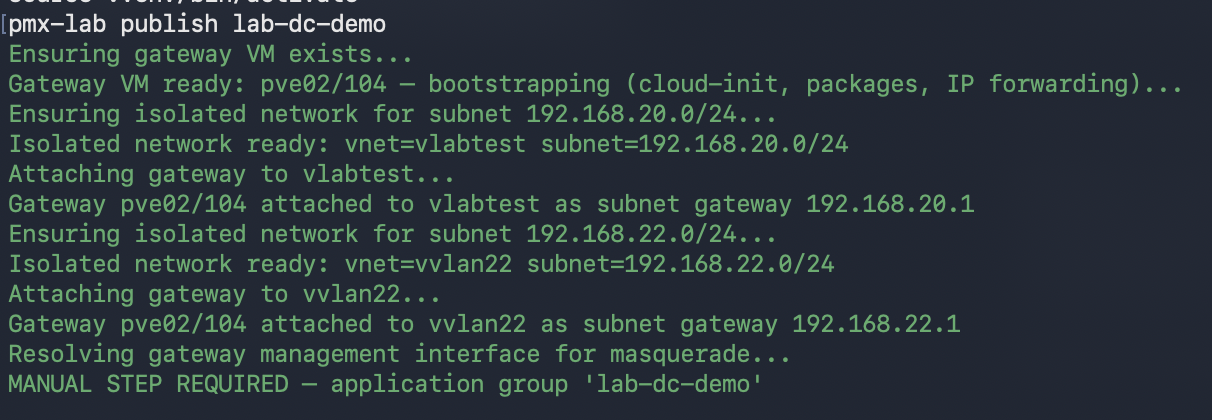
That’s two sealed off copies of two production networks, built from nothing, in about as long as it takes to read this paragraph. If either of those networks already existed from an earlier run it would just reuse them and move on.
Then it stops, and tells me exactly what to go and do next.
Step 2 – The Manual Step
Over in the VBR Console I find the backup job, pick the latest restore point for each VM, and kick off an Entire VM Restore onto the cluster.
There are only two things you have to get right here:
- The restored VM’s name has to match the name in the application group config exactly
- Add it to the isolated network
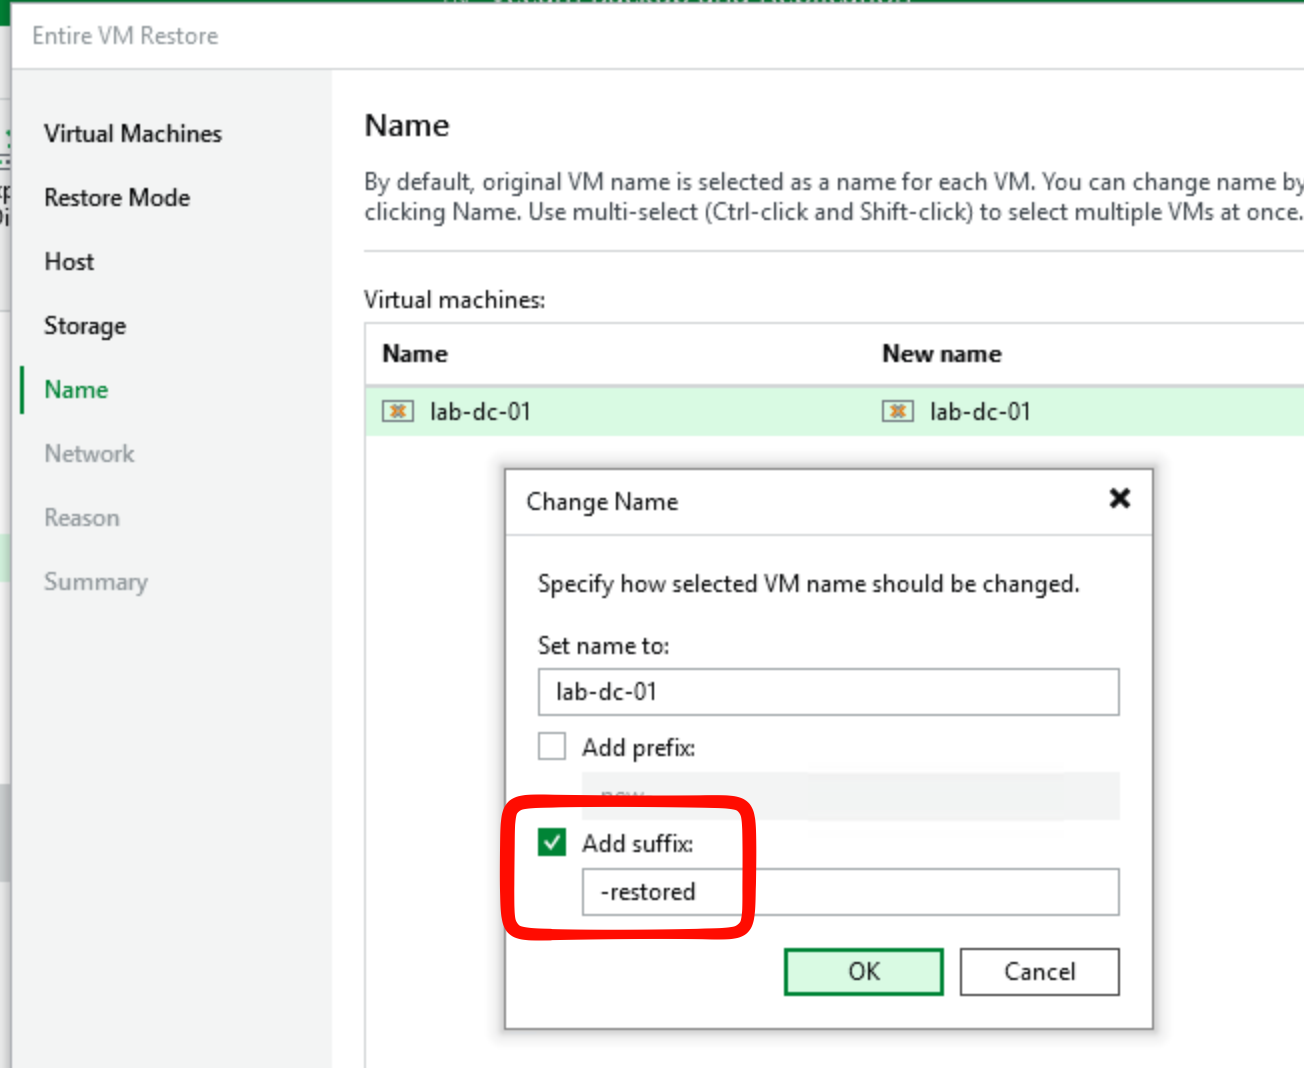
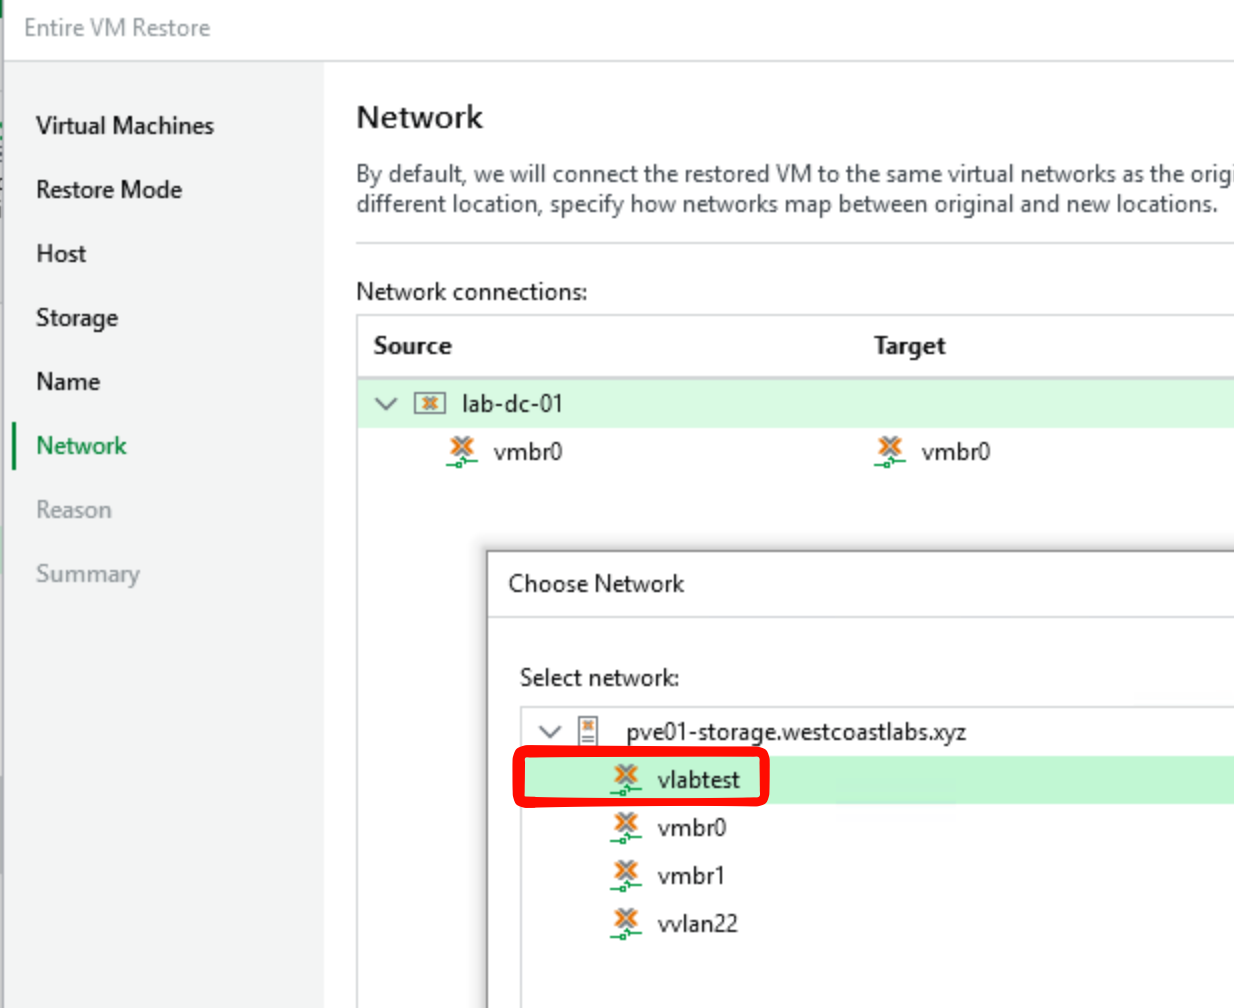
That’s it. You don’t need to write down which node it landed on or what ID it got, none of that. Name it right, put it in the right place, hit finish.
Power on the VMs and back to the terminal we go.
Step 3 – The Tool Picks It Back Up
pmx-lab has been sat there quietly watching Proxmox the entire time I was clicking around in the Console. The moment a VM appears with a name it’s expecting, it takes back over on its own:
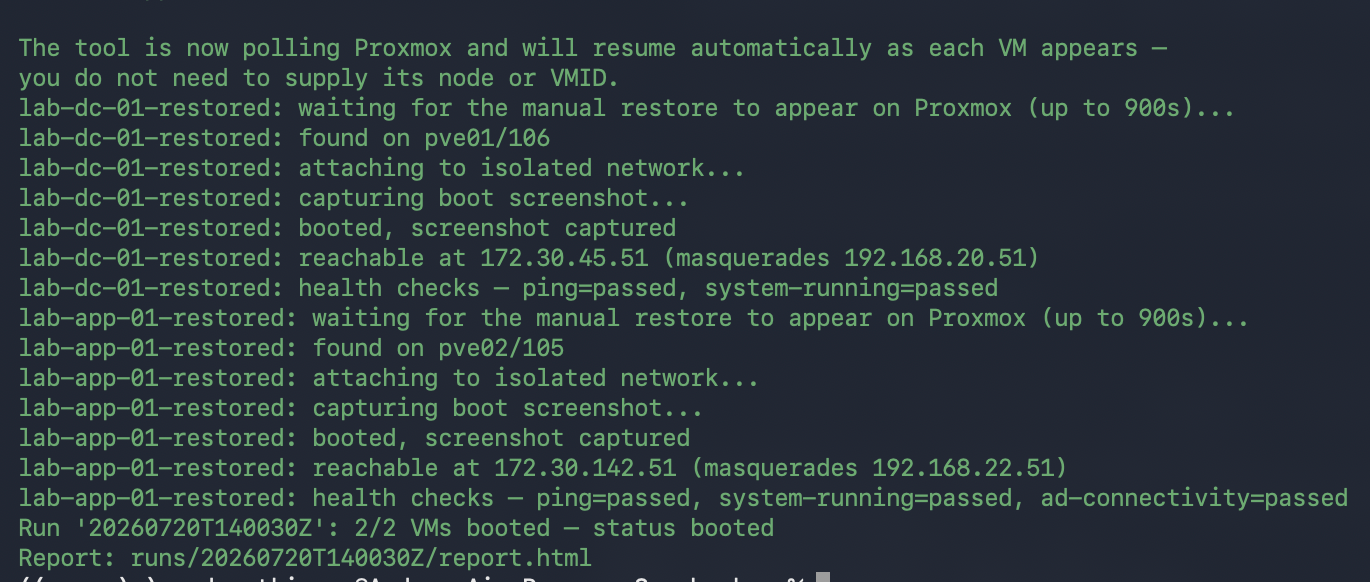
No typing in node names or VM IDs, no telling it where to look. It finds them, checks each one is sitting on the right isolated network and moves it across if it isn’t, and puts each VM’s original IP and network adapter address back the way they were before the backup.

Step 4 – The Actual Proof
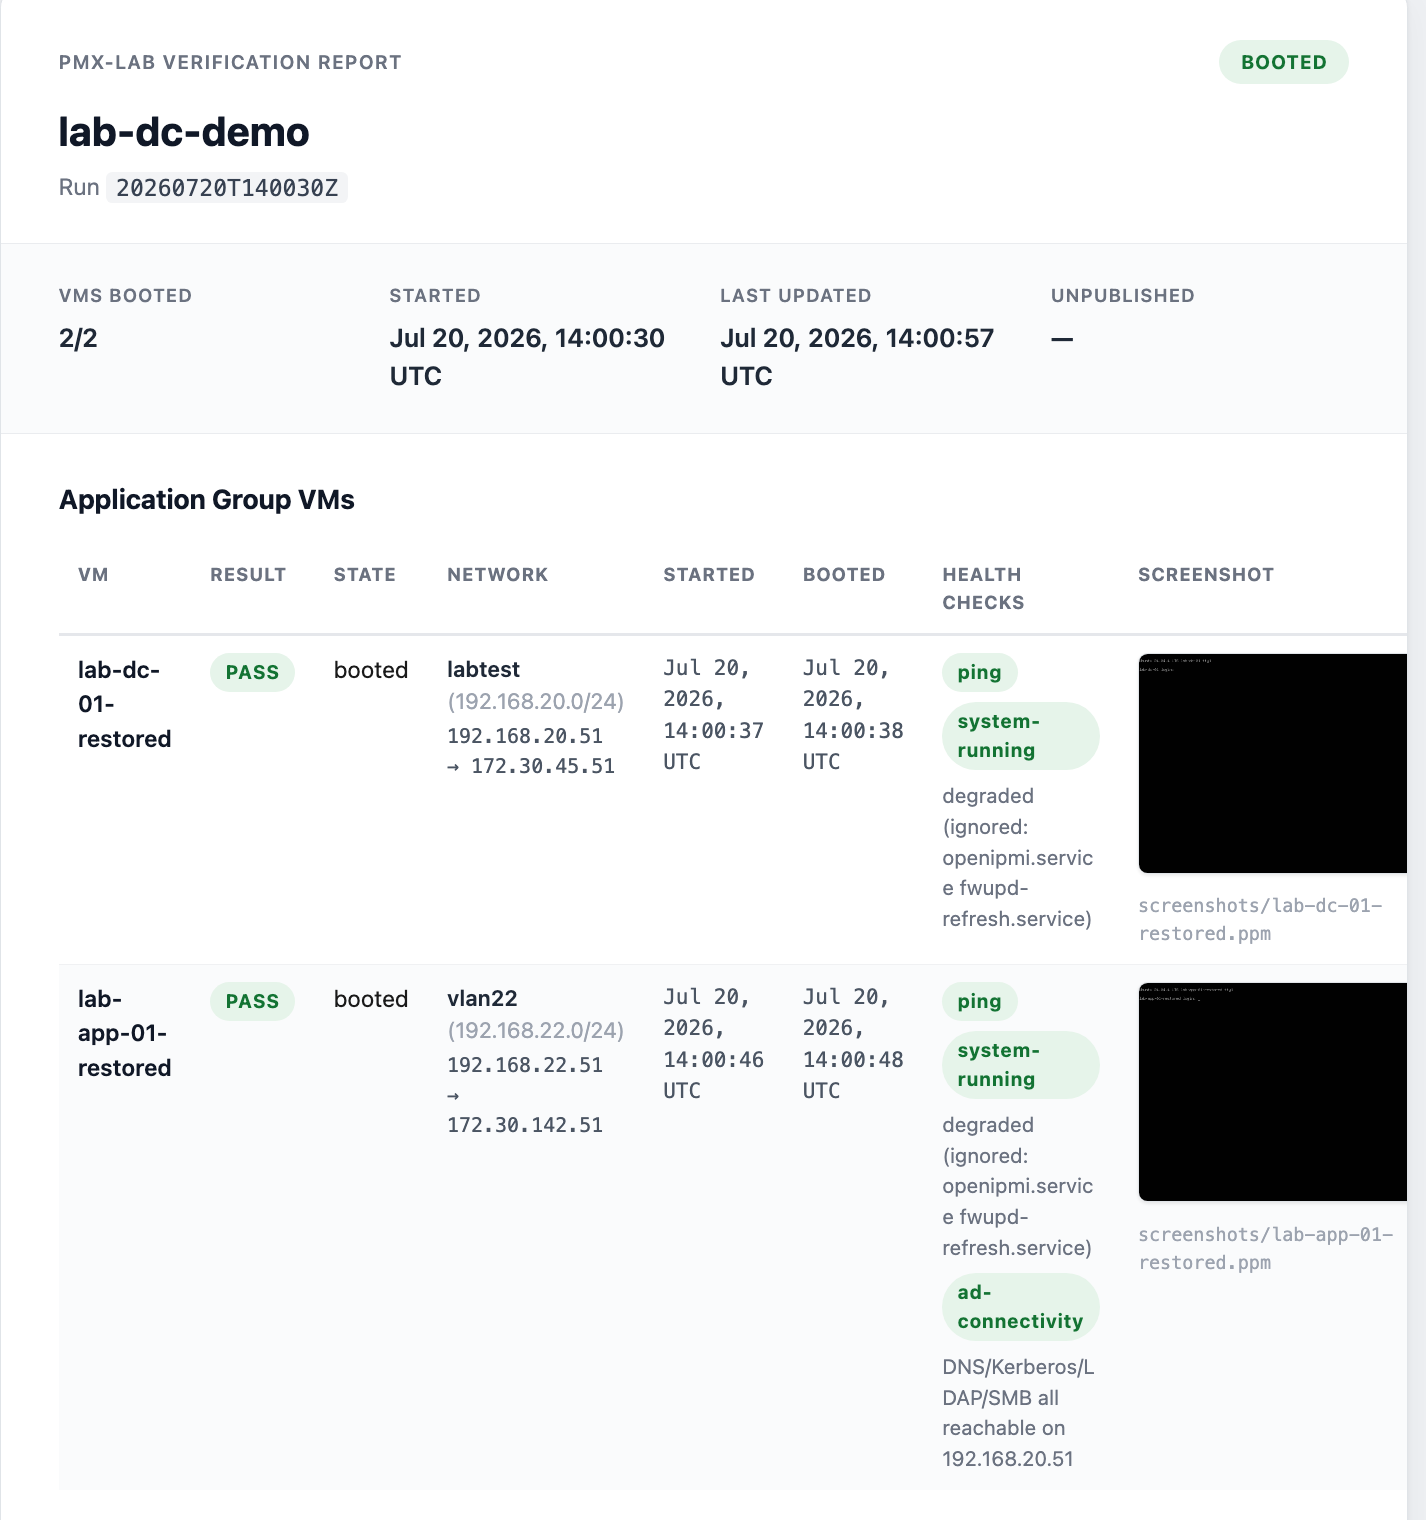
Once each VM settles, the tool grabs a screenshot of its console and runs a few health checks including some AD checks to make sure the domain controller is responding, which is the bit I care about, and then it generates this pretty little report that details exactly what happened including a hyperlink to the screenshot so you can see it.
But wait, there is more. As they always say, trust but verify, which is exactly what we are going to do by actually SSHing into the masquerade IP address of the domain controller.
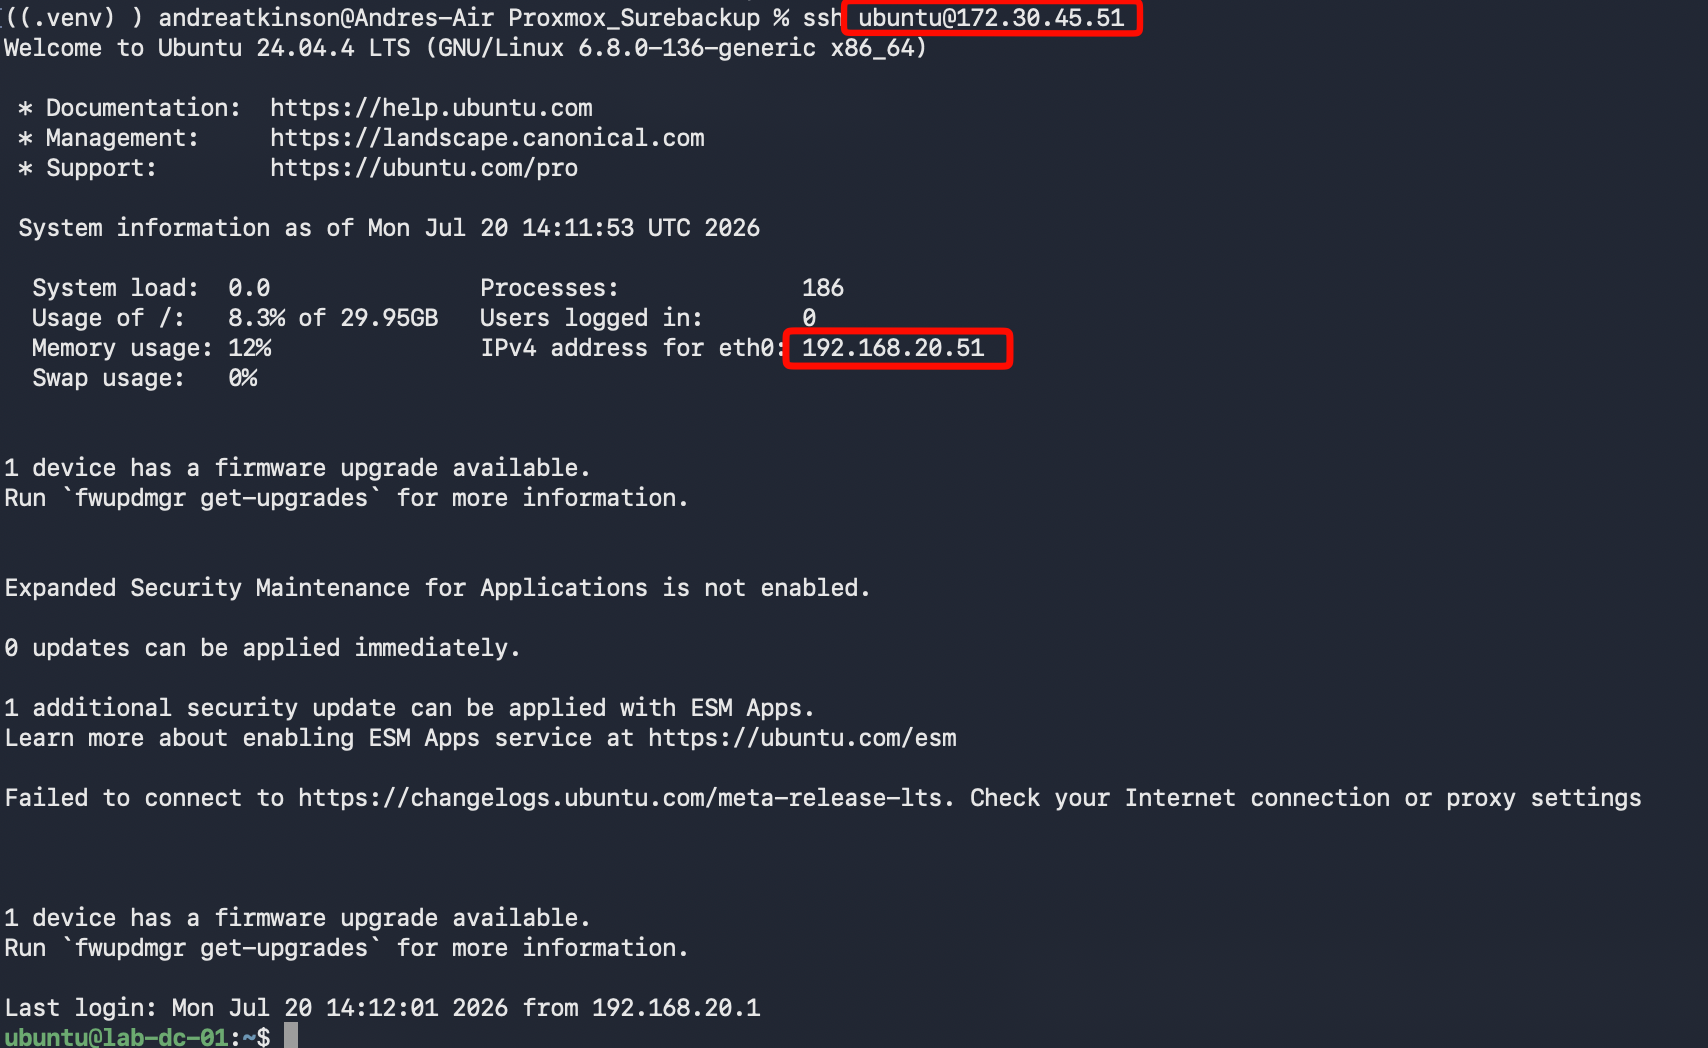
Success! And now for the finale, pinging the “real” IP address of our app server.
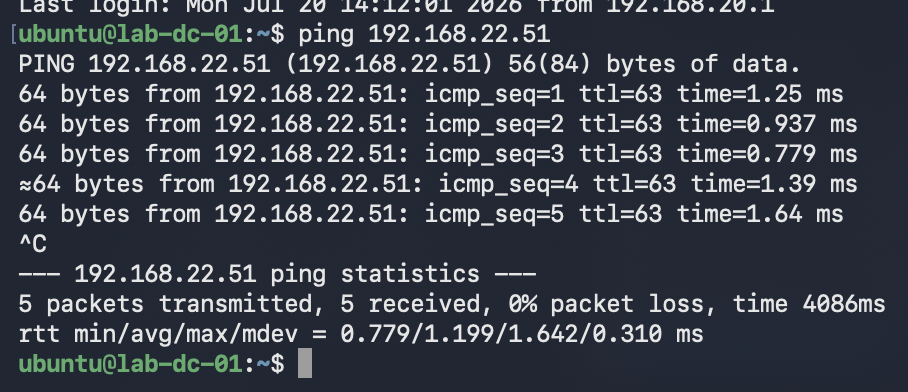
Man, that’s so good, when this worked the first time I don’t think I can explain just how happy I was to finally get this working.
When Things Aren’t Green
Everything above passed, which is lovely, but a verification tool that only ever shows you green ticks is exactly the thing I was complaining about back in Part 1, so it’s worth showing what it looks like when something isn’t right.
If you look closely at the report above you’ll spot both VMs came back degraded on the system-running check, with openipmi.service and fwupd-refresh.service called out. Neither of those matters here, they’re drivers looking for hardware that doesn’t exist inside a VM, which is why they’re on the ignore list rather than failing the run. But that’s the point, the check went looking and told me what it found instead of quietly saying everything’s fine.
Here’s one from an earlier run where a check did go red, before I’d put fwupd-refresh.service on that ignore list. The app server’s system-running check went red and named exactly what was wrong, but notice the VM itself still comes back PASS and booted, because it did boot, that part is not in question. Booted and healthy are two separate questions and I wanted the report to keep answering them separately:
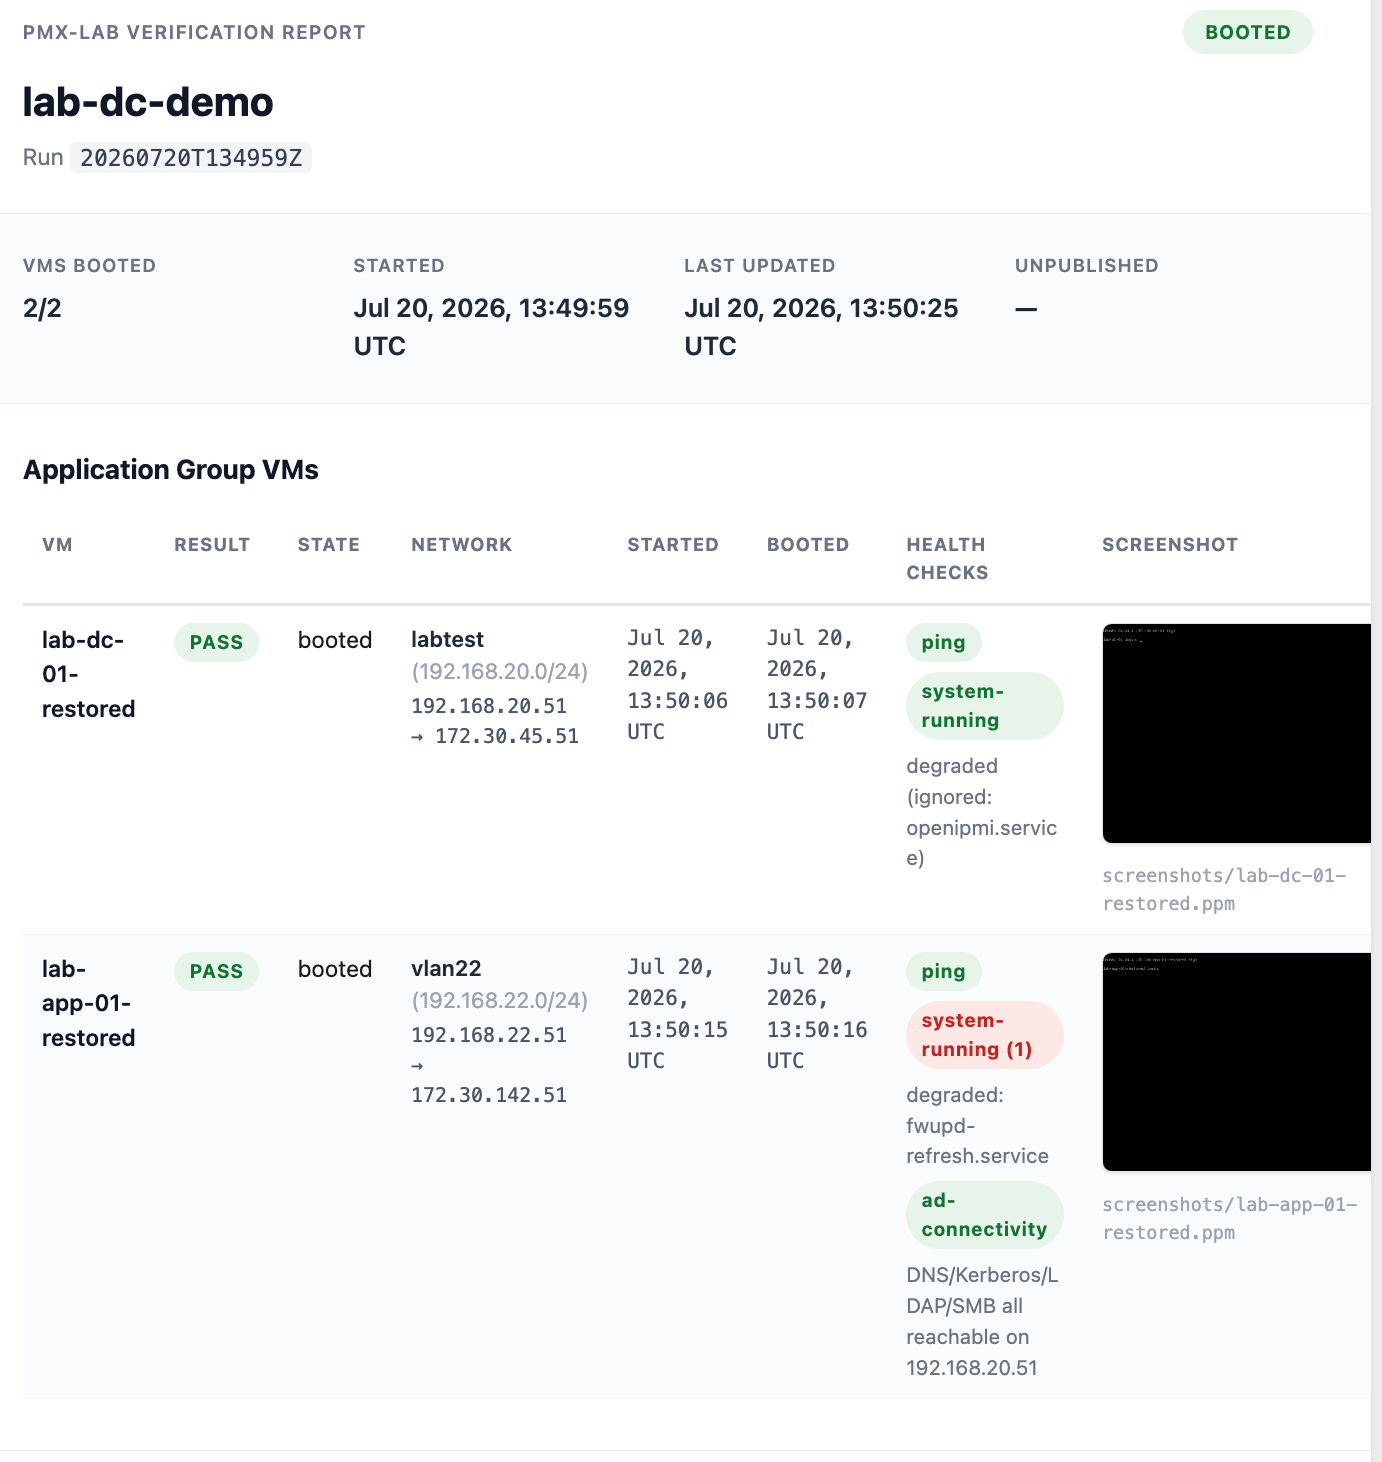
The failed verification is arguably the more valuable one, because that’s the whole reason you’re running this in the first place, far better to find out here than during an actual recovery.
Step 5 – Tearing It Down
Once I’m happy, we can just run the unpublish command, which tears it all down:
pmx-lab unpublish 
That powers down the recovered VMs and removes the addresses they were reachable on. The isolated networks and the gateway VM stay exactly where they are, ready for the next run of this group or any other group sharing those subnets.
And if you’re the sort of person who starts something and wanders off, which I absolutely am, you can hand publish an auto-unpublish timeout up front and let it tidy up after itself.
Where That Leaves Things
So that’s a real multi-tier application, recovered from real Veeam backups, booted on an isolated network, proven with screenshots, health checked, verified talking across subnets, reported on, and cleaned up. On a live cluster.
This has been an amazing journey and a bit of a wild ride honestly, diving into backup verification and how it all actually fits together, but it’s been awesome, I’ve learnt so much (mostly networking) but anyway, that’s the end of this series, I hope you had as much fun reading this as I did writing it.
I hope this has been informative and as always, keep on learning.