Updating Auto-Yara for Veeam v13
// Table of Contents
Disclaimer: I’m not a professional developer. This guide is intended to demonstrate the “art of the possible” rather than serve as production-ready code. Use this example with caution, and always test thoroughly in your environment before relying on it for critical tasks.
Introduction
A little while ago I wrote a blog on Auto-Yara and, at the time, it did exactly what I needed it to do. Fast forward to Veeam v13 and things changed quite a bit. It didn’t take long for me to realise the old workflow was no longer really the right fit, so I went back and reworked it.
This version is a fair bit different from the first one. Instead of relying on a hard-coded list of ransomware families and simply copying files around, it now discovers the published YARA rules directly from the public ransomware.live catalog, downloads them straight into the target directory, keeps track of what it manages with a manifest file, and can optionally use the local Veeam.Backup.PowerShell module to create, update, and start the Veeam file copy job.
So this is really the updated version of that original post, but built around how I am actually using it with V13 now.
The Process at a Glance
I just wanted to give another shout out to ransomware.live. They were already a fantastic source of YARA content when I wrote the first version of this, and the public catalog is what makes this newer approach much cleaner. If you have not spent time on their site already, go and have a look because it is an absolute goldmine.
The process is still pretty straightforward. The script pulls down the YARA files currently published on the ransomware.live catalog page, drops them into the location Veeam expects, and keeps a small manifest so it knows what it managed last time.
If you give it a valid .env file and do not use the skip switch, it connects back to Veeam using PowerShell, resolves the configured file copy job, updates the job objects so they match the downloaded rules, and kicks the job off automatically. If that job does not exist yet, the script can now create it for you on the first run as well, as long as you provide the extra create switches.
Ideally you would run this daily so the rule set stays current without you having to think about it.
-
Configure the automation script Set the target path and decide whether you want to test outside of
Program Filesfirst. -
Create the Veeam connection settings Build the encrypted password file and populate the
.envfile with your Veeam server and job details. -
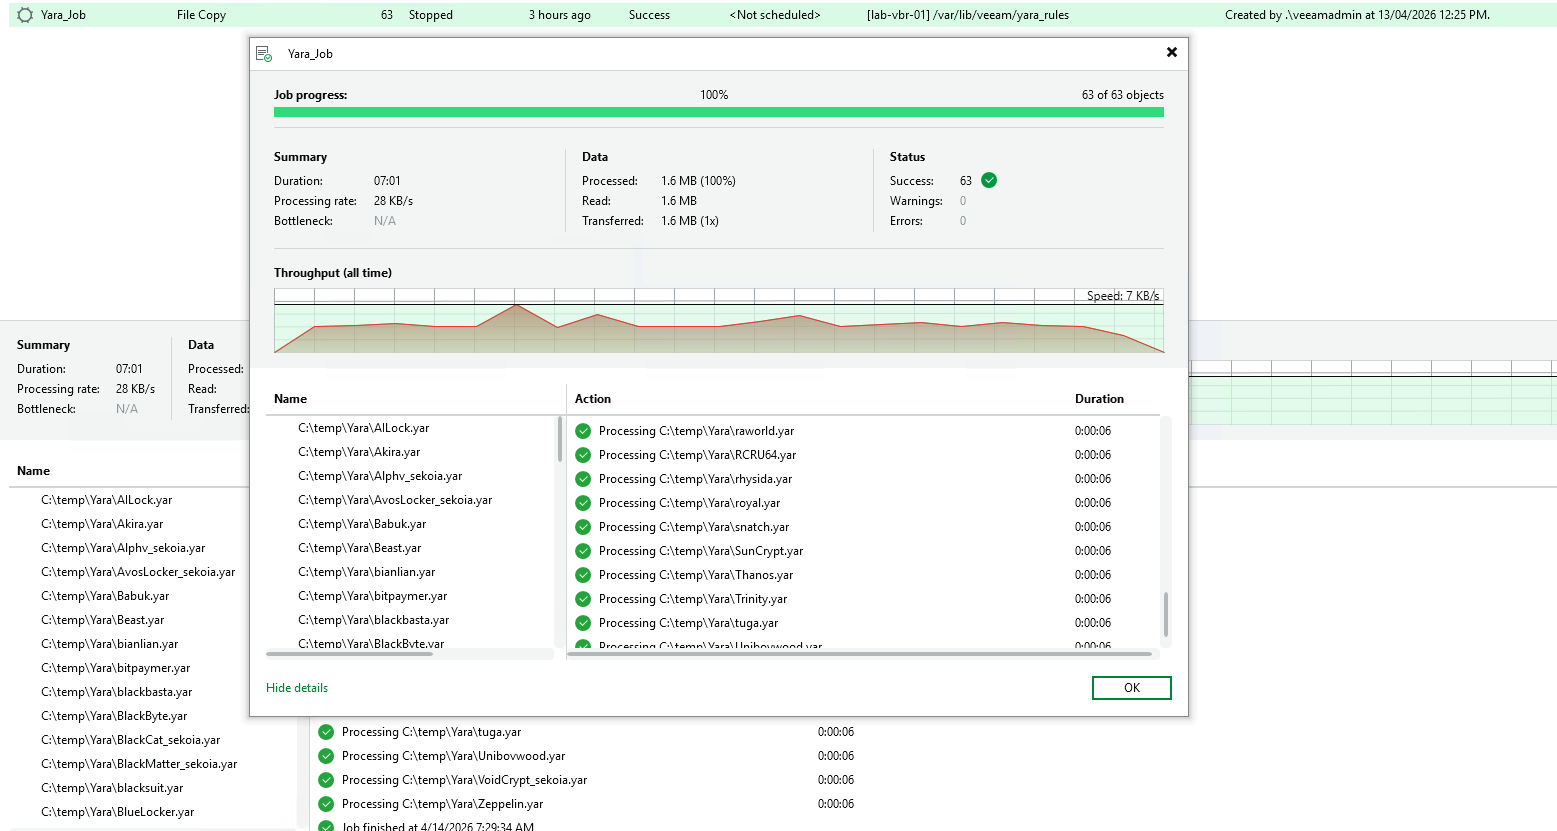
Run the script and verify the download Confirm the rules are being pulled from ransomware.live and written into the expected directory.
-
Allow the Veeam job sync to run Let the script update the file copy job source objects and start the job if you want the workflow fully automated, or create the job on first run if you have not built it already.
-
Review the log and validate the result Check
download_log.txt, confirm the job ran, and make sure the latest rules are where you expect them to be.
What Changed for V13
The biggest change for me was definitely on the Veeam side.
In my live environment, the Yara_Job I wanted to use was exposed through the Veeam PowerShell module as a Copy job rather than something I could cleanly work with through the REST jobs endpoints. Once I hit that, it was pretty obvious the old logic was no longer really the right fit, so the script had to change with it.
The updated script now does a few important things differently:
- It discovers live YARA rule links from the catalog page instead of using a static ransomware family list.
- It supports both
.yarand.yarafiles. - It writes directly into the target folder you specify rather than maintaining a separate local staging folder by default.
- It keeps a
.auto-yara.manifest.jsonfile so stale managed rules can be removed safely on the next run. - It can create the initial Veeam file copy job for you if you run it with the create switches and tell it which source and target to use.
- It can rebuild the Veeam file copy job objects if the current rule set no longer matches what is defined in the job.
- It can start the job automatically once the update is complete.
So really this is no longer just a download script. It is much closer to a full sync process now, which to be honest is exactly where I wanted it to end up.
Veeam PowerShell Settings
The repository now includes two helper files that matter for the V13 workflow:
.env.exampleNew-VeeamPasswordFile.ps1
The .env file is used to tell the script how to connect back to Veeam and which job it should manage. In practice, this is just the bit that tells the script what Veeam server to talk to and which job it should be looking for. The example looks like this:
VEEAM_SERVER=veeam-server.example.com
# VEEAM_PORT=9392
VEEAM_JOB_NAME=Yara_Job
# VEEAM_JOB_ID=00000000-0000-0000-0000-000000000000
VEEAM_USERNAME=DOMAIN\\username
VEEAM_PASSWORD_FILE=.\veeam-api-password.enc
One thing worth calling out here: prefer VEEAM_JOB_NAME where possible. The script can use VEEAM_JOB_ID, but because the file copy job may be rebuilt during the process, the job ID can change, so the name is usually the safer option.
That matters even more now that the script can create the job for you. If you use the create flow, VEEAM_JOB_NAME becomes the thing the script uses when it creates the new file copy job in Veeam.
The job creation settings themselves are not stored in the .env file. They are passed at runtime as script parameters, which I actually think makes more sense because you may only need them once during the initial setup.
To create the encrypted password file, run:
.\New-VeeamPasswordFile.ps1 -OutputPath .\veeam-api-password.encThis uses Windows DPAPI, which means the encrypted file can only be decrypted by the same Windows user on the same machine. Nice and simple, and definitely better than dropping a plaintext password into a script.
Running the Script
If you want to run the workflow end to end, the simplest option is:
.\auto-yara.ps1If you want to test the download side of things first without writing into Program Files, use a temporary path instead:
.\auto-yara.ps1 -TargetDir "C:\Temp\Yara"And if you want to validate the download workflow but intentionally skip the Veeam job update and job start step, use:
.\auto-yara.ps1 -SkipVeeamJobStartIf the file copy job does not exist yet and you want the script to create it for you, you can now do that on the first run as well. For example:
.\auto-yara.ps1 -CreateJob -CreateJobTargetHost "repo01" -CreateJobTargetDir "/repository/yara"If you need to be a bit more explicit, you can also tell it which Windows source host to use and set a description at the same time:
.\auto-yara.ps1 -CreateJob -CreateJobTargetHost "repo01" -CreateJobTargetDir "/repository/yara" -CreateJobSourceHost "veeam01" -CreateJobDescription "Auto-Yara managed file copy job"There are a few parameters worth knowing about in the V13 version:
CatalogUrllets you change the source page used to discover rule links.TargetDircontrols where the rules are downloaded.LogFiledefines the path to the audit log.SkipCleanupleaves older managed files in place instead of removing rules that are no longer published.EnvPathlets you point to a custom.envfile.SkipVeeamJobStartdownloads the rules but skips the Veeam sync and job start portion.CreateJobtells the script to create the configured file copy job if it cannot find it.CreateJobTargetHostdefines the Veeam-managed target host the new file copy job should use.CreateJobTargetDirdefines the target folder for the new file copy job.CreateJobSourceHostoptionally pins the Windows source host instead of relying on auto-resolution.CreateJobDescriptionlets you stamp a description on the newly created job.
When the Veeam integration is enabled, the script connects with Connect-VBRServer, resolves the configured job, compares the current job objects to the downloaded rule files, rebuilds the job if needed, and then starts it.
If it cannot find the configured job and you have used -CreateJob, it will build the file copy job first and then continue with the normal sync and start process. If you do not use -CreateJob, it will still print the currently available Copy jobs, which makes troubleshooting a lot easier.
Task Scheduler Setup (Optional)
Just like the first version, this is something I would absolutely schedule rather than run manually.
To run the script automatically every day:
- Open Task Scheduler and choose Create Task.
- Under General, tick Run with highest privileges.
- Under Triggers, create a daily trigger for whatever time suits your environment.
- Under Actions, choose Start a program.
- Use
powershell.exeas the program. - Use the following arguments:
-ExecutionPolicy Bypass -File "C:\Path\To\auto-yara.ps1"If you are writing directly into the Veeam YARA rules directory under Program Files, make sure the scheduled task is running with the right privileges. The script explicitly checks for that scenario.
Conclusion
This update ended up being a bigger rework than I first expected, but to be honest it is a much better fit for Veeam v13.
The core idea has not changed at all. We still want fresh YARA rules in Veeam so we can do better threat hunting and make better restore decisions. The difference now is that the workflow is a lot cleaner and much more aware of the Veeam job it is actually trying to drive.
If you used the original version, this is the one I would move to going forward.