Advent Calendar Day 10: Veeam Security - After a Backup
Advent Calendar Day 10: YARA Scanning & Veeam Threat Hunter - Recovery Security
Welcome to Day 10 of our Veeam Blog Advent Calendar! Over the past two days, we’ve covered security before backup and during backup. Today, we’re tackling the “After” phase: ensuring your backups are clean and secure before you restore them back to production.
This is the final safety check. You’ve detected threats during backup, you’ve isolated infected systems, and now you need to restore operations. But how do you know the backup you’re about to restore is actually clean? What if malware slipped through? What if it’s been hiding in your backups for weeks?
Welcome to Veeam Threat Hunter and YARA-based Secure Restore. your last line of defense before data returns to production.
YARA Scanning & Veeam Threat Hunter
10 points for anyone who can tell me what YARA stands for! And for the Aussies—no, it’s not the river in Victoria, even though that’s also the first thing I thought of when I heard it. It actually stands for YARA (Yet Another Recursive Acronym), and all jokes aside, this is an incredibly powerful tool built right into Veeam that allows you to quickly and efficiently detect malware or ransomware activity post-backup. This is far more pointed in the sense that we know what we are looking for, and now we want to go scan our workloads for that particular file extension or particular hash value—think REGEX on steroids, basically, is how I like to explain it. Whereas Threat Hunter, whilst an equally powerful tool, is more aimed at our traditional signature-based scanning (think antivirus scanning, if you will), where we’re not entirely sure what we’re looking for but we have a database of signatures to match against.
Structure of YARA Rules
The structure of a YARA file is pretty straightforward but can get extremely complicated, so a quick breakdown: we have a metadata field which is just a human-readable section to describe the file and who made it; we have a strings section which defines what strings it should try to match or HEX values; and then we have the condition section which describes what to do when the rule is matched.
I won’t go too much more in-depth, but feel free to read the YARA documentation here.
rule ExampleRule {
meta:
description = "An example rule"
strings:
$a = "example"
condition:
$a
}
Veeam provides you with a few YARA rules out of the box, but I have previously blogged how we can automate this (shameless plug) here if you want to read more. I highly recommend you take a look at Ransomware.live—it’s a treasure trove of information.
Setup
Bit of a running theme here, but it’s really simple to set up and genuinely doesn’t require a lot of effort as it’s already set up by default
YARA
- Open the VBR console
- Select the Hamburger Menu
- Select Malware Detection Settings
- Select the Hamburger Menu
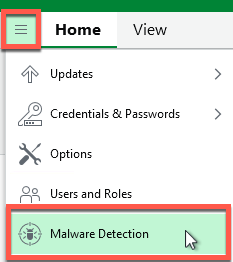
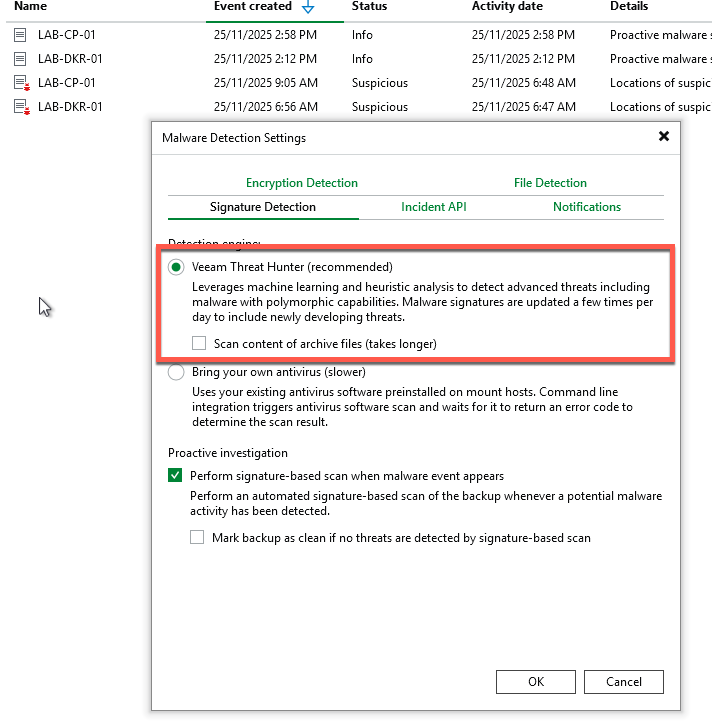
- Navigate to the Signature Detection tab and confirm Veeam Threat Hunter is enabled
Now that we have confirmed that it’s all set up as we require, we need to create a YARA rule to search for. In my case, the Docker host showed signs of .micro and .get, so let’s create a rule to search for those.
- Create a file called
test_yara.yar - Add the following lines (I literally just used ChatGPT to generate this YARA file)
rule TeslaCrypt_3_Indicators
{
    meta:
        description = "Detects simple indicators related to TeslaCrypt 3.0"
        author = "ChatGPT"

    strings:
        $micro = ".micro"
        $get   = ".get"

    condition:
        any of ($micro, $get)
}
- Place the YARA file with the .yara or .yar extension in the C:\Program Files\Veeam\Backup and Replication\Backup\YaraRules folder (for Veeam Backup & Replication on Microsoft Windows) or in the /var/lib/veeam/yara_rules/ directory (for Veeam Backup & Replication on Linux). You can add the file through the File view in the Veeam Backup & Replication console.

- Now that we have the file in place, we can trigger a scan of the machine
- Navigate to the Backup node
- Find the infected workload (in my case, my Docker server)
- Right-click, Scan backup

- Select YARA Rules
- Select the rule from the dropdown list and scan

- Let the scan run and essentially this will go through every restore point until it finds a clean one.

Threat Hunter
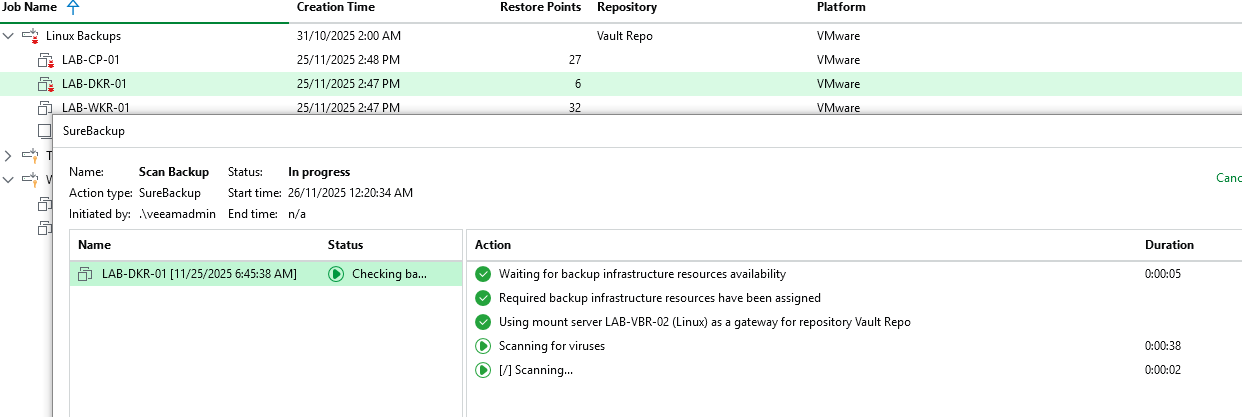
Threat hunter is just as simple but doesnt require us to create any files, we can simply kick off the scan immediately and Veeam will start scanning the workload using its built in Threat Hunter capabilities.

This will kick off the scan backup operation as we can see in the screenshot below
Wrapping Up
And there you have it—the final piece of the security puzzle! We’ve now covered the complete lifecycle:
- Before backup: Credential security and hardening
- During backup: Real-time malware detection with Veeam Secure Restore and event forwarding
- After backup: YARA scanning and Veeam Threat Hunter for validation before restore
YARA scanning gives you surgical precision to hunt for specific indicators of compromise, while Threat Hunter provides comprehensive signature-based detection. Together, they ensure that when you need to restore from backup—especially after a ransomware incident—you’re restoring clean data, not reinfecting your environment.
The beauty of this approach is that it’s all built into Veeam. You don’t need external tools or complex integrations. You can scan backups on-demand, automate scans as part of your recovery testing, or integrate them into your secure restore workflows. And with the ability to scan across multiple restore points, you can identify exactly when the infection occurred and restore from a known-good state.
Remember: your backups are your last line of defense. Make sure they’re clean before you bring them back to production.
See you tomorrow for Day 11! 🎄