Deploying VRO Part 3: Orchestration Plans
Introduction
Welcome to Part 3 of our blog series on deploying Veeam Recovery Orchestrator (VRO). In Part 1, we deployed VRO, and in Part 2, we integrated Hyper-V and configured a recovery location.
In this final part, we’ll focus on building an Orchestration Plan, running pre-checks, and executing a restore to a Hyper-V recovery site. This is where your disaster recovery strategy becomes real and testable.
The Process at a Glance
1. Recovery Plans
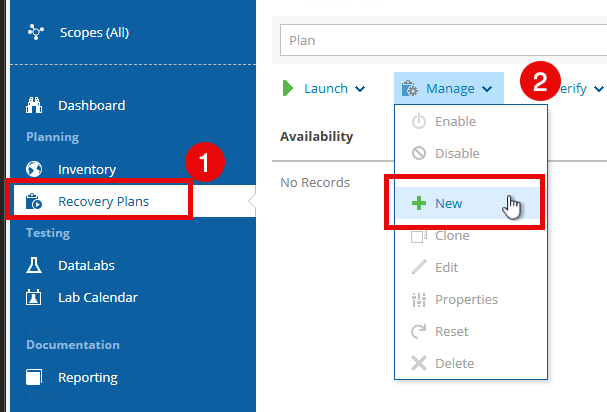
Now that all the surrounding infrastructure is in place, it’s time to create our recovery plan.
- Navigate to Recovery Plans
- Click New
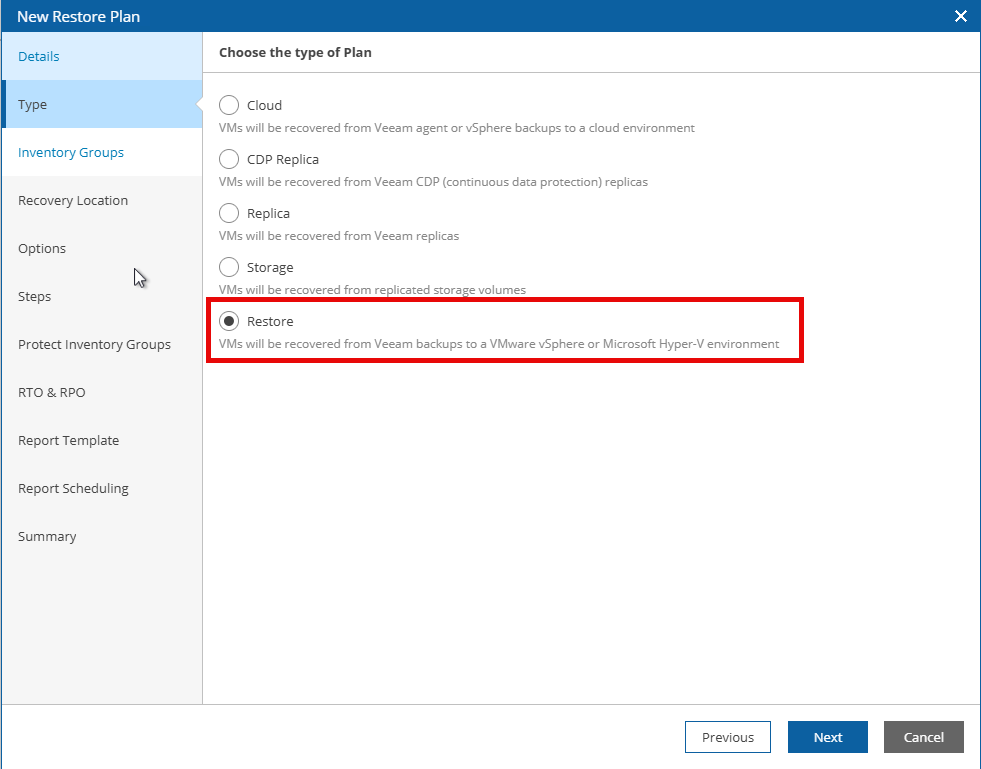
- Give your plan a name and optional description
- Select the “Restore” type
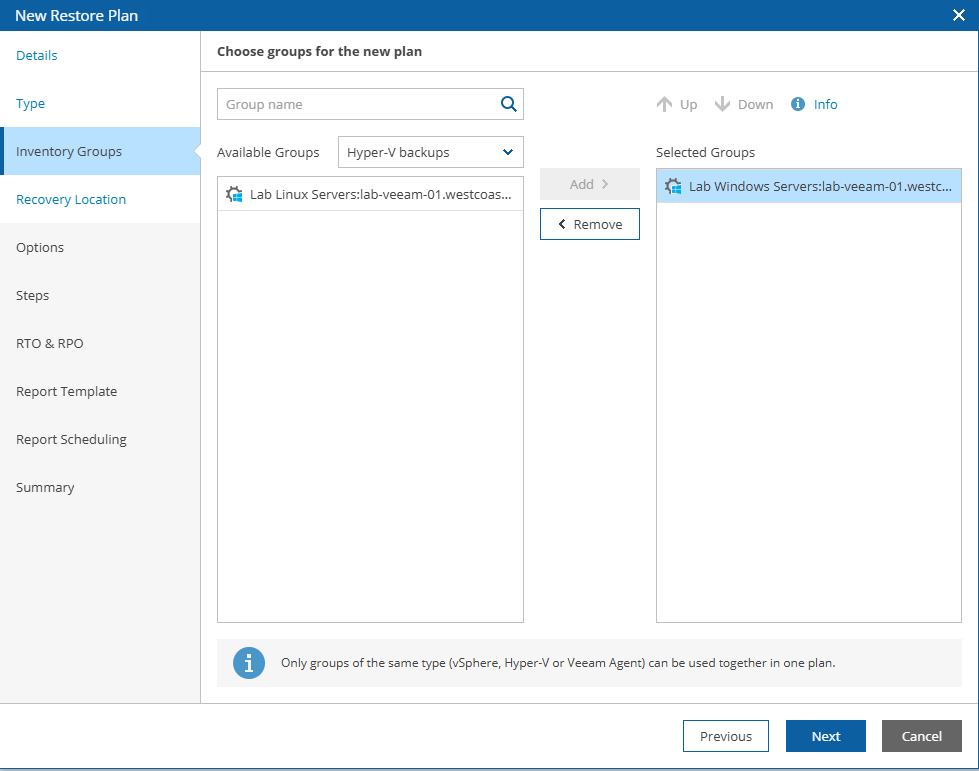
- In Inventory Groups, select the backup job — in this example, it’s a Windows Server backup job
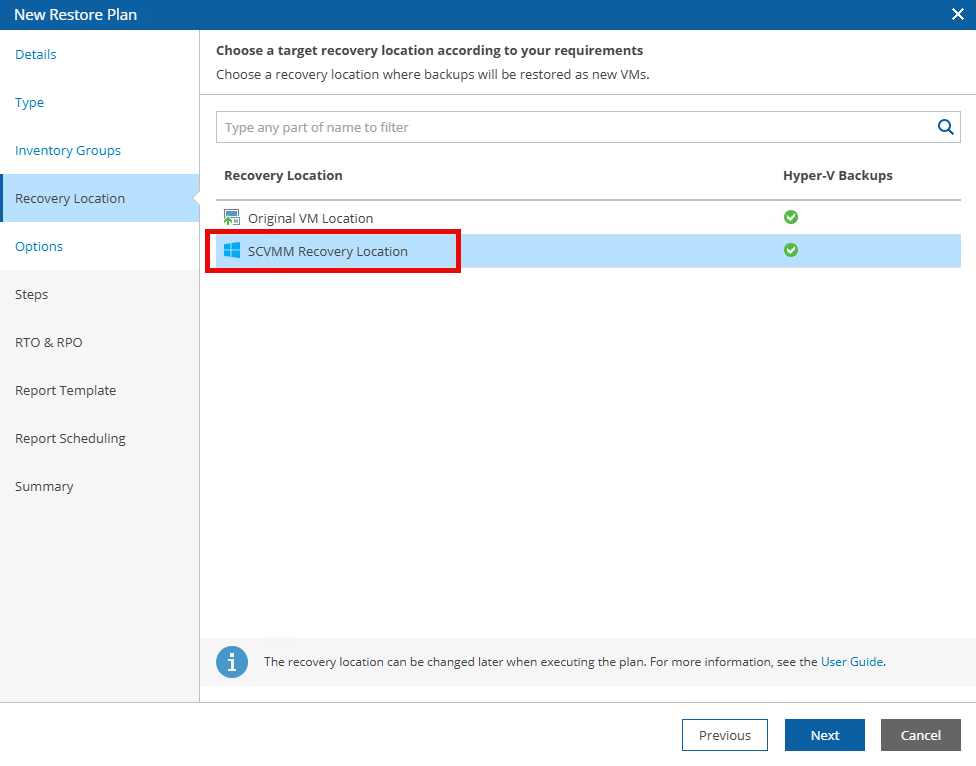
- Select the recovery location we created earlier
- Under Options, leave the default selections
- Choose which steps you’d like to perform — for this demo, we’ll leave the defaults
- Set your RPO and RTO requirements
- Select a report template
- Schedule your recovery plan report
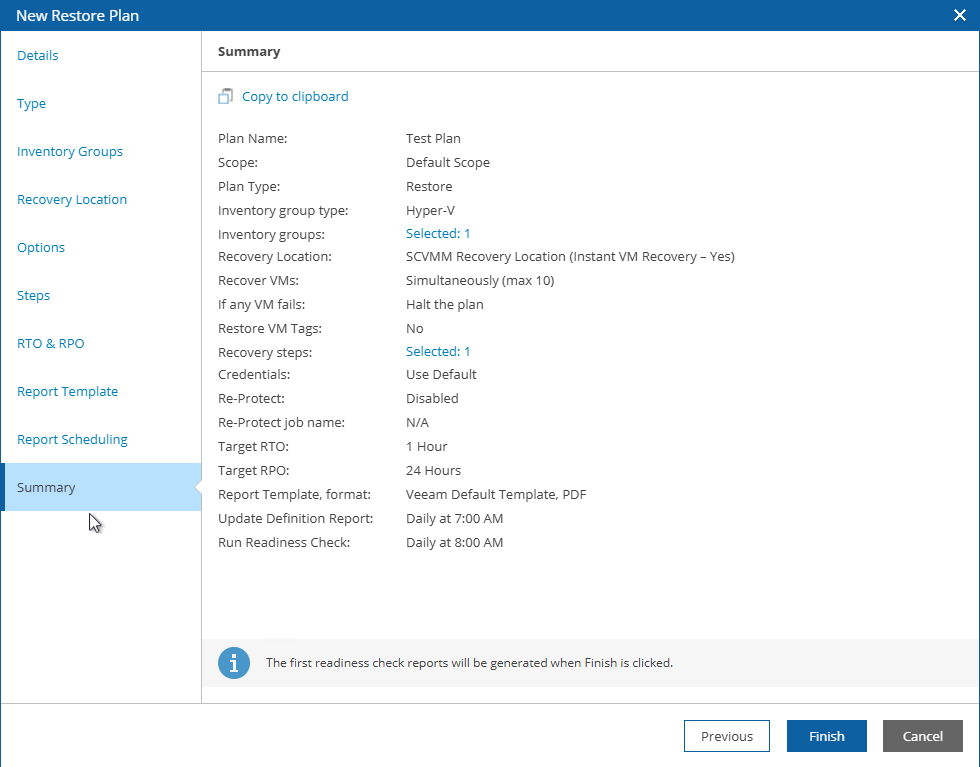
Once all steps are completed, your recovery plan should be created successfully. If everything is configured correctly, it should pass verification — as shown below:

Conclusion
With orchestration plans in place and successfully tested, your Hyper-V-based disaster recovery strategy is now validated and ready. Whether you’re migrating off VMware or building multi-platform resilience, VRO ensures your workloads are protected and recoverable wherever they run.
Thanks for reading — I hope you found this guide helpful. As always, stay curious and keep learning!