Deploying VRO Part 2: Integrating Hyper-V
Introduction
Now that Veeam Recovery Orchestrator (VRO) is deployed and ready to rock and roll, we’re diving into Part 2 of our blog series.
In this post, we’ll walk through the process of integrating Microsoft Hyper-V into the VRO environment.
By the end of this post, VRO will be able to communicate with your Hyper-V infrastructure and use it as a valid recovery target.
The Process at a Glance
1. Prerequisites
Before integrating Hyper-V into VRO, ensure the following requirements are met:
- Hyper-V hosts are running Windows Server 2016 or later and are reachable over the network.
- You have a service account with:
- Local administrator rights on the Hyper-V host(s)
- Access to manage Veeam Backup & Replication jobs
2. Initial Configuration Wizard
Let’s launch the initial Configuration Wizard and run through all the required steps:
-
Configure Orchestrator server settings
- Assign an Administrator role or group
- Specify server details if desired
-
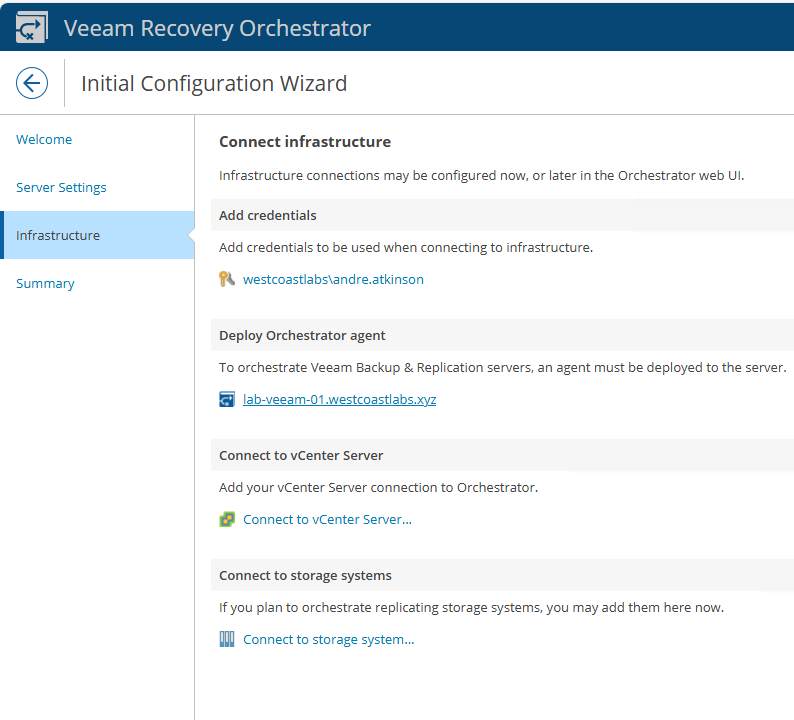
Connect infrastructure
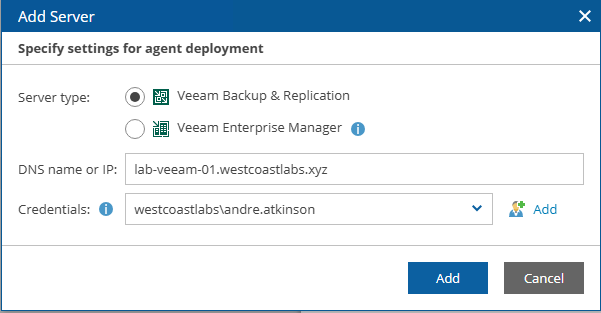
- Add credentials to be used when connecting to infrastructure
- Deploy the Orchestrator agent — this installs a lightweight agent on the VBR server used for orchestration
We can skip connecting a vCenter Server and storage system as i do not have any VMware infrastructure in my lab but this will be required if you wish to restore across HyperVisors
Review the settings in the next step and confirm you’re happy to continue.
3. Adding Hyper-V
Now that we’ve completed the initial setup, we can start integrating our Hyper-V environment.
In my lab, I do run SCVMM, but as of VRO v7.2.1, Veeam added the ability to add Hyper-V Failover Clusters directly, which is a huge addition. Not everyone wants to or can run SCVMM, so this really opens up that mobility.
Right, let’s get into it:
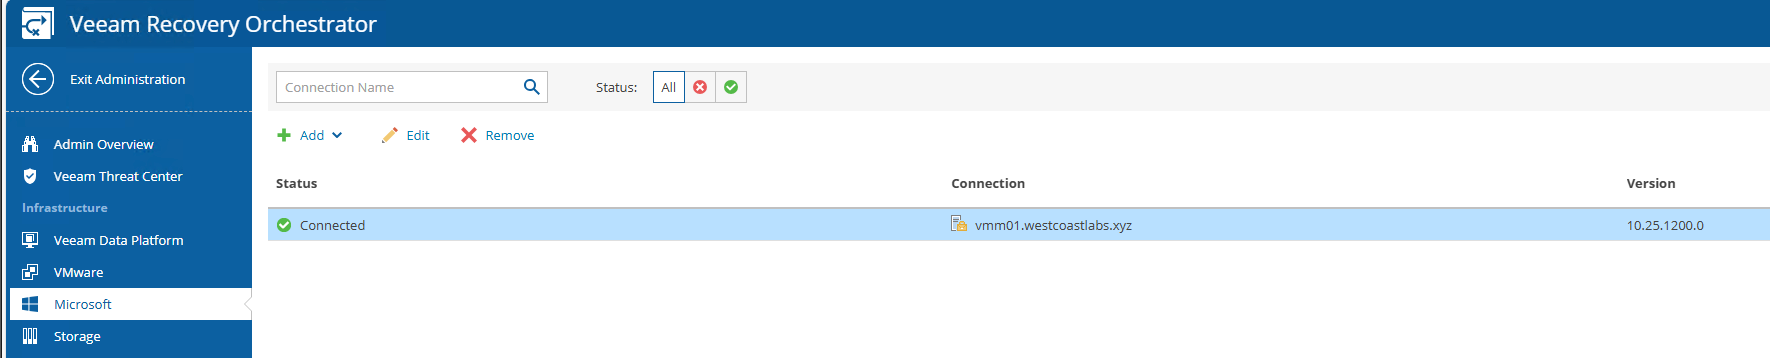
- Select Microsoft, then click Add

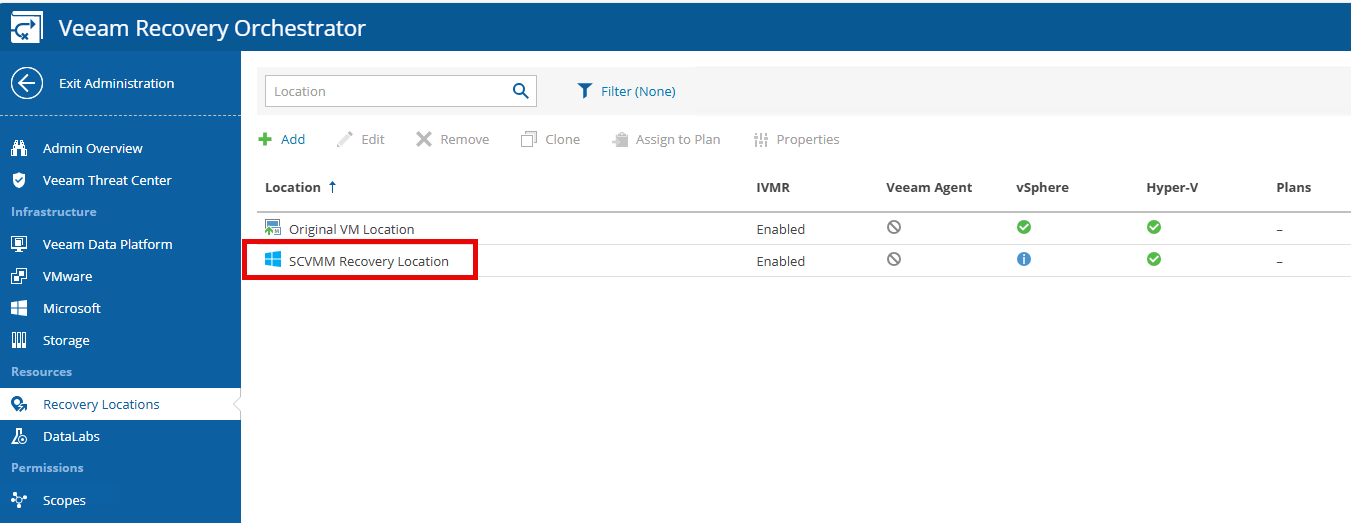
- Provide the required credentials
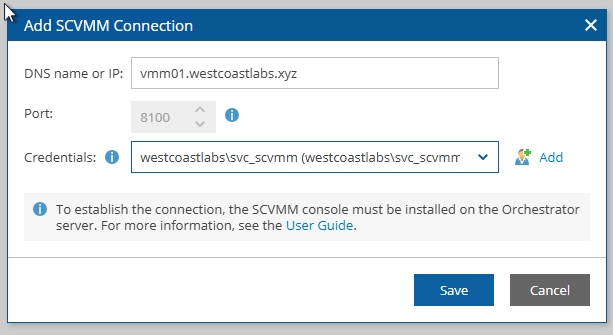
- This will take a few minutes, but once completed, you should see your SCVMM or Hyper-V server added
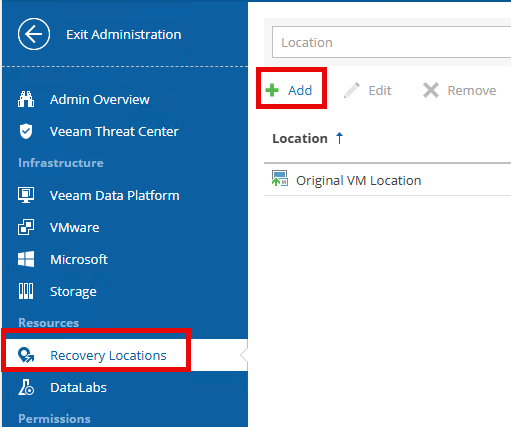
4. Create Recovery Location
Now that we have our Hyper-V cluster added, we can define a recovery location for use in orchestration plans:
- Navigate to Recovery Locations
- Click Add
-
Choose type of recovery location
- Select Hyper-V
-
Confirm the connection point
- In my case, I’m selecting SCVMM, but if you’re targeting a cluster directly, use the direct connection option
-
Recovery Location
- Provide a name
-
Recovery Options
- Enable Instant Recovery (optional, based on your DR plan)
-
Cluster Details
- Enter the SCVMM server, cluster, and cluster volume details you wish to use
-
Network Mappings
- Create the appropriate network mappings
- If you plan to perform cross-hypervisor restores, you will need to define both Hyper-V and VMware network mappings
→ View Veeam network mapping guide
Once completed, you’ll see a summary screen. Confirm everything is correct and click Finish.
Conclusion
In Part 3, we’ll walk through creating an orchestration plan and performing some recovery tests to validate that your DR setup is fully functional and flexible enough to support your mobility strategy.