Connecting Splunk to Veeam
// Table of Contents
Introduction
Today, we’re embarking on a journey that merges the best of both worlds: Veeam’s robust data protection solutions and Splunk’s powerful analytics platform. Picture this as a fusion of expertise, where we’re not just safeguarding your data but also unleashing its full potential.
In this blog, we’re delving into the process of Connecting Splunk to Veeam. We’ll navigate the setup process, explore advanced configurations, and unveil the possibilities that arise when these two tech giants join forces.
So, buckle up and get ready to discover how Connecting Splunk to Veeam can elevate your data management game to new heights.
Process
- Deploy Splunk In this lab we will be deploying Splunk on Docker
- Pull the Splunk Docker images
docker pull splunk/splunk:latest- Deploy both containers using the following docker commands (Replacing PASSWORD with your own password)
docker run -d --name splunk --hostname splunk -p8000:8000 -p9997:9997 -p8088:8088 -p8089:8089 -p1514:1514 \
              -e "SPLUNK_PASSWORD=Password@1" \ #Change the password please.
              -e "SPLUNK_START_ARGS=--accept-license" \
              -it splunk/splunk:latest
Give the containers a few minutes to start up successfully, once the containers have started you should be able to log into the Splunk console with http://dockerIP:8000

- Installing the Veeam App
- Log into Splunk using admin and the password you set in the previous step
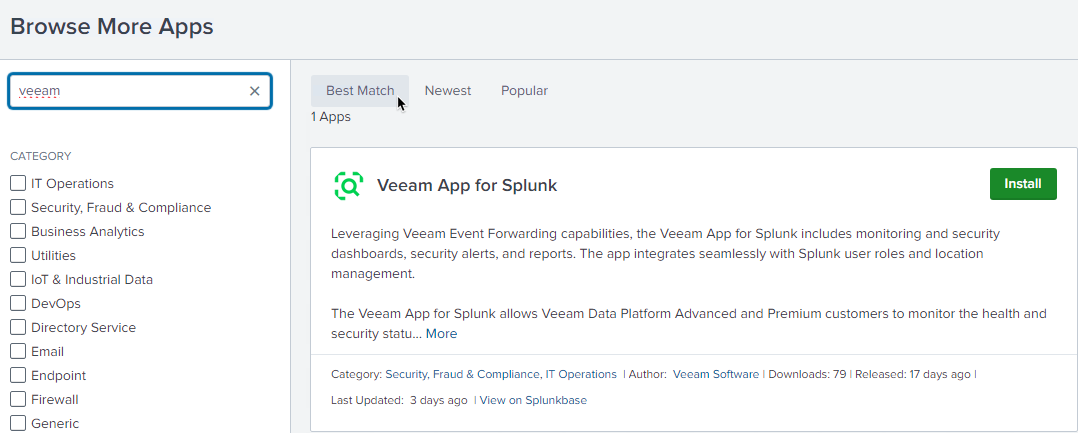
- Navigate to Apps -> Find More Apps
- Search for Veeam
- Click Install
- Sign in with your Splunk credentials to finish the install
- This will cause Splunk to restart.
- Configure Veeam
- Open your Veeam Console and selec the Hamburger menu
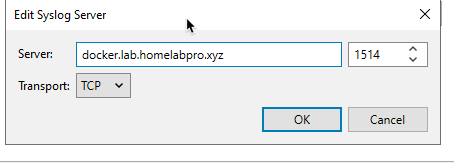
- Select Options -> Event Forwarding
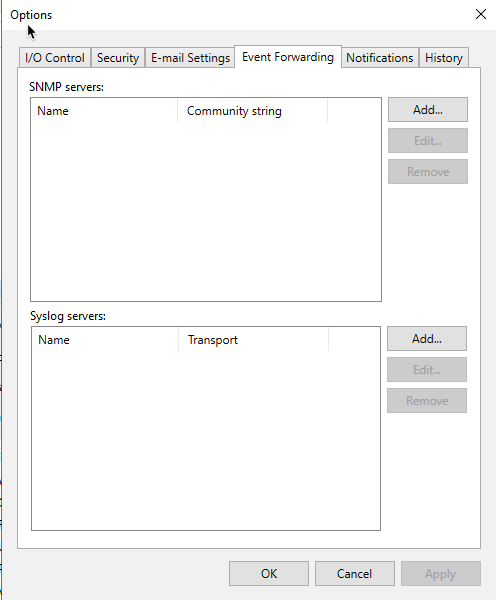
- Because this is docker, we are not using the default UDP port of 514, instead we will use TCP port 1514 due to docker security
- Configure Splunk
- Navigate back to your Splunk console
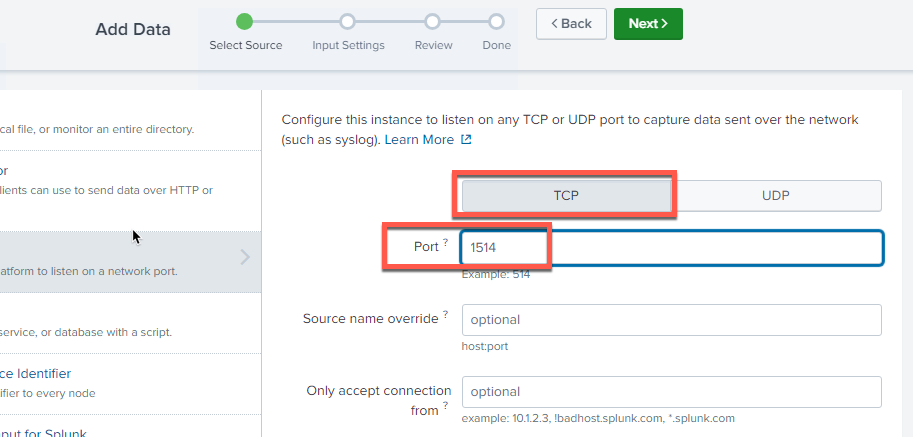
- Open settings -> Data Inputs
- Select TCP

- Configure the Port and Source Name Override as below
- Port: 1514
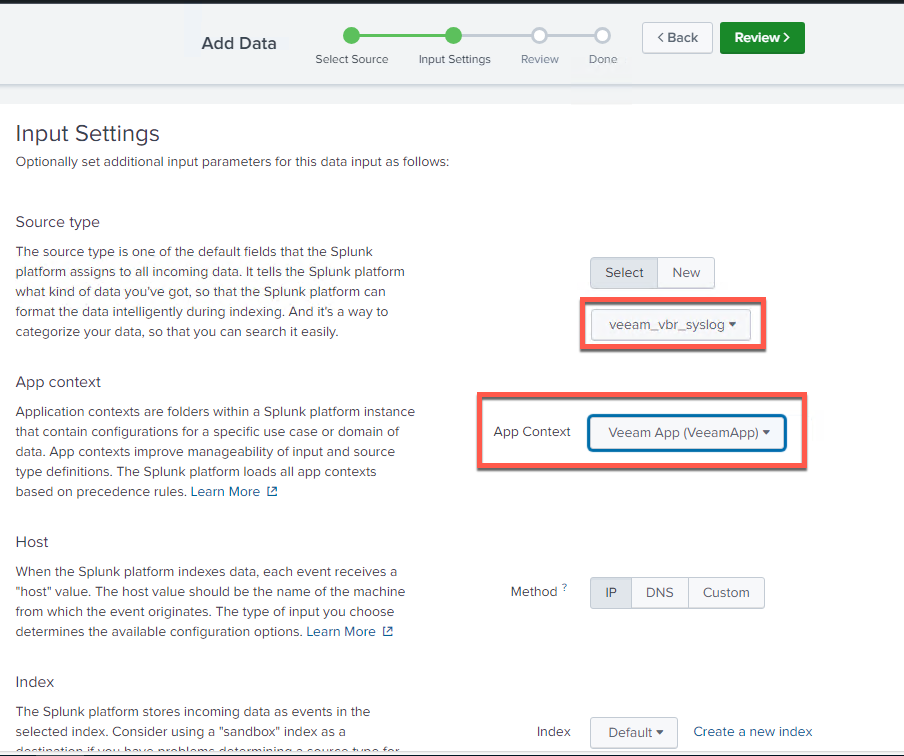
- Under input setting, configure the following:
- Source type: veeam_vbr_syslog
- App context : Veeam App
- Leave the rest as default
-
Review your settings and click submit.
-
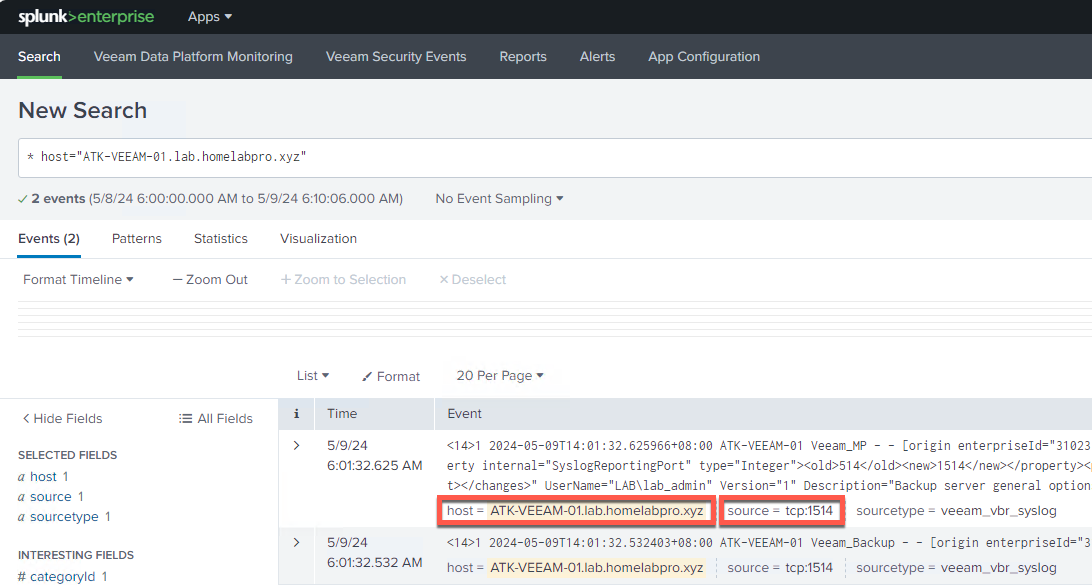
If we do a search in Splunk now we should be able to see data coming from our Veeam Backup and Replication server.
- Adding VeeamONE
Final step is to add VeeamONE into the mix so that we can get all the logs and information from VeeamONE into Splunk
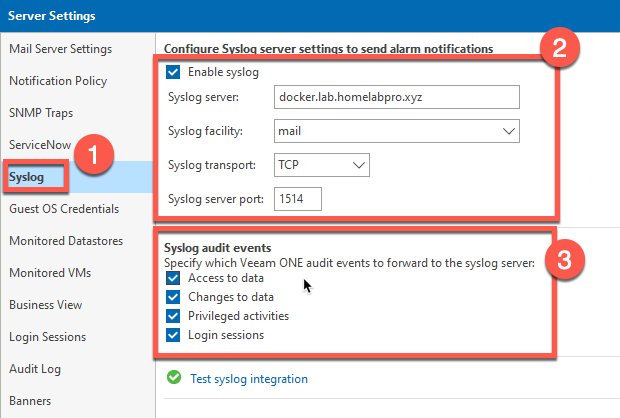
- Open your VeeamONE Client
- Settings -> Server Settings
- navigate down to syslog and add in the same details you did previously for VBR
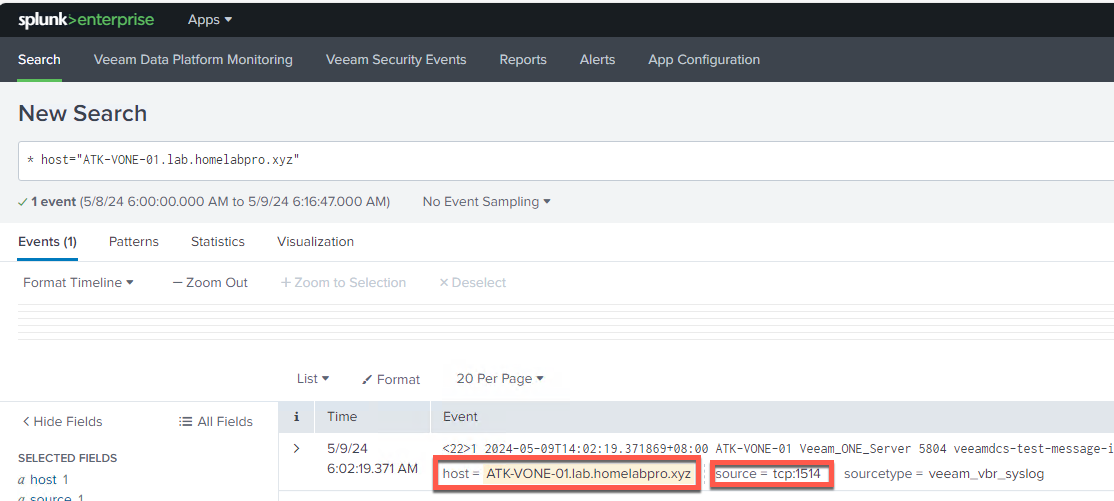
- If we go back to Splunk we should now be able to see syslog information coming from VeeamONE
As we conclude our exploration into connecting Splunk to Veeam, it’s evident that this fusion of expertise opens doors to a realm of possibilities in data management. By seamlessly integrating Veeam’s robust data protection solutions with Splunk’s powerful analytics platform, we not only fortify data security but also unlock its full potential.
I hope this helpful and as always, keep on learning!