Configure a VTL with Veeam
// Table of Contents
Having a homelab is a fantastic way to learn new things, and recently I needed to perform some testing regarding tapes. Now, I obviously don’t have any tape infrastructure in my lab, nor was I going to purchase any, which led me down the path of researching tape libraries, of which there are many.
I needed something that was lightweight and super easy to deploy, as my homelab is small and decided to use QuadStor VTL.
Process
As part of this process I will be deploying the QuadStor VTL onto a Linux VM and connecting it to VBR, assumptions are made here that you have a Linux VM ready to go and VBR deployed.
-
We start by downloading the required files from the QuadStor site linked above
- There are a few pre-reqs that need to be deployed and we can do this by running the following commands
#install Pre-reqs
sudo apt-get install uuid-runtime build-essential sg3-utils apache2 gzip xz-utils postgresql libpq-dev psmisc linux-headers-`uname -r`

sudo a2enmod cgi

#start apache webserver
sudo systemctl enable apache2

#disable ubuntu firewall (optional)
sudo ufw disable
Once we have installed the pre-reqs, we can copy the files across from where you have downloaded them to the Linux VM and install the DEB package.
#install the package
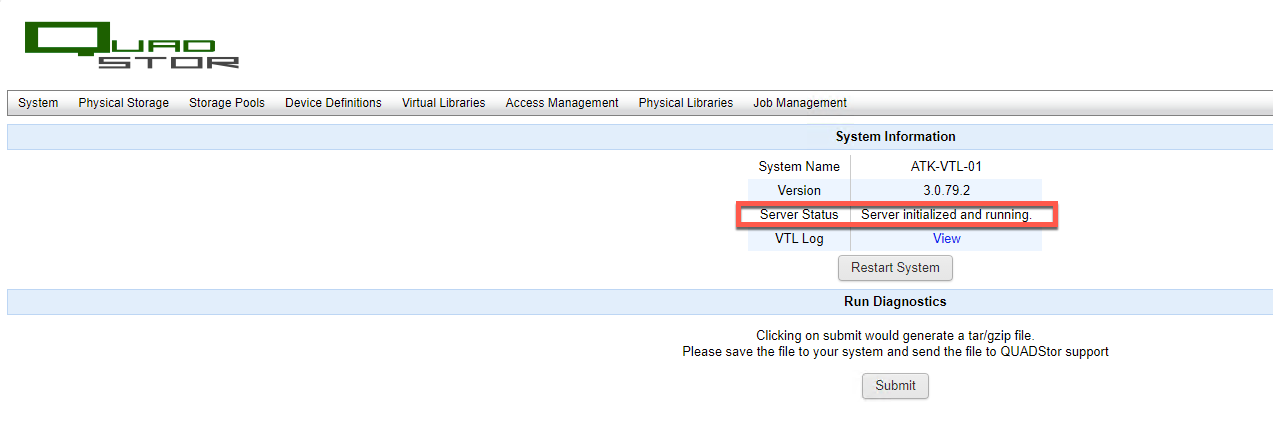
dpkg -i quadstor-vtl-xxx.debFantasitc, now that we have successfully installed QuadStor VTL, lets launch the web console by navigating to http://IP
- Navigate to Physical storage and Select “add”(for the disk to show here you will need to add a new harddisk within VMware to your VM and rescan for the disk to show)
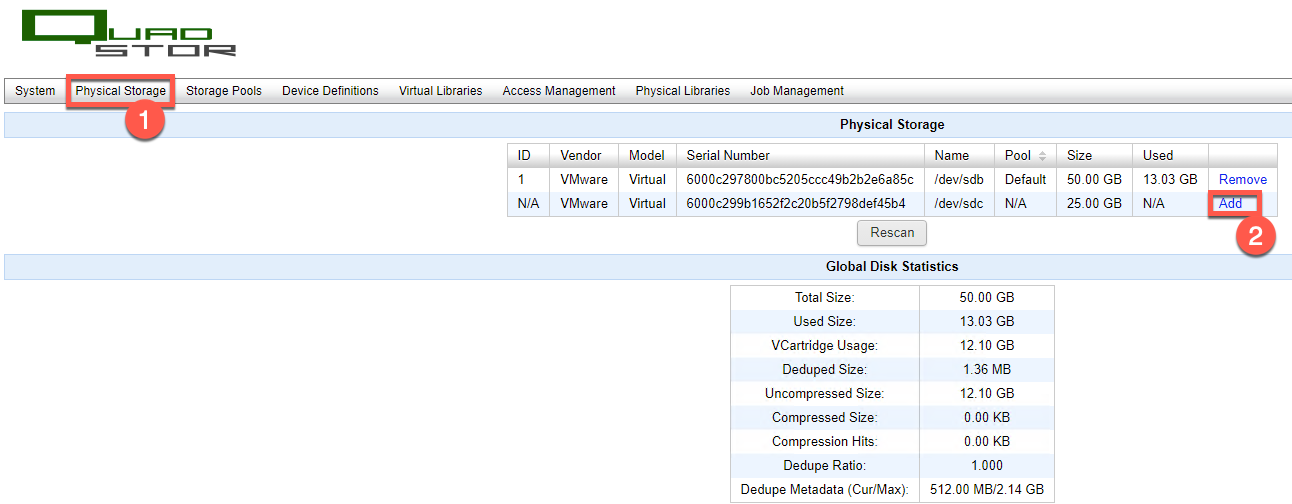
- Add the storage to the default storage pool

-
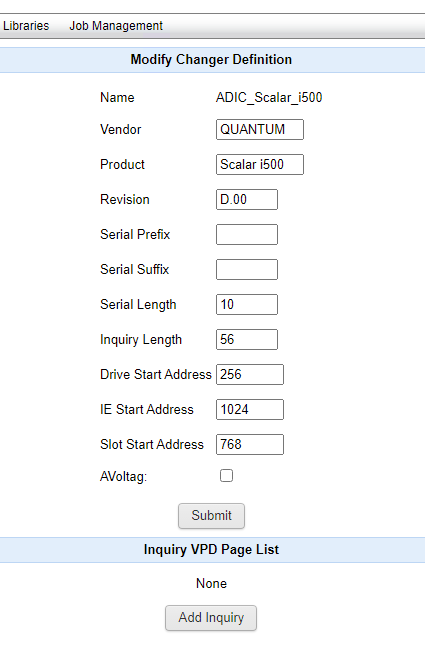
Next we need to configure the Changer and Drive Definitions, this is how we essentially decide what make and model of VTL we are using.
- There are multiple options here so feel free to refer to the offical docuementation for more options.
-
First we will add the Changer Definition as below (Please note this is case sensitive)
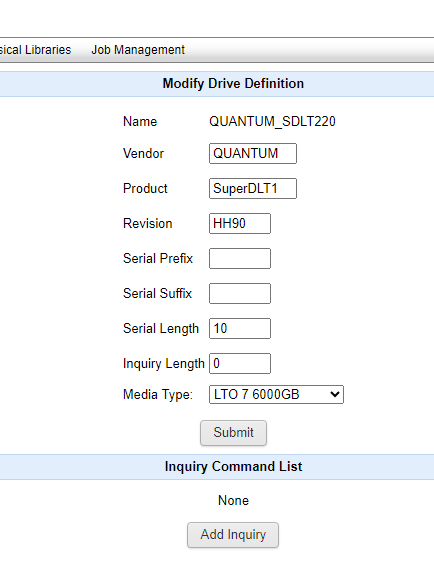
- Next up is the Drive Definition
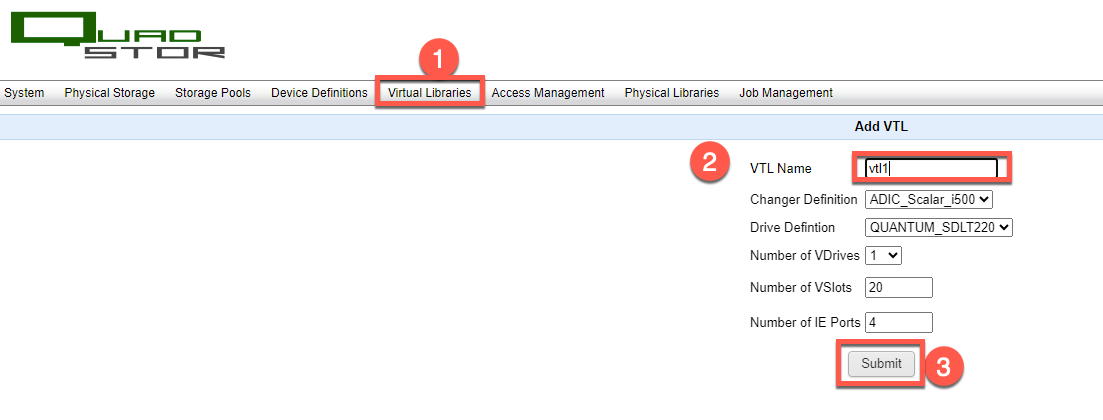
Ok now that have configured the required definitions and configured the storage, we can actually get onto creating our VTl and tapes.
- To do this we need to navigate to Virtual libraries and configure our VTL
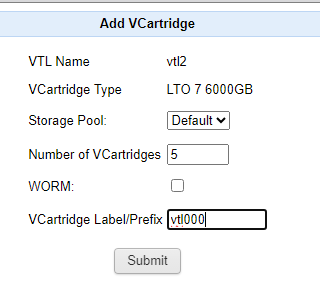
- Now that we have added our VTL, we can create our disks by selecting the VTL and navigating to the bottom of the page and selecting create VCartridge

- Provide the amount of tapes you want and the specified prefix
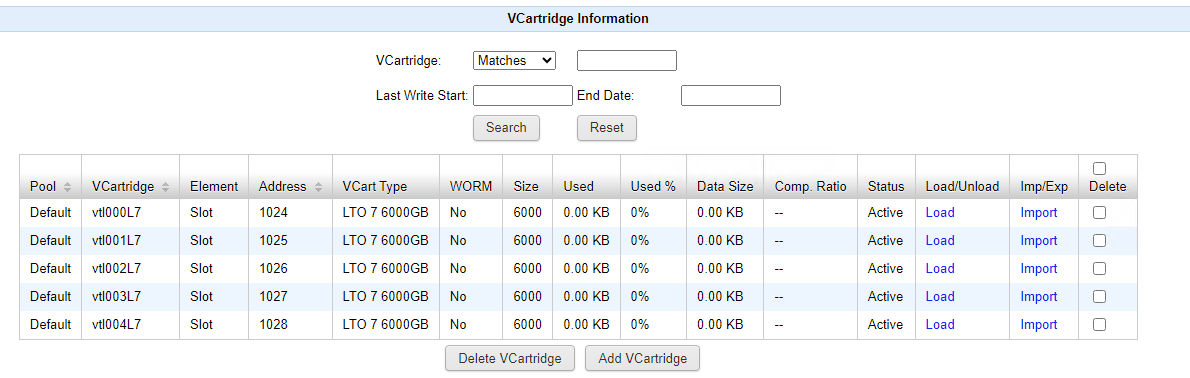
- We should now have our tapes listed.
Fantastic, now for the fun bit, tying this all together with Veeam so we can start our tape backups.
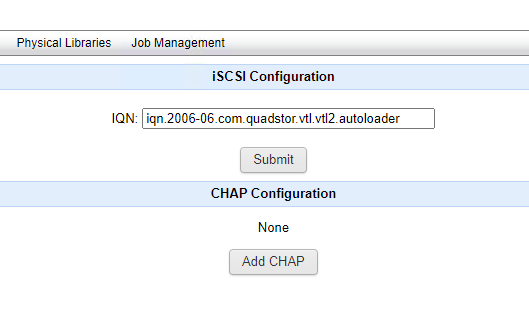
- The tape library is connected via in-guest ISCSI to our Veeam server so as the first step we need to get the ISCSI address of the VTL, we can do that on the Virtual libraries tab > ISCSI > View and also note down the IP address of the VTL server.
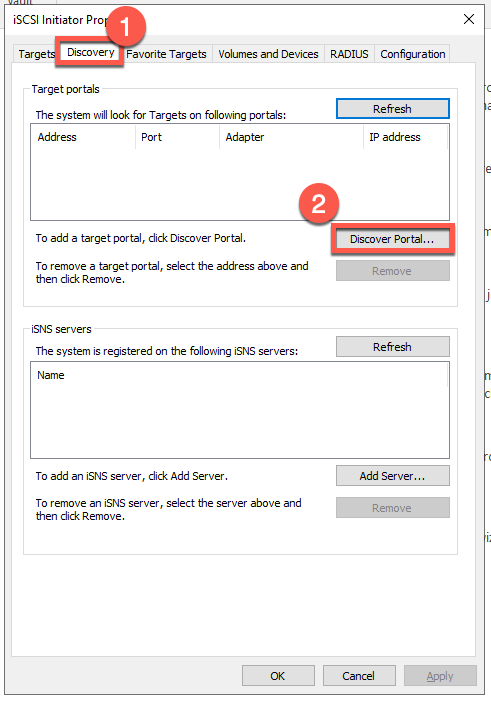
- Log int your Veeam server and open up the iSCSI initiator properties > Discory Tab. Select the Discover Portal button and add the IP address.
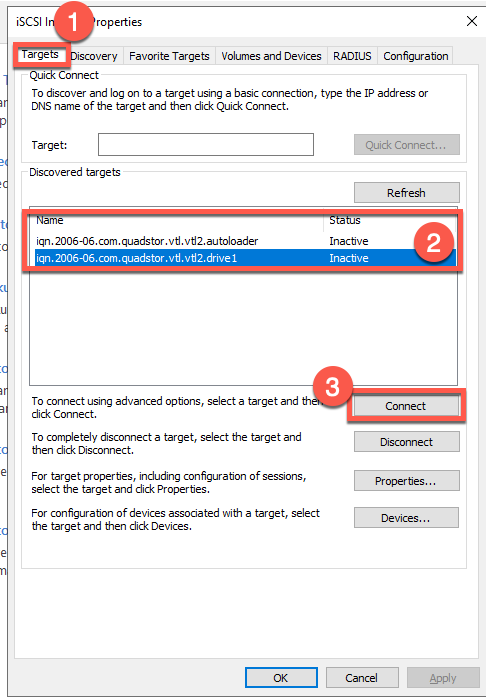
- Once the IP address has been added you should see your iSCSI targets discovered, click on each target and connect them
- Open the Veeam console and navigate to the Tape Infrastructure Node > Add Tape Server
- Select your VBR server(Or whatever server you mounted the VTL to via iSCSI)
- Define traffic rules
- Review and apply
Once the rescan has been completed you will notice that the Tape library has automatically been added.
- Navigate to Tape Infrastructure > Libraries

We can now start doing tape jobs and simulating tape in our environment for testing purposes :)
I hope this helpful and as always, keep on learning!