Migrate Linux Repo to Hardened Repo in Cloud Connect
I got a request on how to convert a Linux Repo into a Hardened Repository that’s behind Cloud Connect. So, I thought I’d write down the process.
I will caveat this by saying this is not an official process, and you should always perform your own testing before using something in production (PROD).
Process
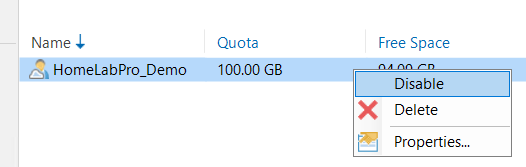
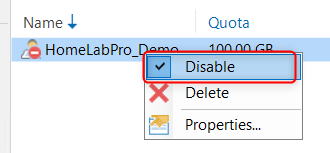
- Disable tenants that are using the “old Linux Repo” in Cloud Connect
- Navigate to backup infrastructure tab
- managed servers
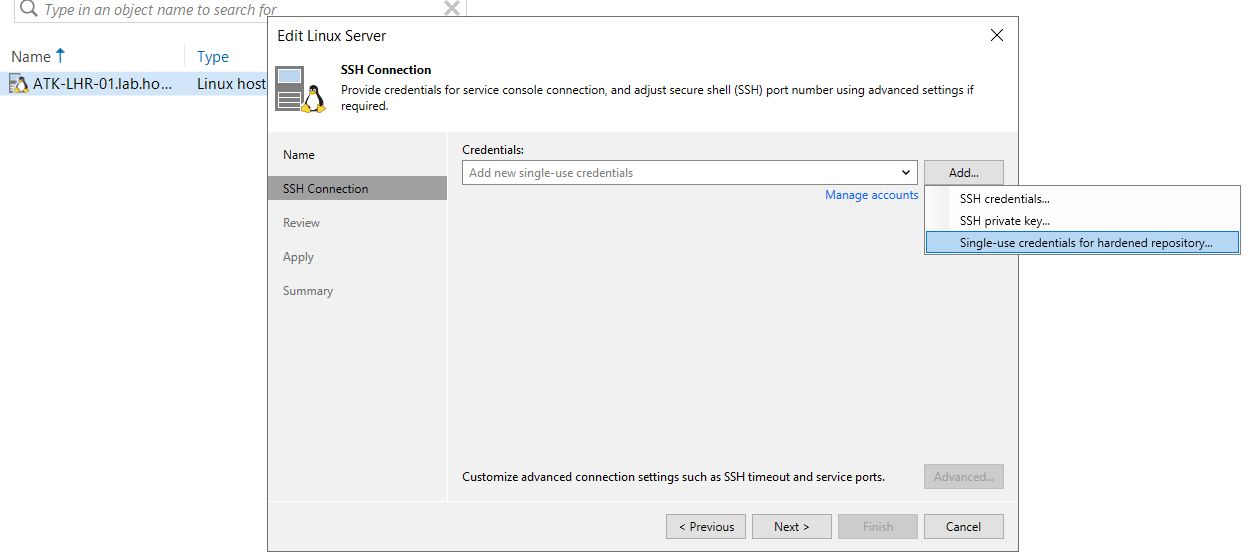
- Select Linux server and change the account from regular linux credentials to single use creds for LHR
- Make sure the permissions etc on the folder in LHR is correct
- Modify the permissions on the existing backup files to be owned by the account that you used for the single use permissions (in my lab I used the Path /backups and the account was lhr)
- chown -R owner:group <dir_path>
- chmod 700 <dir_path>
- perform any additional hardening as reccomended by your security team
- Modify the permissions on the existing backup files to be owned by the account that you used for the single use permissions (in my lab I used the Path /backups and the account was lhr)

- Navigate to Backup Repositories
- Add Hardened Repository
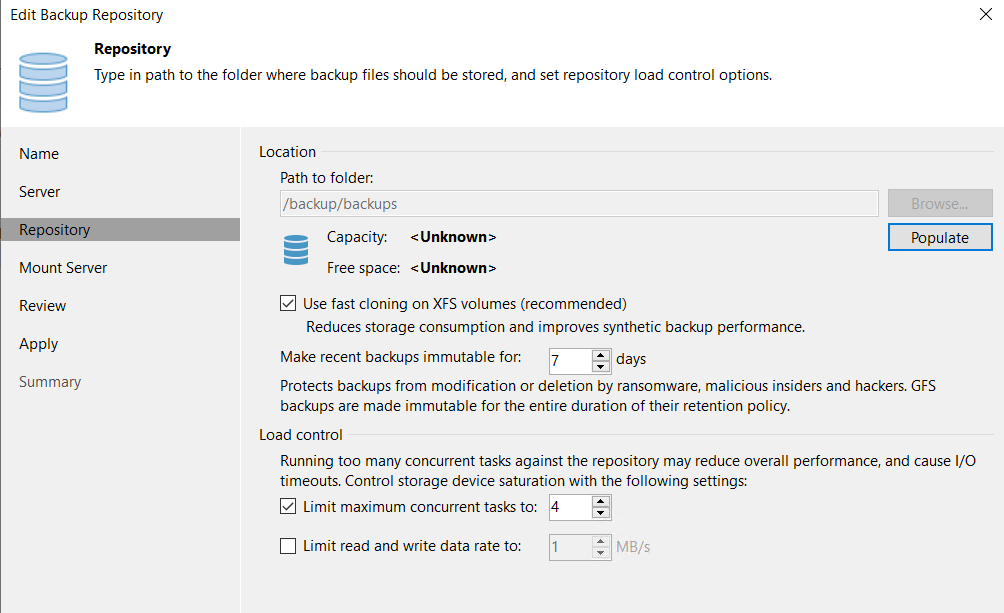
- Map the exact same repo(*Make sure the paths are exactly the same, ex. /backup)
- Navigate to tenants and follow the replace Cloud Repo process(https://vee.am/9y3HHw)
- Configure a new backup repository that you plan to use as a cloud repository.
- Open the Cloud Connect view.
- In the inventory pane, click Tenants.
- In the working area, right-click the tenant account and select Disable.
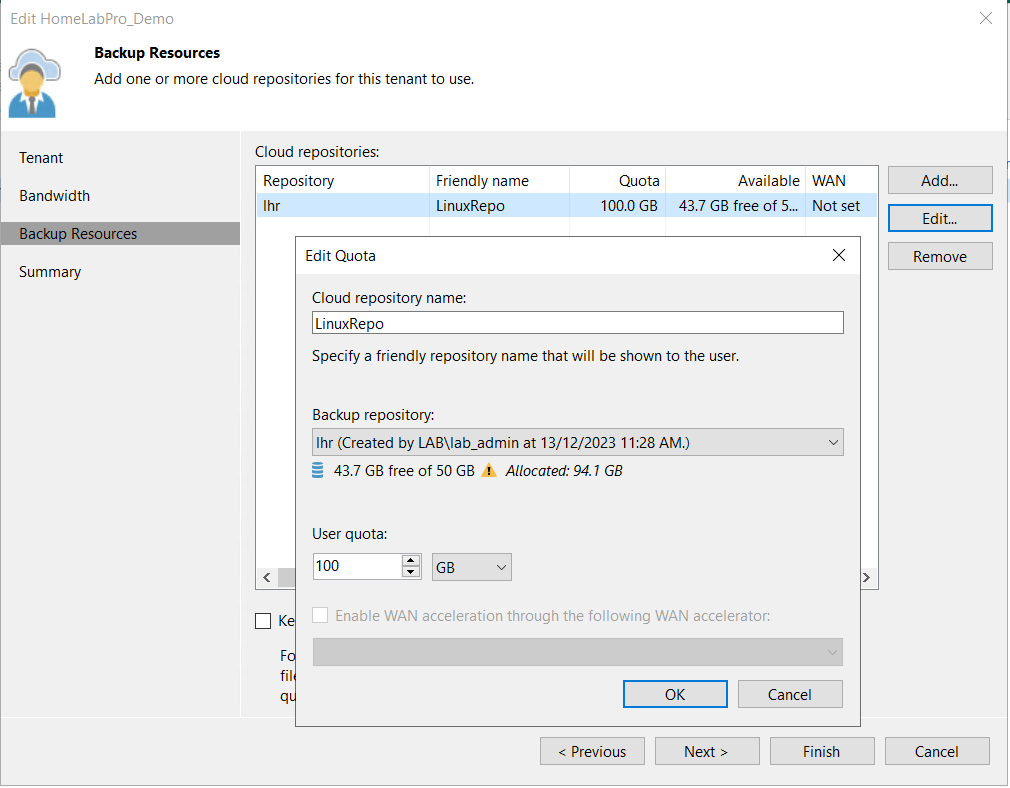
- Change resource allocation settings for the tenant on the initial cloud repository:
- Open the Cloud Connect view.
- In the inventory pane, click Tenants.
- In the working area, right-click the tenant account and select Properties.
- At the Backup Resources step of the wizard, select the initial cloud repository in the list and click Edit.
- Click Finish to save the changes.
- Configure a new backup repository that you plan to use as a cloud repository.
When you are done with this process your tenant should have the “New” hardened repo mapped.
Now that we have successfully mapped the new backup Hardened Repository, we can safely remove the “old” linux repository, once that has been completed we can simply re-enable the tenant and request they resume backups
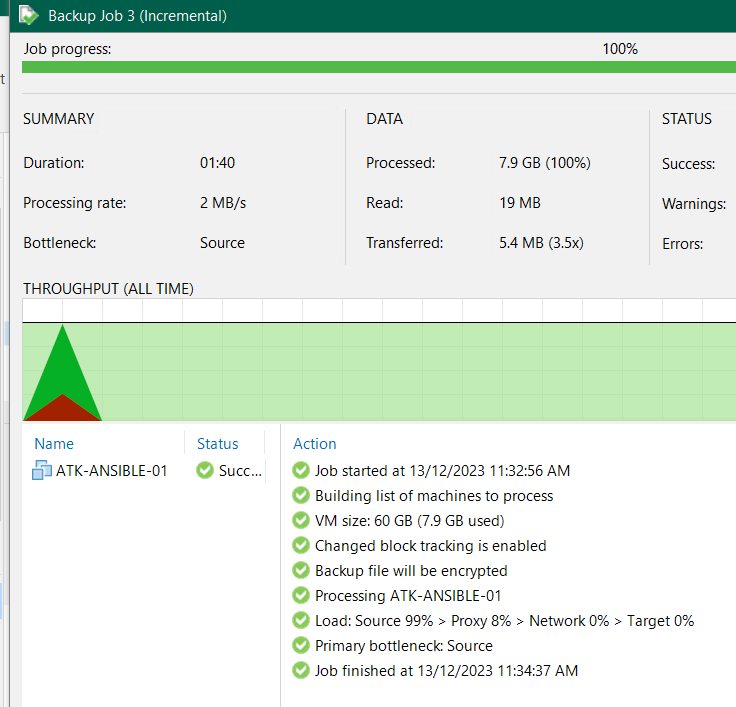
I’ve tested this in my lab and the backup chain kept doing its incrementals. I can also see that it went back and added the immutable flag to the full backup that I took before enabling immutability.

Checking the job we can also confirm that it was an incremental.
I hope this has been informative and has always, Keep on learning.