The Kubernetes Journey – CSI and Kasten Backups
// Table of Contents
In the previous post we mentioned a Kubernetes cluster is made up of a CNI, CSI and a container runtime. We previously went through the process of deploying our container runtime(containerd) and our network interface(calico) and managed to bootstrap the whole setup together forming our functional cluster, Awesome!
Continuing with our learning here as always I’m sure this blog series will contain some errors/issues as I am learning as I go so please feel free to reach out to me and lets chat, we are all learning together!
Overview
Today’s blog will be focusing on getting the CSI setup so we can deploy persistent volumes and of course backups because as we all know backups are important.
Deployment – Container Storage Interface (CSI)
So what is a CSI? , essentially its a plugin that sits between your containers and third party storage providers allowing the third party providers to expose their storage to be used for persistent volumes. This is important as we require out data to survive past the life cycle of the container.
There is a fairly extended list of CSI’s to choose from but to keep things simple in the lab we will use NFS, Credit goes to Michael Cade for this one as I basically followed his process to get this working.
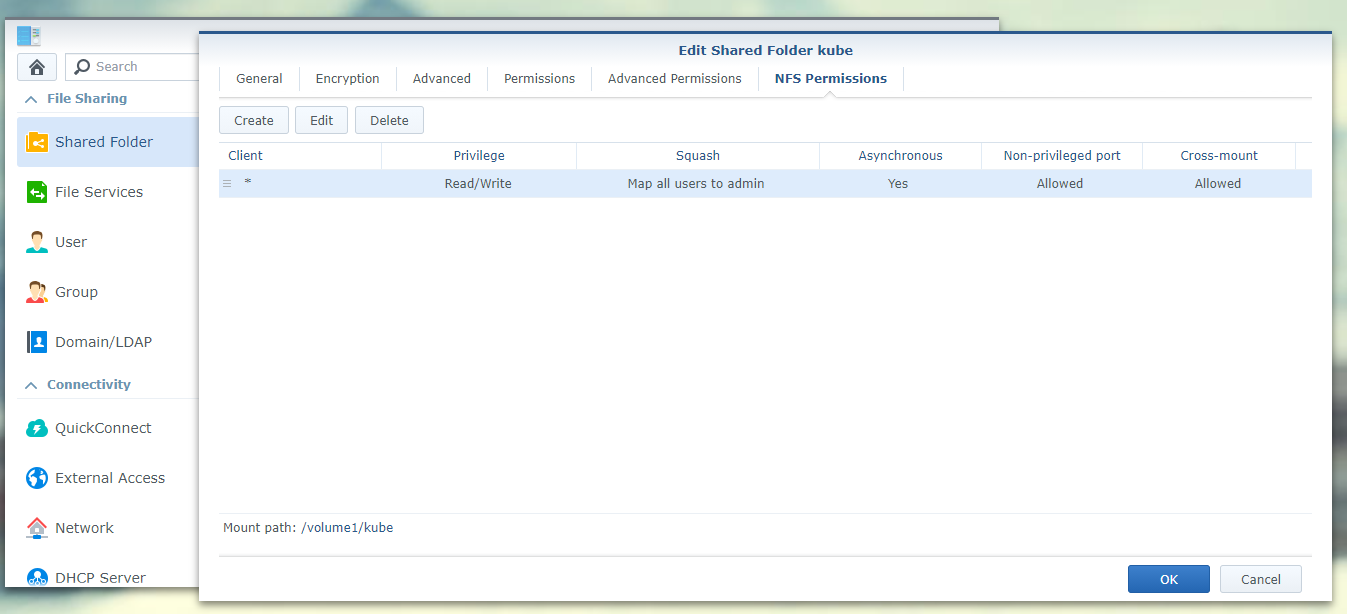
Before we jump across to our cluster we need to first create and export an NFS share, I wont go through the full process but I used my Synology homelab NAS and exported it as /volume1/kube to any client (you can choose to restrict it only to your cluster if you wish)
Next up, we will install the NFS Subdirectory External Provisioner using Helm by running the following command.
#Add Repo
helm repo add nfs-subdir-external-provisioner https://kubernetes-sigs.github.io/nfs-subdir-external-provisioner/

#install package
#change the server ip to your storage devices IP
#Change Path to your mount path
helm install nfs-subdir-external-provisioner nfs-subdir-external-provisioner/nfs-subdir-external-provisioner \
    --set nfs.server=x.x.x.x \
    --set nfs.path=/exported/path

#make your NFS share the default storage class
kubectl patch storageclass nfs-client -p '{"metadata": {"annotations":{"storageclass.kubernetes.io/is-default-class":"true"}}}'
If you need anymore information on changing the storageclass you can find more info on the process in the Kubernetes documentation. I’m probably going to say this a lot but seriously the documentation is pretty impressive.
if things went well you should now see the NFS provider listed as your default storageclass.

Deployment – Kasten
Right, now that we have this all configured we can deploy Kasten. We start off by making sure we meet all the pre-reqs. Again following the epic documentation we can see just how easy it is.
#Add the Helm Repo
helm repo add kasten https://charts.kasten.io/
#Run the primer script
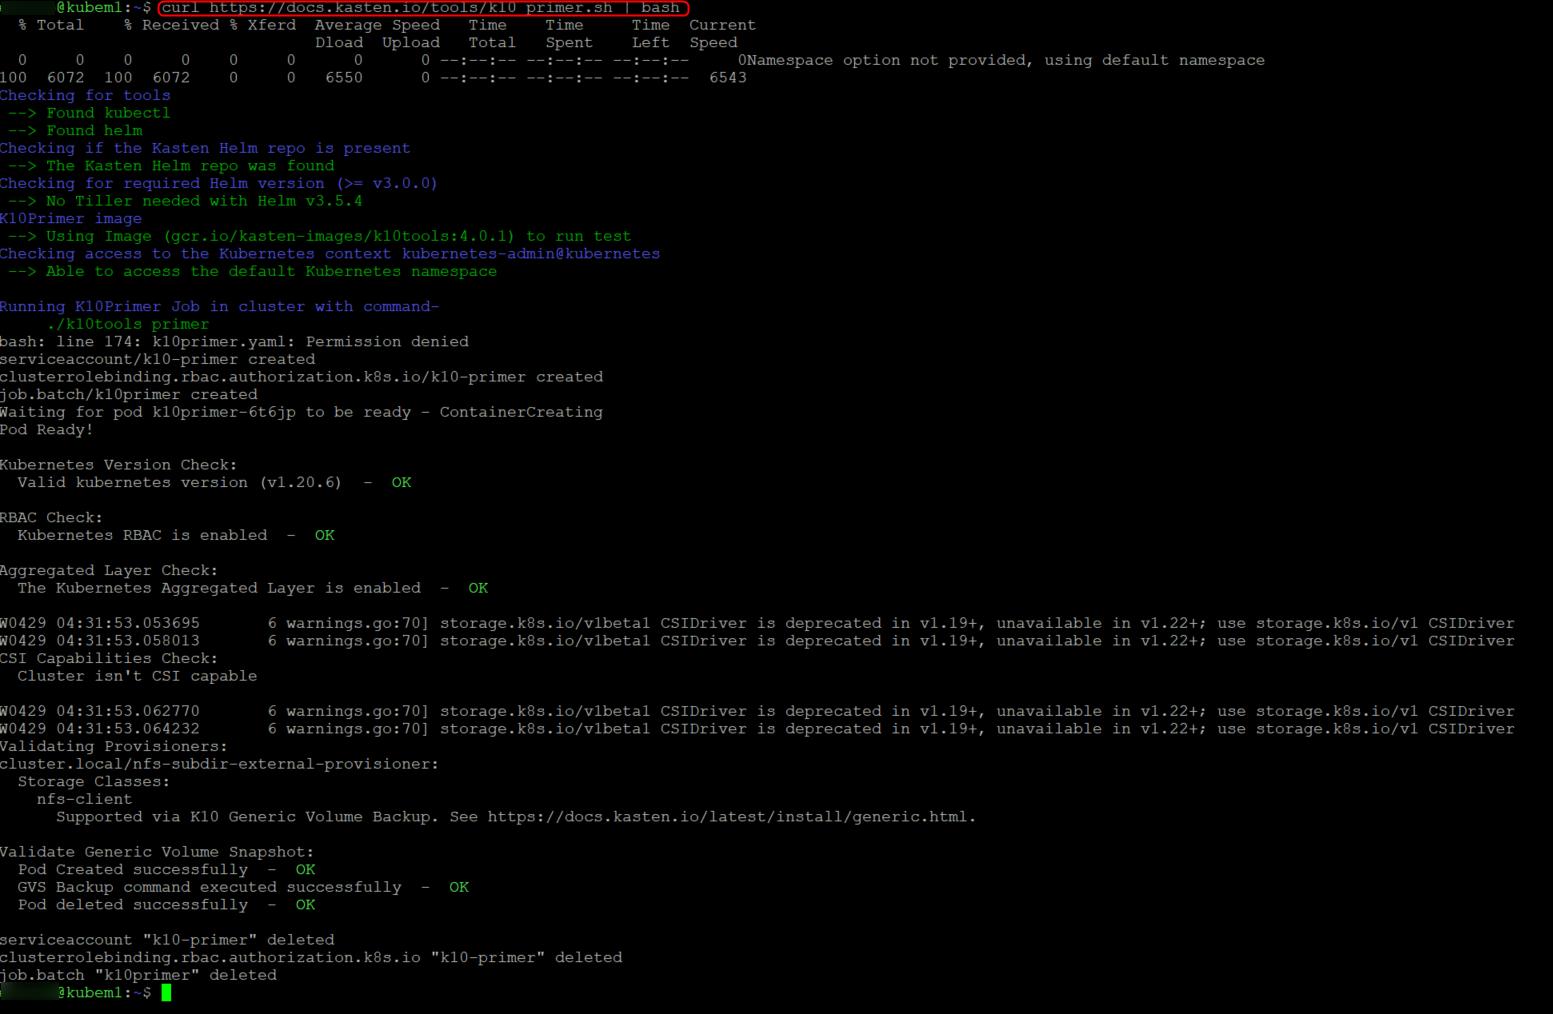
curl https://docs.kasten.io/tools/k10_primer.sh | bashWhat this primer script does is validate that the cluster is ready to be used, you should see a bunch of green ok’s (I got a couple warnings but thats cool we can keep on going)
Once you are happy we can press on and kick off the Helm chart and deploy Kasten, In my case we will be following the documentation for Other Distributions as I am deploying this on-premise.
We will also be adding a few variables onto our install as we want our dashboard to be exposed via our MetalLB loadbalancer and we want to use token authentication, we do this by adding the “ExternalGateway” and “tokenAuth” flags to our install parameters.
#Create the required namespace
kubectl create namespace kasten-io

#kick off the deployment
helm install k10 kasten/k10 --namespace=kasten-io \
    --set externalGateway.create=true \
    --set auth.tokenAuth.enabled=true
Give it a few minutes to complete, you can confirm its fully deployed by running kubectl -n kasten-io get pods. you should see all the pods deployed.

Now we just need to find the external IP provided by our load balancer. we can see that by running “kubectl -n kasten-io get svc”..as we can see on the screenshot below the “gateway-ext service has got an external IP.
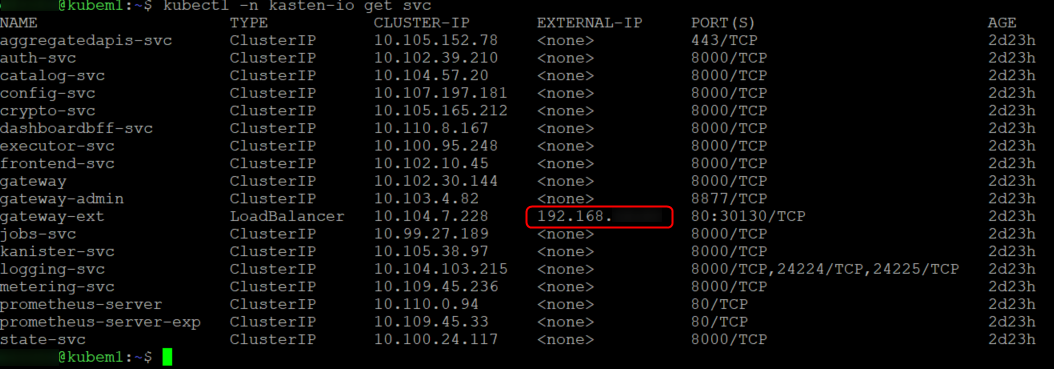
If we browse to that IP on port 80 we should see our web console. (http://IP/k10)
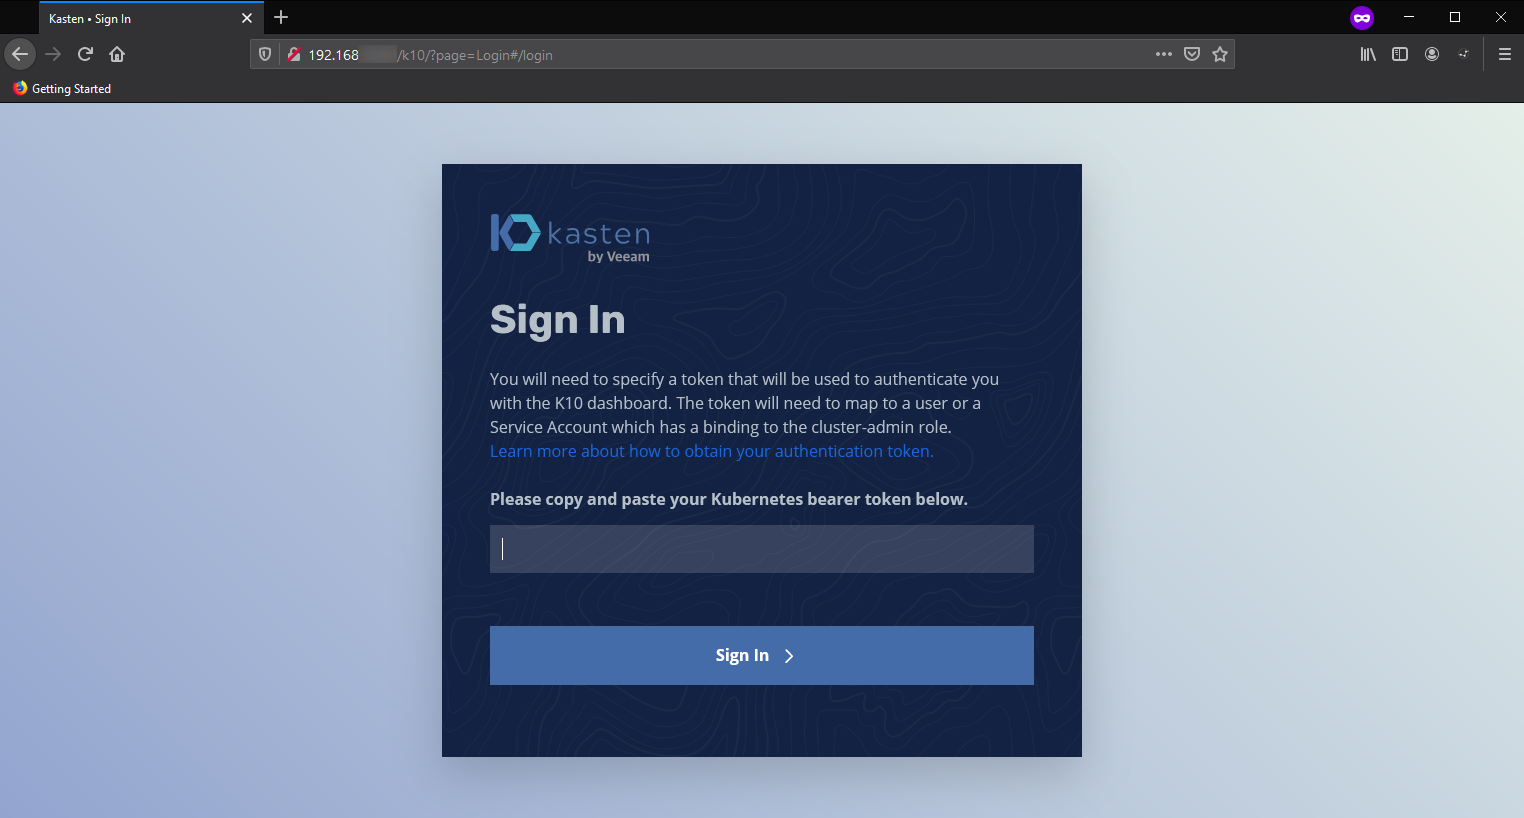
Look at that! love it!
Right nearly done…Next you will need to get the token from your service account to log in and get the dashboard. (more info linked above)
# Assume K10 is installed in the 'kasten-io' namespace
# Extracting token from SA 'my-kasten-sa'

# get the SA secret
sa_secret=$(kubectl get serviceaccount my-kasten-sa -o jsonpath="{.secrets[0].name}" --namespace kasten-io)

# extract token
kubectl get secret $sa_secret --namespace kasten-io -ojsonpath="{.data.token}{'\n'}" | base64 --decode
and just like that you can log in and start backing up your K8s cluster.
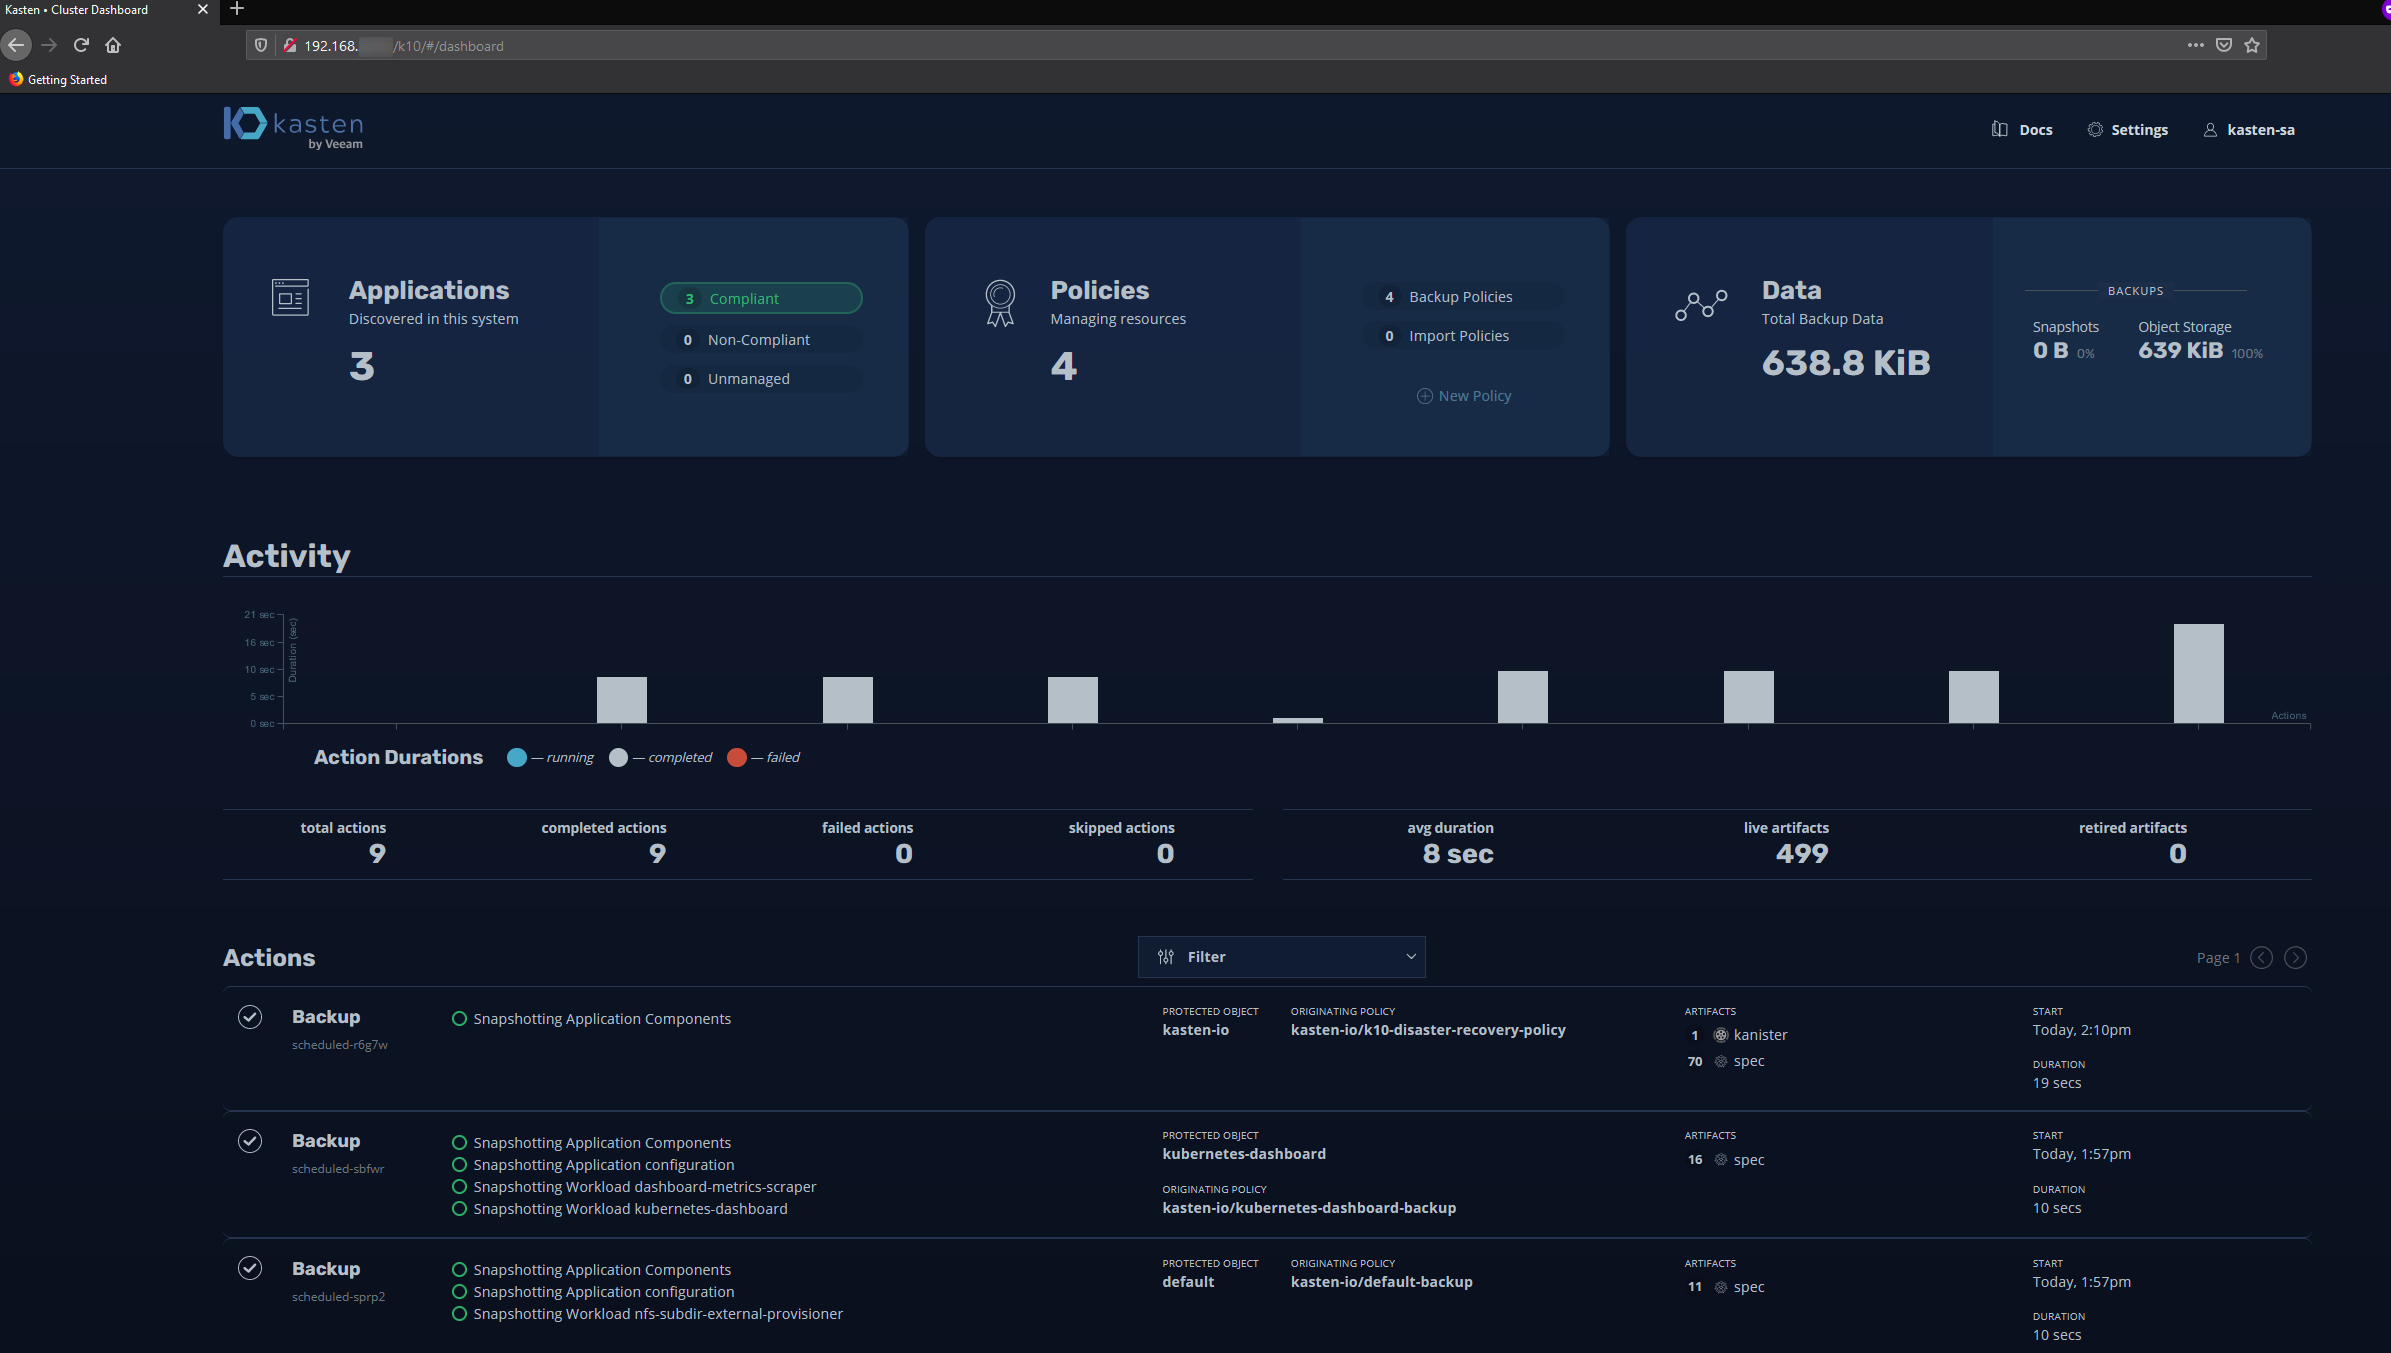
Fantastic, Kasten is installed and working!
So why was configuring the storage so important? Well Kasten requires persistent storage to function and we can see this by inspecting the pods a bit, lets have a look.
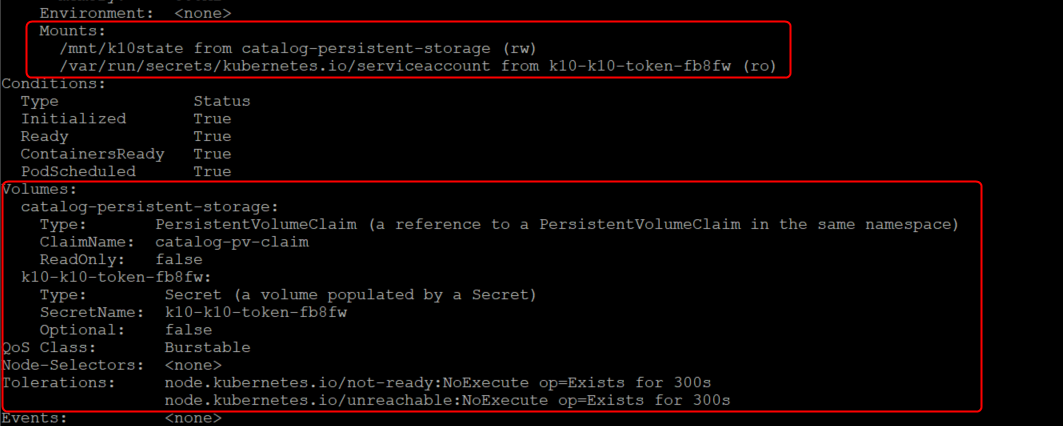
so if I describe a pod yeah we can see that there are mnt points inside the pods, in this case ill describe the catalog pod by running “kubectl -n kasten-io describe pod catalog-svc-585566955d-cwq4k“, what we get is a massive output but the key bit here is the mnt points and the volumes.
So if we take a look at the Persistent volume claim we can see that it is using volume pvc-dd3078ca-8165-4181-9bac-4f0bd95306e8
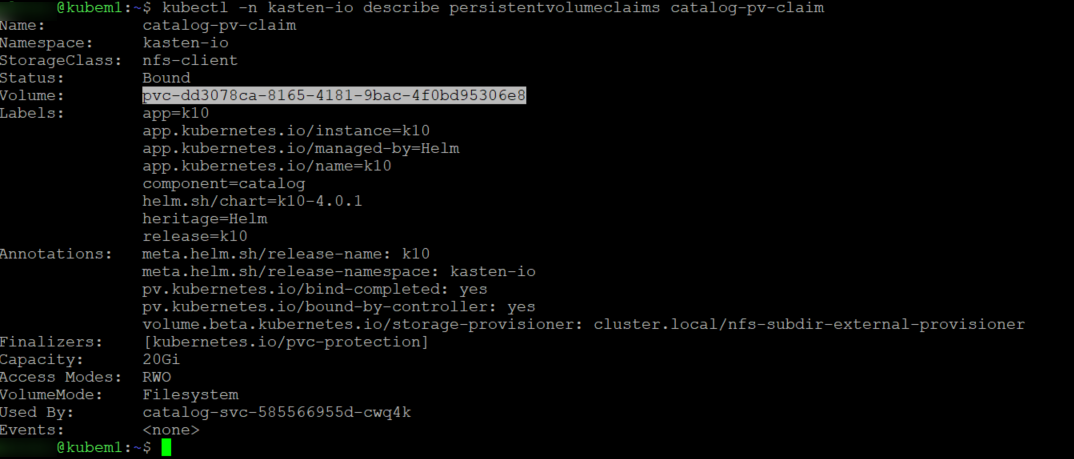
Think you seeing a pattern here..lets describe the volume.
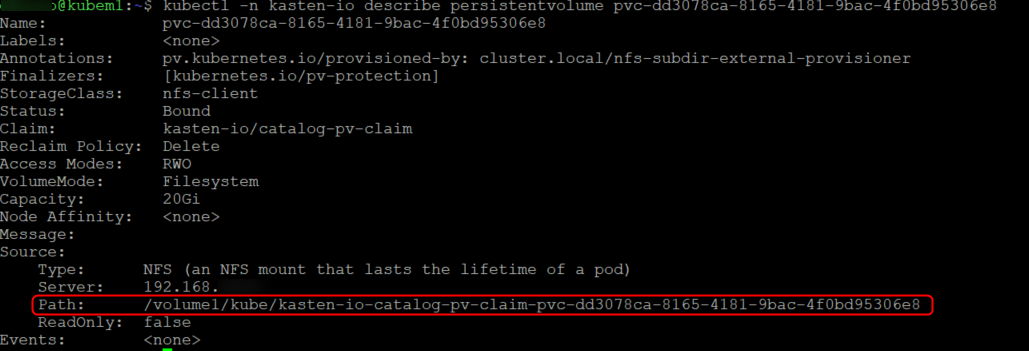
We can see that the NFS provider automatically provisioned the data on our NFS share and we can confirm that by browsing to the share off my windows laptop! the data stored there will now persist past the pods life cycle so if you ever delete a pod you can still get to the data as its not stored within the pod but rather on external storage.

To take even a further look we know that there is a catalog pod on the worker node KubeW1 so lets run mount | grep catalog on that node we can see that the volume is mounted within our pod.

I hope this was informative and gives you a better understanding of persistent storage inside K8s because I know it took me a fair while to understand it.
As always if you have any comments or questions or spot anything wrong in the blog im more than happy to have a chat 🙂