Backup Azure SMB Share using Veeam
As more customers move to Public/Hybrid cloud models, we increasingly get asked “how do we protect our workloads in this new way of operating?”. My answer to that question is always Veeam.
The release of Veeam Version 10 gave us the ability to backup NAS shares, which strengthened the Veeam portfolio greatly. This update allows us to natively target SMB and NFS shares without the need for workarounds that are difficult to manage.
As Veeam understands the protocol we can target any file share directly and back it up, Nifty right? Up until now the use case has been to protect a windows file server or a NAS of some sort, but what about Cloud Native? What about Azure Files? Considering this is a serverless SMB share, Why not?
The image below show cases the architectural components used to setup NAS backups.
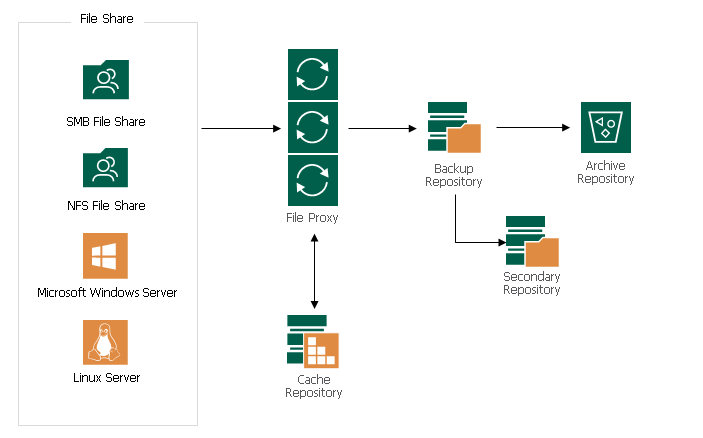
File Proxy A file proxy is an architecture component that sits between the file share and other components of the backup infrastructure. The file proxy operates as a data mover that transfers data between the source file share and the backup repository. The file proxy processes jobs and delivers backup and restore traffic. Cache Repository A cache repository is a storage location where Veeam Backup & Replication keeps temporary metadata. Veeam Backup & Replication uses the cached metadata to reduce the load on the file share during the backup procedure. This allows performing incremental backups from the file share very quickly and very efficiently.
So now that we have the components out of the way and a better understanding of the setup, lets get to the fun bit of configuring the lab.
- Azure Setup
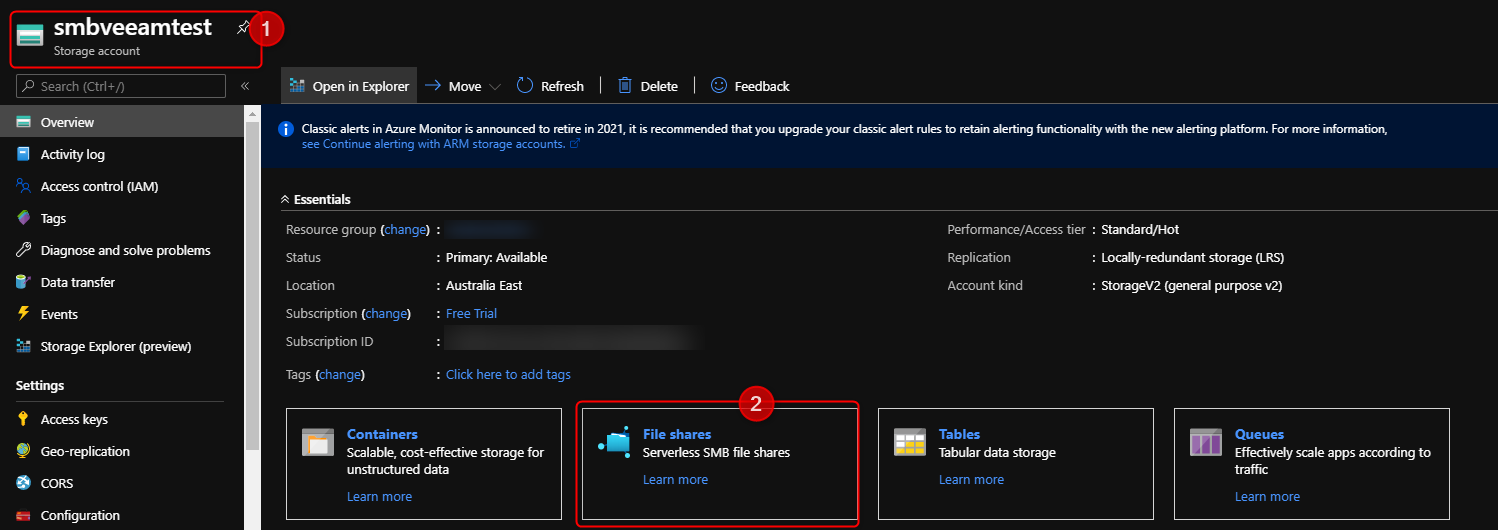
- Log into your Azure Portal.
- Navigate to the storage account you wish to use and select File Shares.
- Create a File Share.
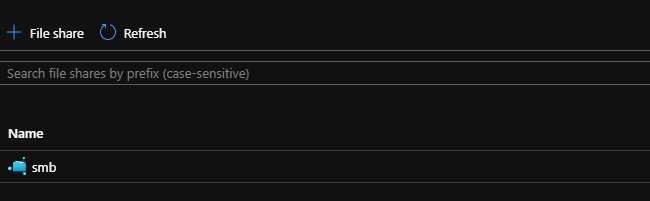
Now that we have our Azure File Share created, lets move onto the Veeam setup.
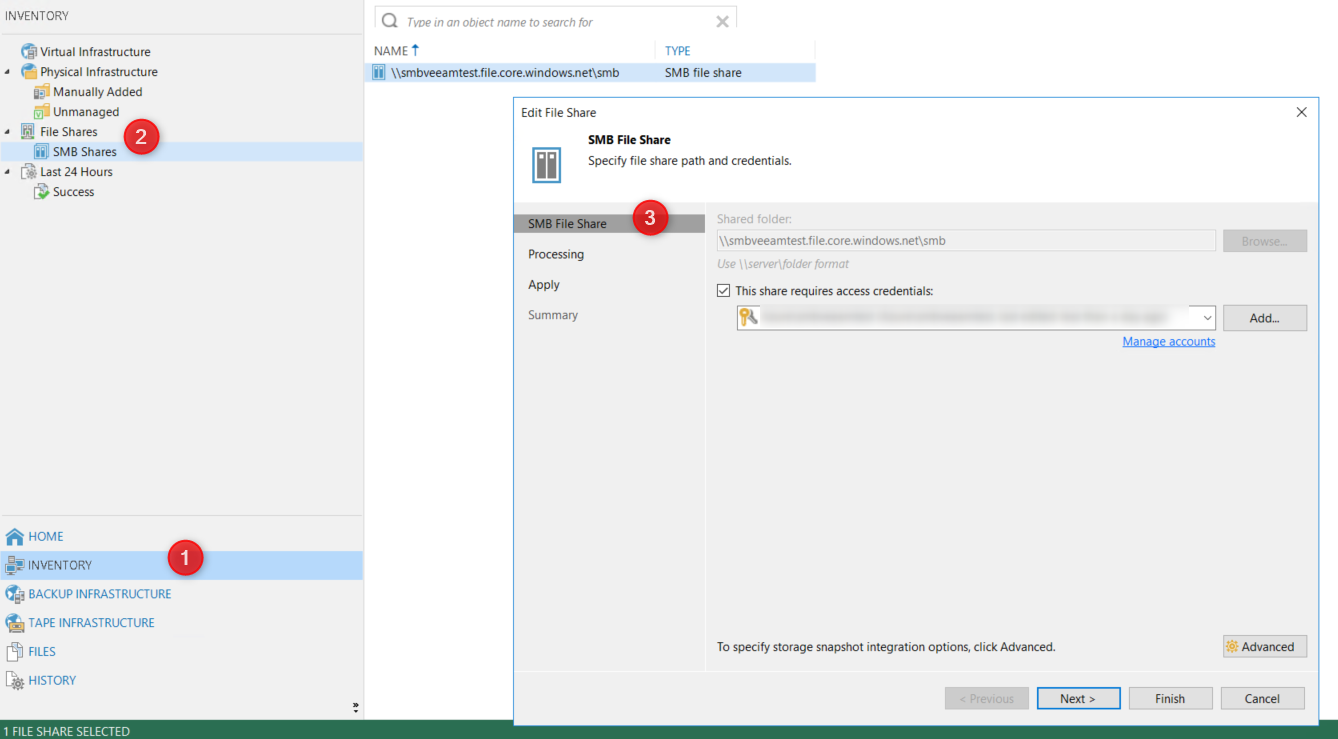
- Log into your VBR server.
- Navigate to inventory.
- Select File Shares -> Add SMB File Share.
- Copy your file share details from your Azure Portal.
- Specify access credentials.
- Specify File proxy and Cache Repository.
- Apply settings.
- Select File Shares -> Add SMB File Share.
Cool, Your File Share should have been successfully added to our VBR console. Next up we will need to create the Backup Job.
- Create a File Share Backup Job
- Select your File Share.
- Specify Repositories and Retention periods.
- Confirm the Schedule.
- Confirm all the details are correct and complete the setup.
- Select your File Share.
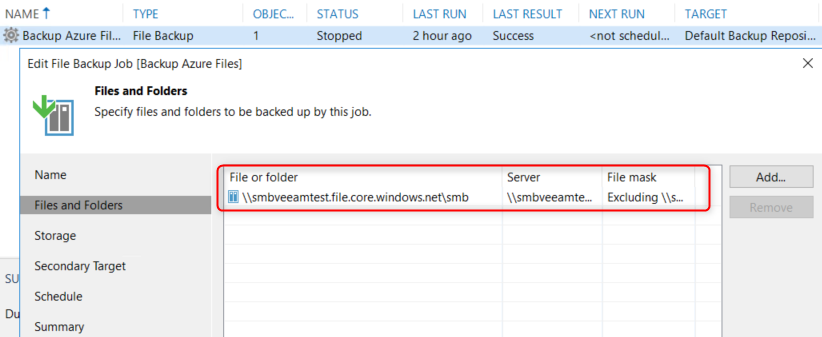
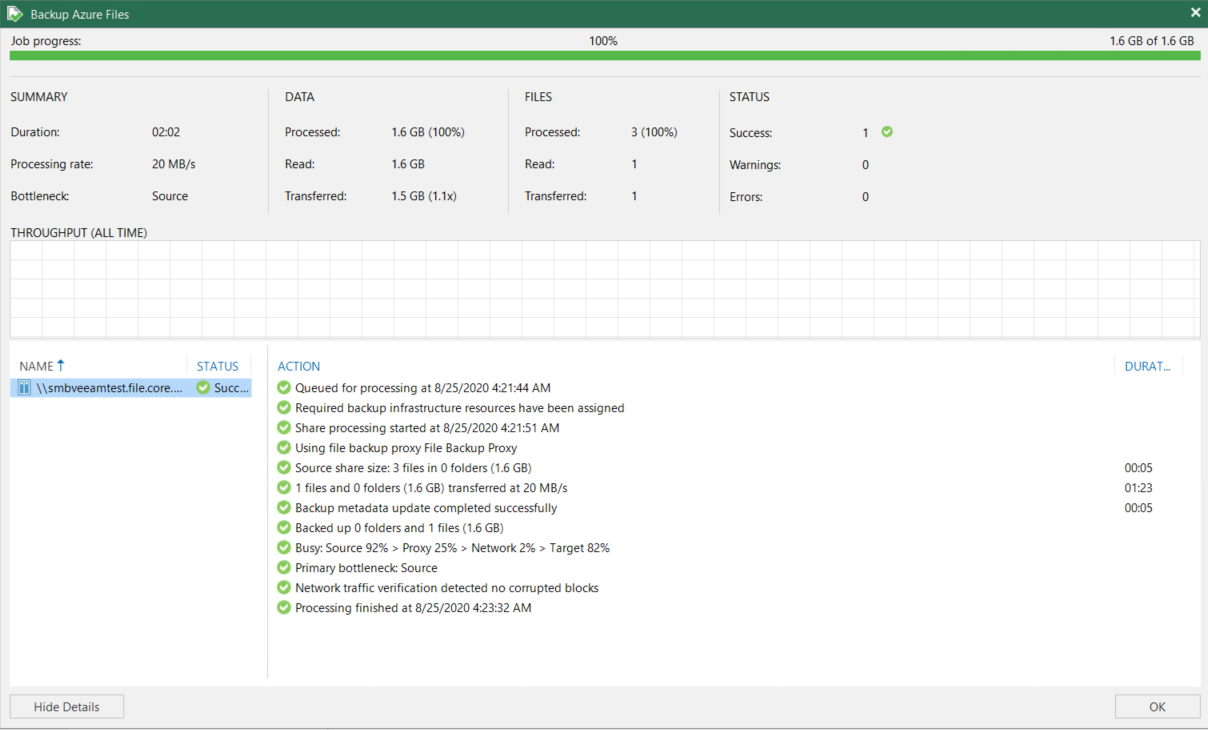
At this point you should see your Backup Job in Veeam ready to be initiated. Once you have run the job, confirm that it completes successfully as below.
As with all data protection scenarios, backup is only worth its weight if it can be restored. With that in mind, lets kick off a restore to confirm all our files have been backed up.
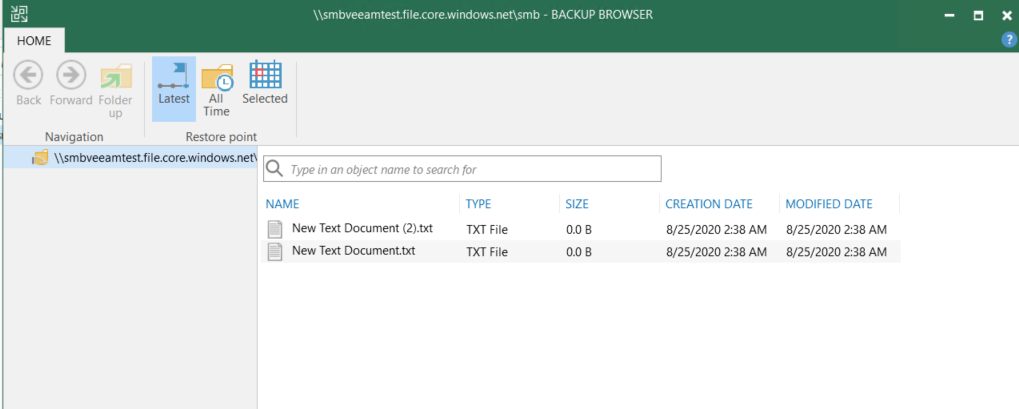
Looks good to me! As you can see above, the File Share has been backed up successfully and is ready to be restored.
The misconception that your data is protected just because it is stored in the cloud could be costly to you and your business so it is nice to know that no matter where your data lives, Veeam has your back.