Using NetApp Trident with Kubernetes – Configuring Kasten
Welcome to part 3 and the final post of this blog series :), following on from part 2, let’s continue with our configuration.
Today we will be setting up our snapshot controllerand configuring Kasten by Veeam to take backups of our Pacman game we deployed previously.
Deploying External-Snapshotter
First, we will need to deploy the external snapshotter, this deploys the required CRDs(custom resource definitions) and the snapshot controller enabling us to take snapshots.
- The repo can be downloaded from Github Trident Site
- Navigate to the client -> config -> CRD folder inside the repo and deploy the 3 manifest files (Shoutout to Eugene for his help in getting this bit sorted, he did some amazing work here and determined you need to use version 5 of the CRDs for this to work successfully.)
cd /external-snapshotter/client/config/crd
kubectl create -f\
snapshot.storage.k8s.io_volumesnapshotclasses.yaml,\
snapshot.storage.k8s.io_volumesnapshotcontents.yaml,\
snapshot.storage.k8s.io_volumesnapshots.yaml
- Next, we deploy the snapshot controller, Inside the repo folder navigate to deploy/kubernetes/snapshot-controller and deploy the 2 manifest files.
cd deploy/kubernetes/snapshot-controller/

kubectl create -f rbac-snapshot-controller.yaml,setup-snapshot-controller.yaml
- Finally, according to the Kasten documentation we will need to create a VolumeSnapshotClass so that Kasten knows what to use.
- Create a file called volumesnap.yml and add the below code, once complete create the VolumeSnapshotClass by running kubectl create -f volumesnap.yml
- More info can be found on the Trident documentation
- You may notice the Kasten annotation, more info can be found here
apiVersion: snapshot.storage.k8s.io/v1
kind: VolumeSnapshotClass
metadata:
  annotations:
    k10.kasten.io/is-snapshot-class: "true"
  name: trident-snapshotclass
driver: csi.trident.netapp.io
deletionPolicy: Delete
Deploying Kasten
Now that we have all of our snapshot capabilities enabled, we need to deploy Kasten I have blogged about this previously at length so will be brief here but if you need more information please go look at this post.
following the amazing Kasten documentation we can deploy Kasten in three commands.
helm repo add kasten https://charts.kasten.io/

kubectl create namespace kasten-io

helm install k10 kasten/k10 --namespace=kasten-io \
    --set externalGateway.create=true \
    --set auth.tokenAuth.enabled=true
-
This will deploy a few pods and can take a few minutes to deploy completely. (Took about 10 minutes in my lab)
-
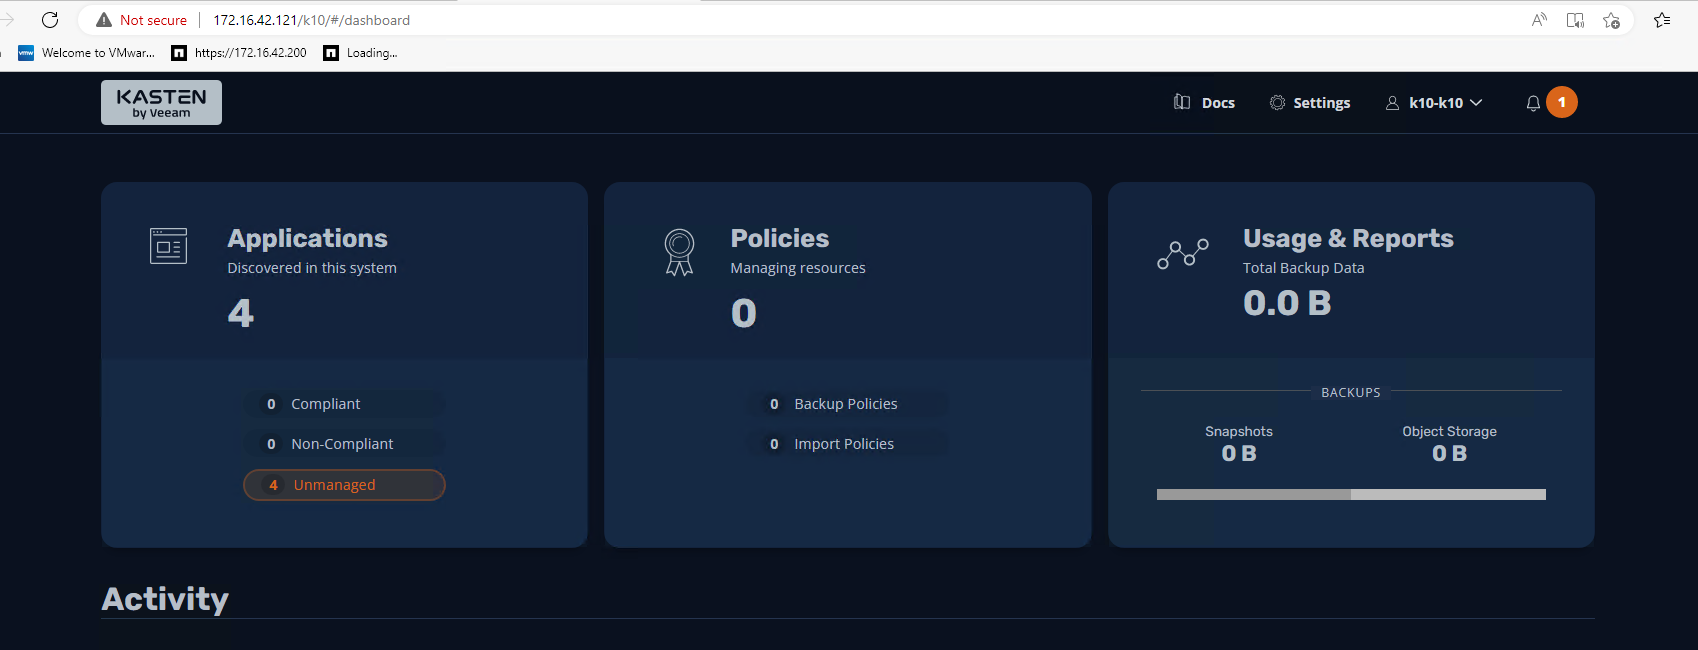
Navigate to the IP provisioned using http://{IP}/k10/ and you should be greeted with a nice dashboard, login using the K10 token.
-
Select “Applications” on the home screen.
-
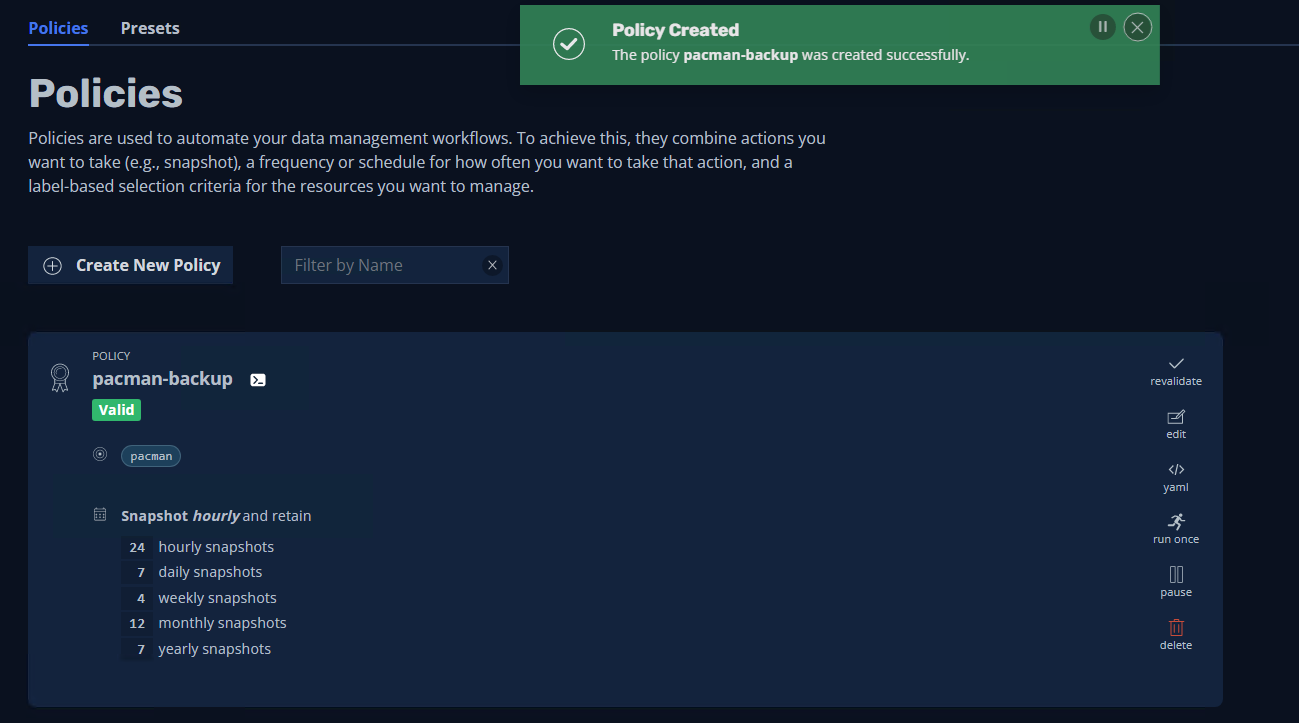
Select the Pacman application and click on “Create a Policy” to create a new Backup policy. Configure the policy as you require.
-
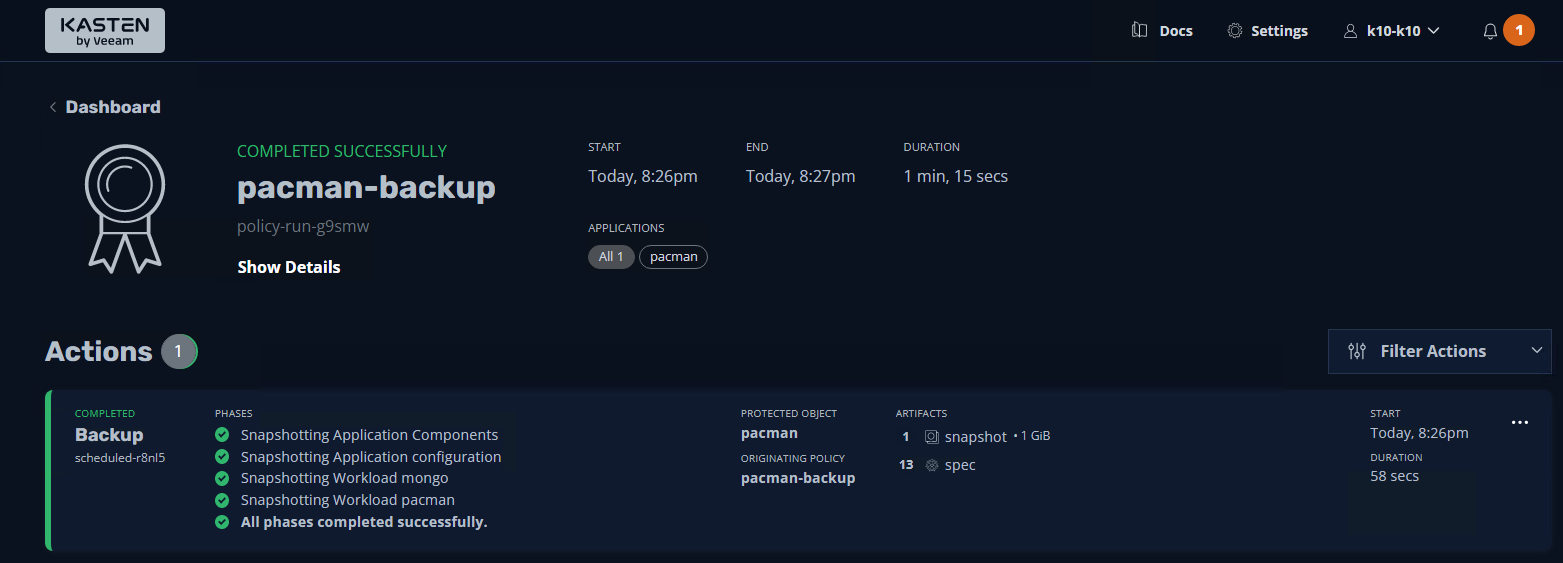
Just like that we have a successful backup of our Pacman application.
According to the Trident documentation the snapshots are taken as Netapp snapshots.
“For the ontap-nas, ontap-san, aws-cvs, gcp-cvs and azure-netapp-files drivers, each PV maps to a FlexVol. As a result, VolumeSnapshots are created as NetApp Snapshots. NetApp’s Snapshot technology delivers more stability, scalability, recoverability, and performance than competing snapshot technologies. These Snapshot copies are extremely efficient both in the time needed to create them and in storage space.”
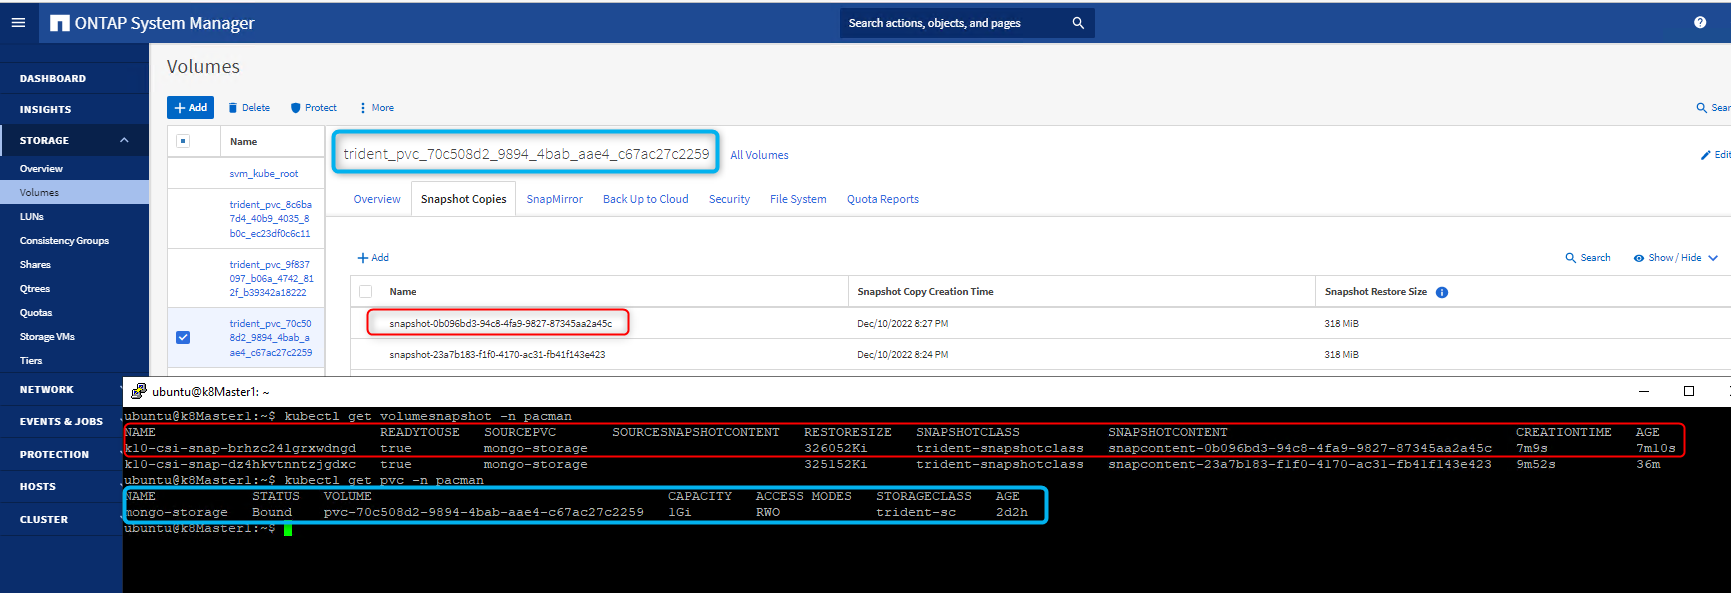
Checking the array, we can see that we do indeed have a NetApp snapshot ready to use, we can also confirm using kubectl that it is indeed the Pacman applications volume. EPIC stuff!!
Wow that was a journey, thank you to everyone who assisted, shoutout to my fellow Veeam Vanguards for answering all my questions and helping me down this journey of learning.
I hope that as interesting to read as it was for me to set it up and play around 🙂 That’s it for this blog series and as always, keep learning.