Using NetApp Trident with Kubernetes – Deploying ONTAP Select
Today’s idea is to configure Netapp trident as our CSI provider so we can consume NetApp ONTAP storage for our Kubernetes cluster. This will be a multi part blog series as there is just to much to cover in a single post.
To use Trident as our Container Storage Interface, we need to first deploy a virtual NetApp appliance in our lab which will be used to present our storage, this is a two stage process as we first need to deploy the ONTAP Select Deploy OVA after which we can deploy our NetApp virtual appliance. (of course if you already have a NetApp array in your environment you can skip this step, I am using the virtual edition for lab purposes).
Getting Started with ONTAP Select Deploy
- Download the OVA from NetApp (This will require a valid NetApp account)
- Once you have the OVA downloaded, deploy it to your VMware environment.
- Select what storage you wish to use.
- Select your network.
- Customize the template to your environment.
- Confirm all the details and click finish
Once the ONTAP Select Deploy OVA has been deployed successfully you should be greeted with a log in screen, use admin and the password you set to log in to the console.
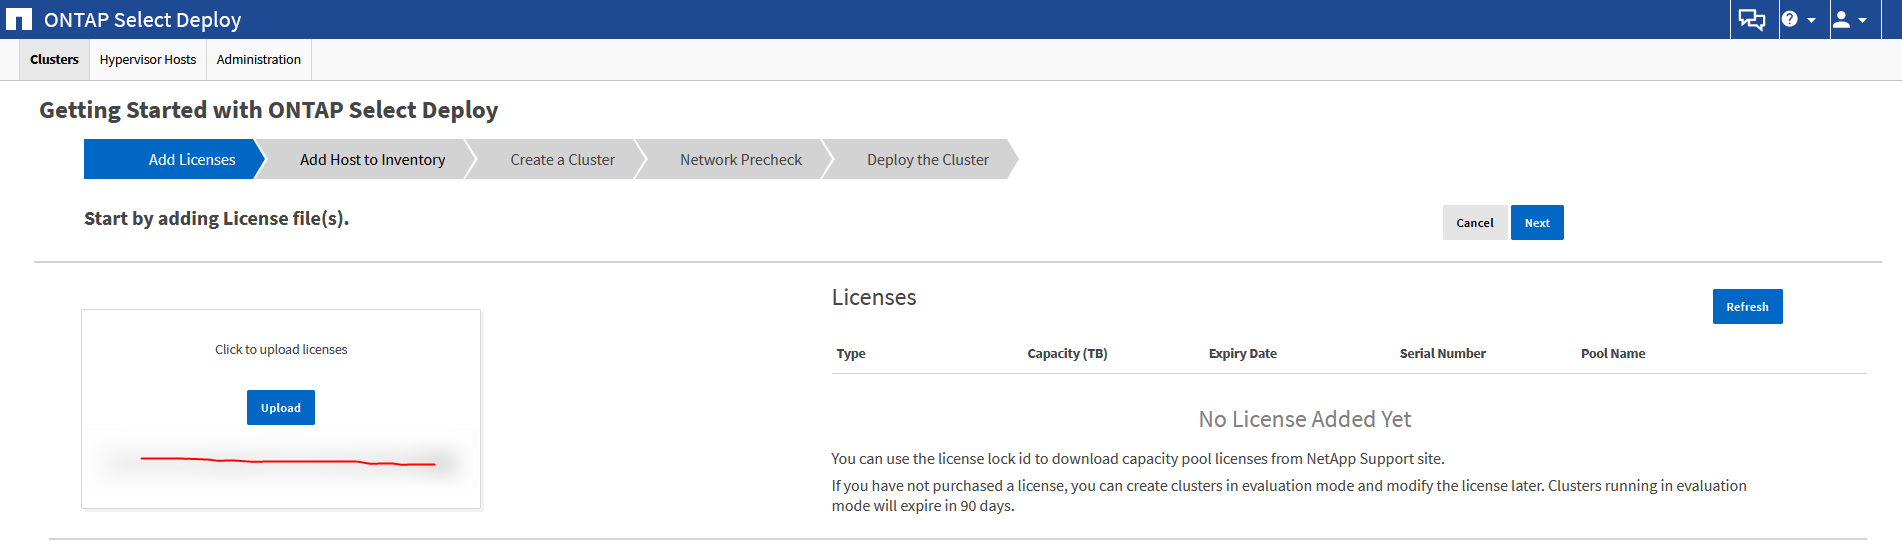
- We start off by providing a license(I will just be using an evaluation license for now)
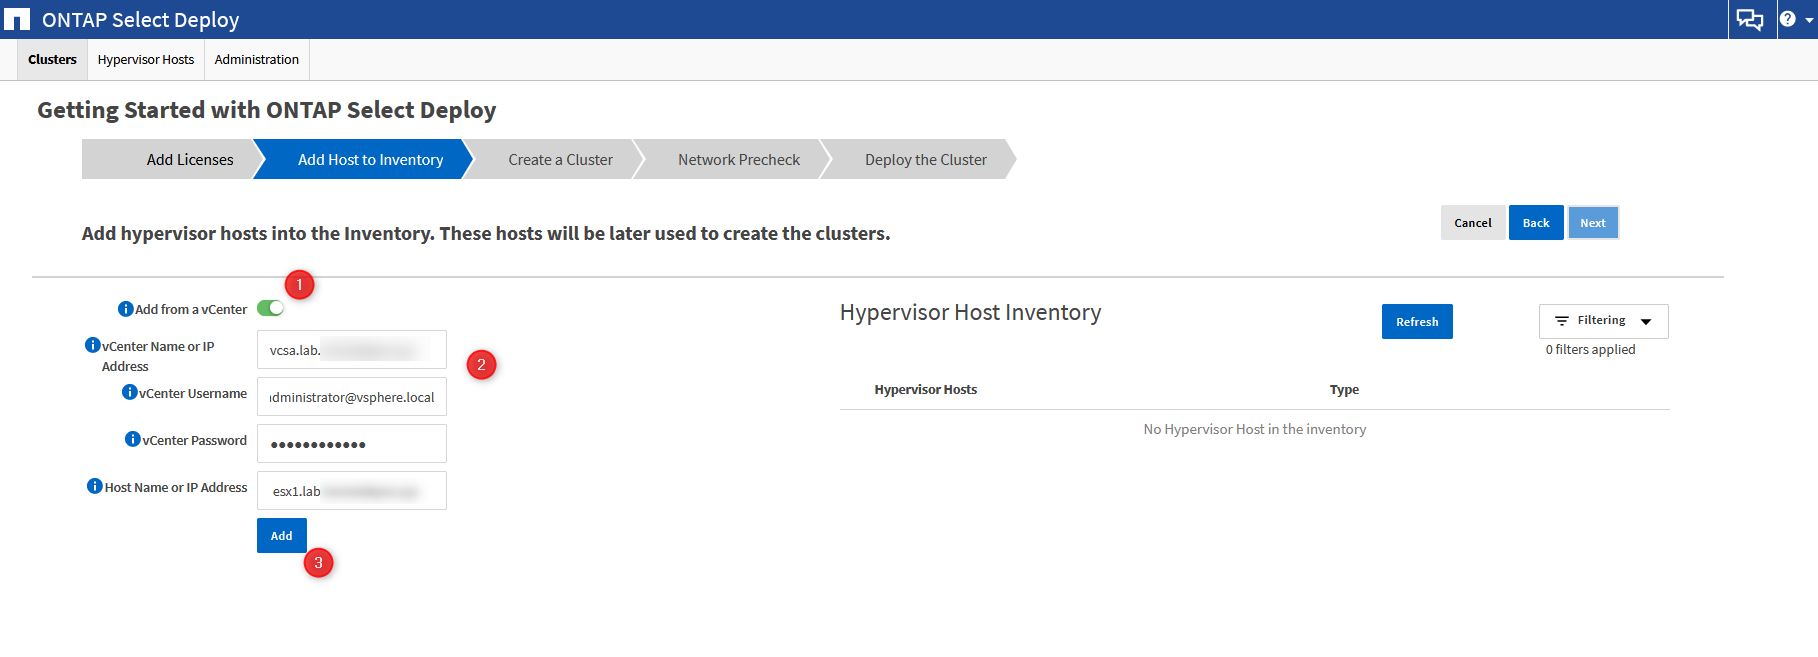
- Add an ESXi server, This is where the NetApp array will actually be built, you can add multiple if you wish.
Create a Cluster using ONTAP Select Deploy
At this point you have finished the ONTAP select deploy configuration, you can either cancel out of the wizard at this point and come back later to deploy the cluster or continue on with the wizard.
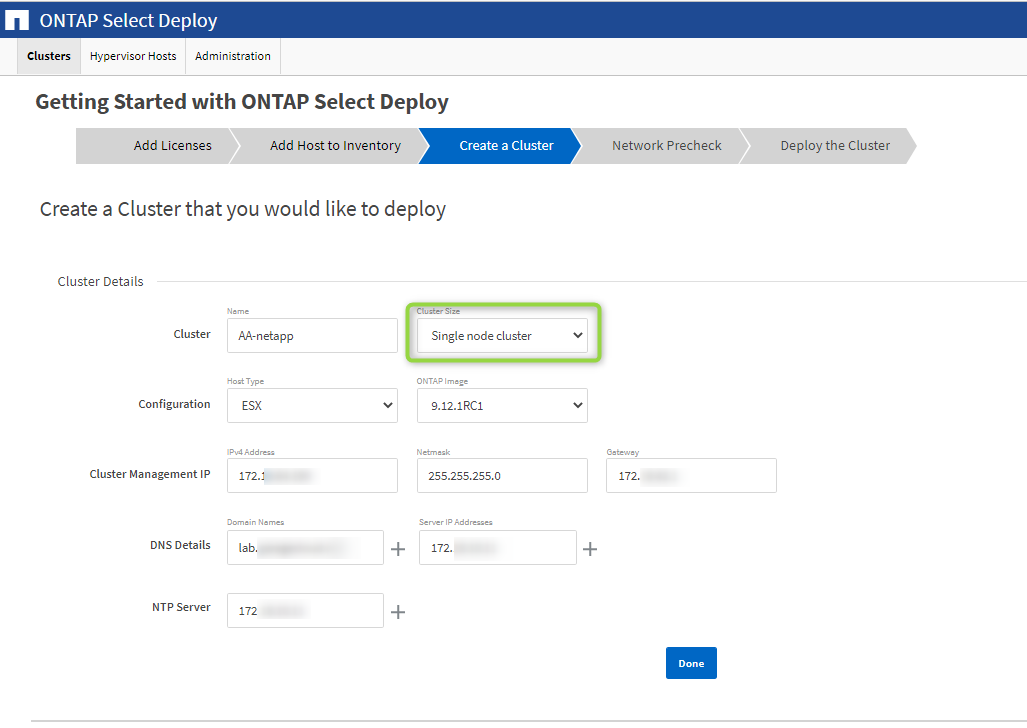
- Lets create the cluster, we start off by providing some details, I am opting for a single node here as my lab is limited.
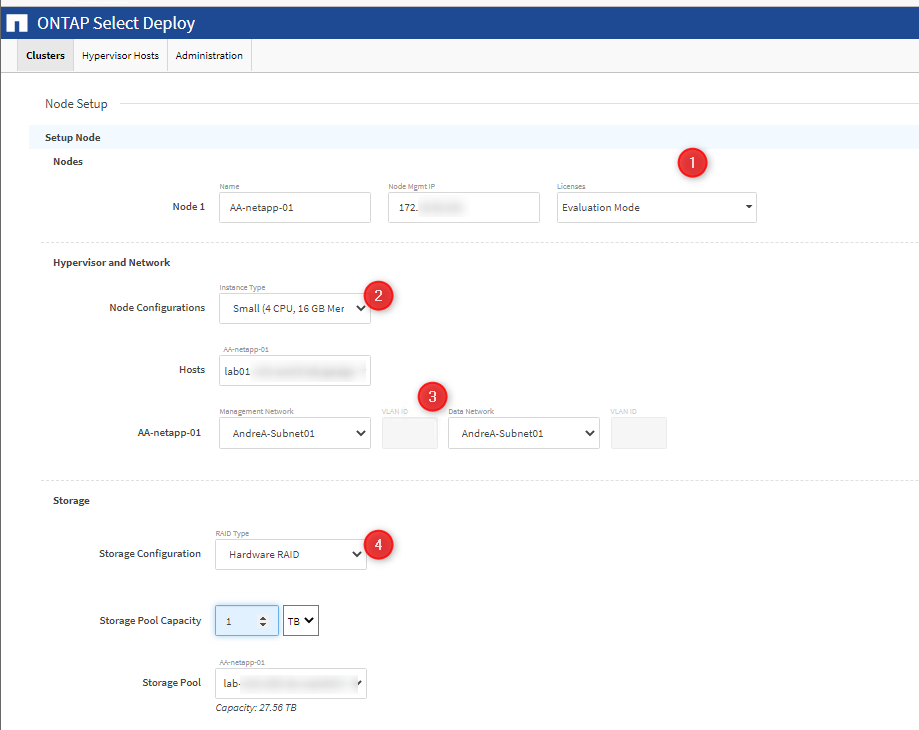
- Select the license, provide some Hypervisor details and finally configure some storage for the virtual appliance.
- Provide a password for the virtual appliance and click create to kick off the process.
- You can view the progress on the events tab but this process usually takes about 15 minutes to complete obviously depending on the node type/size and your lab.
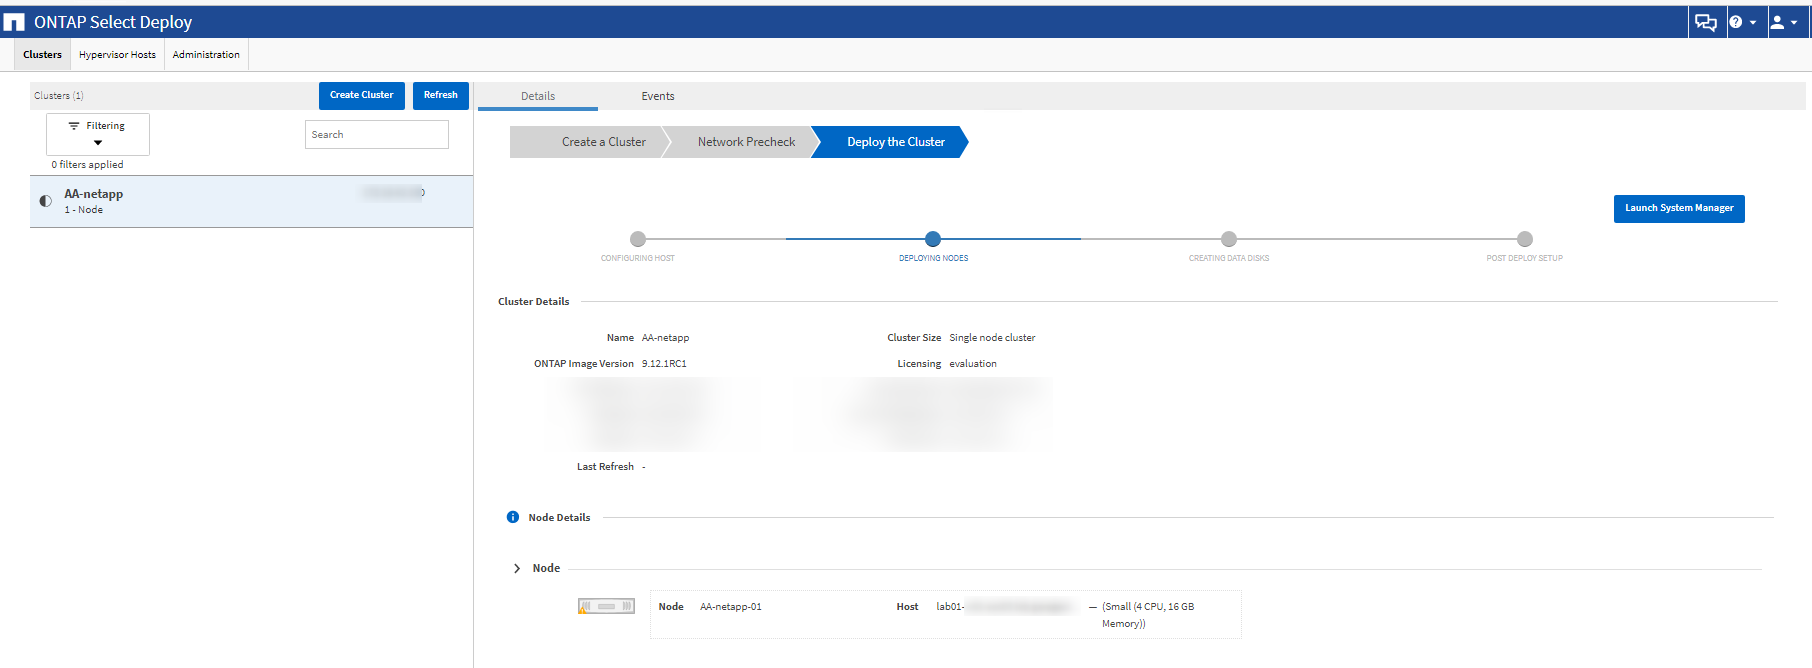
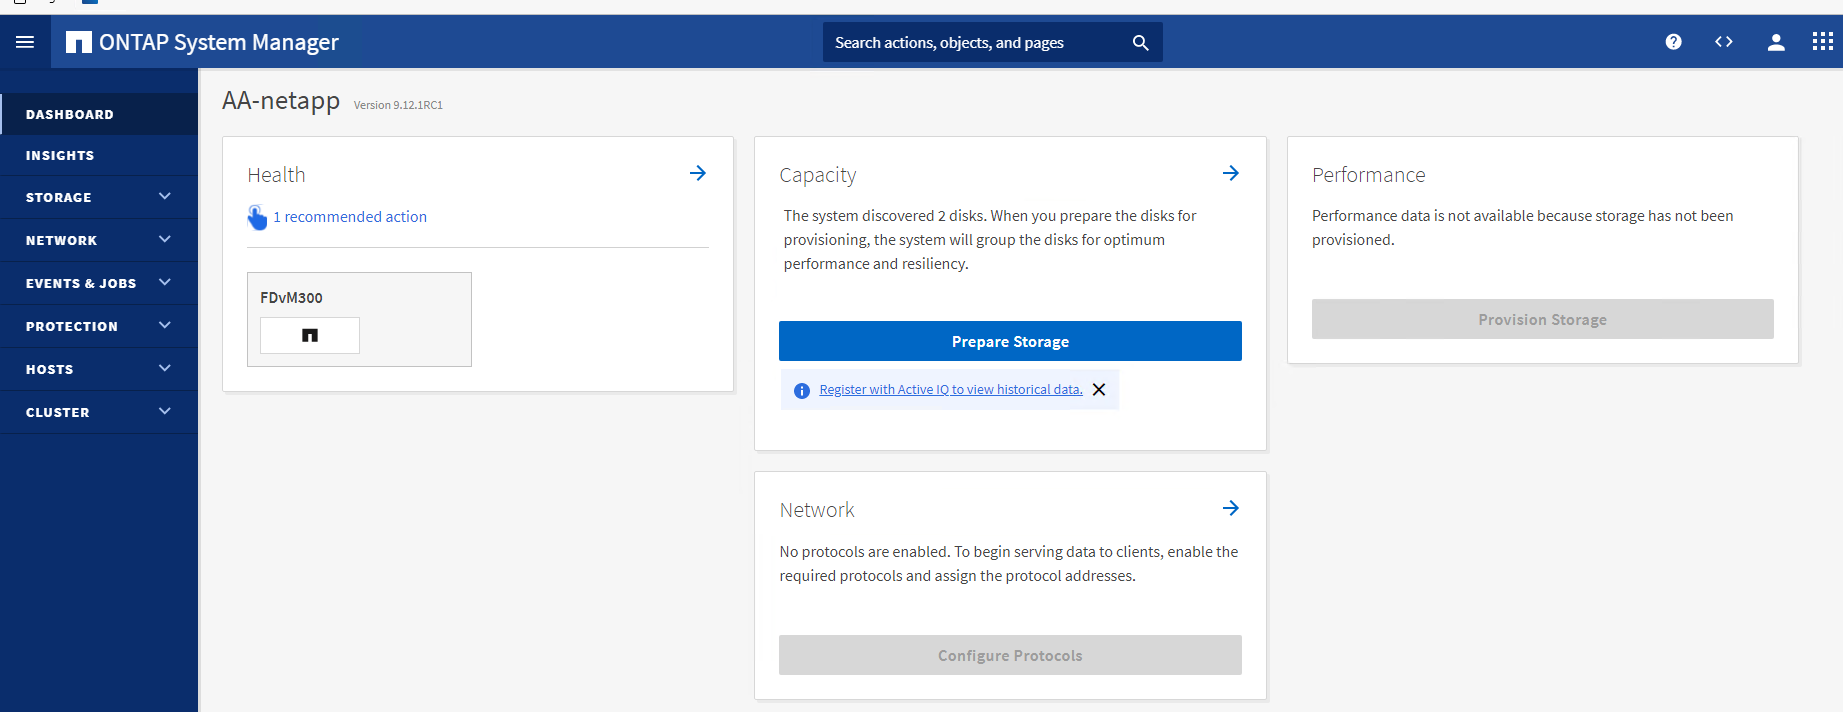
Fantastic, that’s completed successfully and now we can log into the web console using https://{IP}/sysmgr/v4/ and begin to configure our newly provisioned NetApp array.
That’s its for this post, In the next post we will go through the NetApp configuration as well as setting up Trident CSI in our Kubernetes stack so please stay tuned and as always keep on learning.