Wasabi S3 and Veeam
I recently started asking myself what S3 storage I could leverage for my HomeLab as I was looking for something cheap, quick, and secure, this lead me down a few tracks but through the Veeam Vanguard Program I landed on wasabi.
Wasabi Hot Cloud Storage is a universal, one size fits all cloud object storage service that eliminates confusing storage tiers and satisfies nearly all storage performance requirements, and best all they do not charge egress charges or API request charges which is for my use case was beyond perfect.
Best of all it integrated seamlessly into Veeam and supports immutable backups, so far so good.
So today I thought I would walk through the steps of setting up a Wasabi immutable bucket and configuring it withing Veeam.
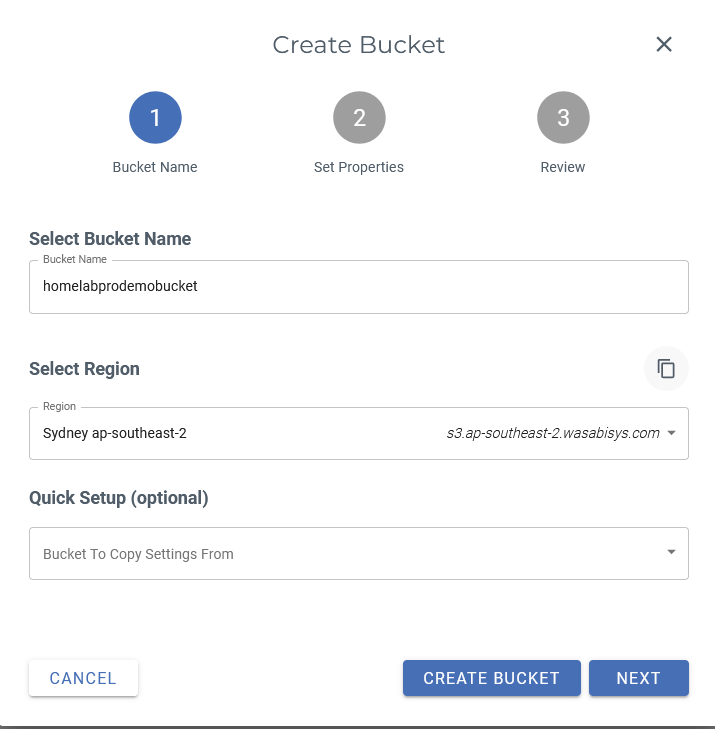
Step 1 – Create the bucket
- Choose a bucket name and set the region
- Take note of the region details, This will be required during the Veeam configuration.
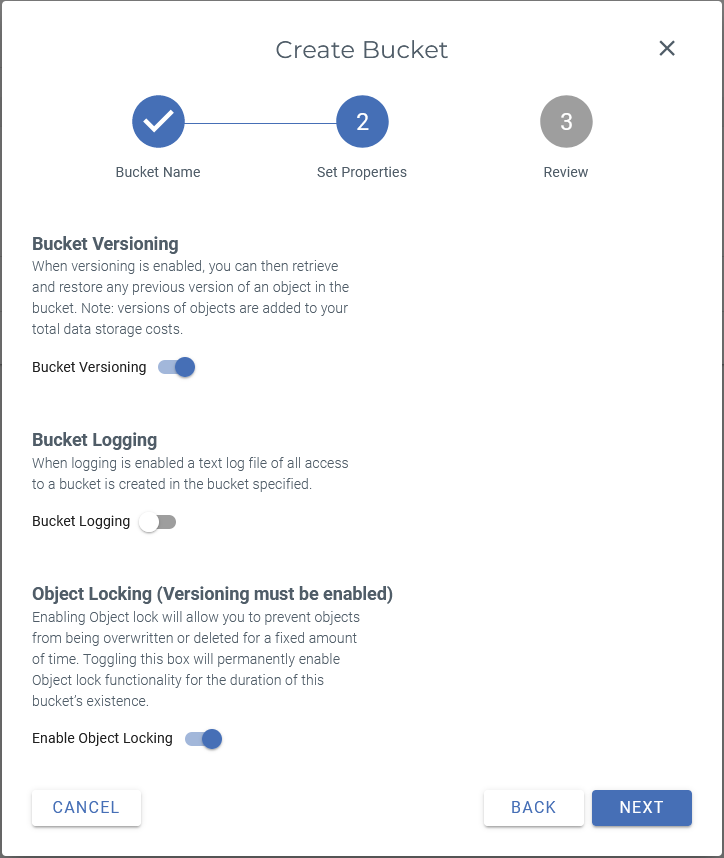
- This is the important step here as its where we enable immutability, Enable the options as below.
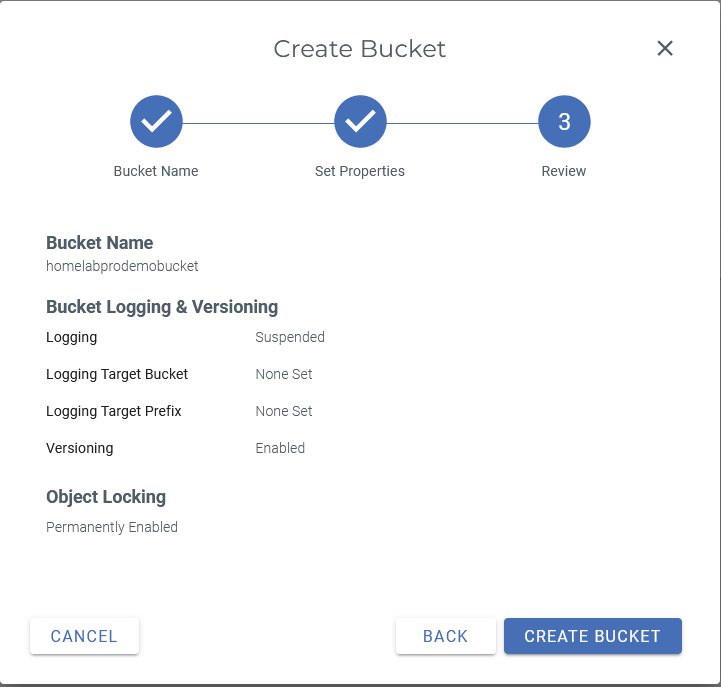
- Review your bucket details and click create bucket.
Step 2 - Create the User
As with any object storage or internet facing service, its best practice to limit the scope of the user that has access which is exactly what we will be doing here, the idea here is provide the least privileges required to get the job done.
- Log into your Wasabi portal and select create user.
- Select Create user in the top right.
- Provide a username and select Programmatic as your access type.
- Create a group as per Wasabi recommendations.
- Skip applying a policy for now as we will create one that limits access to just the one bucket.
- Review your user details and click create user
Wasabi will automatically pop up with option to download your API key, do so and save them in a secure place as they will not be displayed again.
Step 3 - Create Policy
- Navigate to the “Policy” section on the left hand pane and select Create Policy.
- We will use the Veeam KB article linked to create the policy.
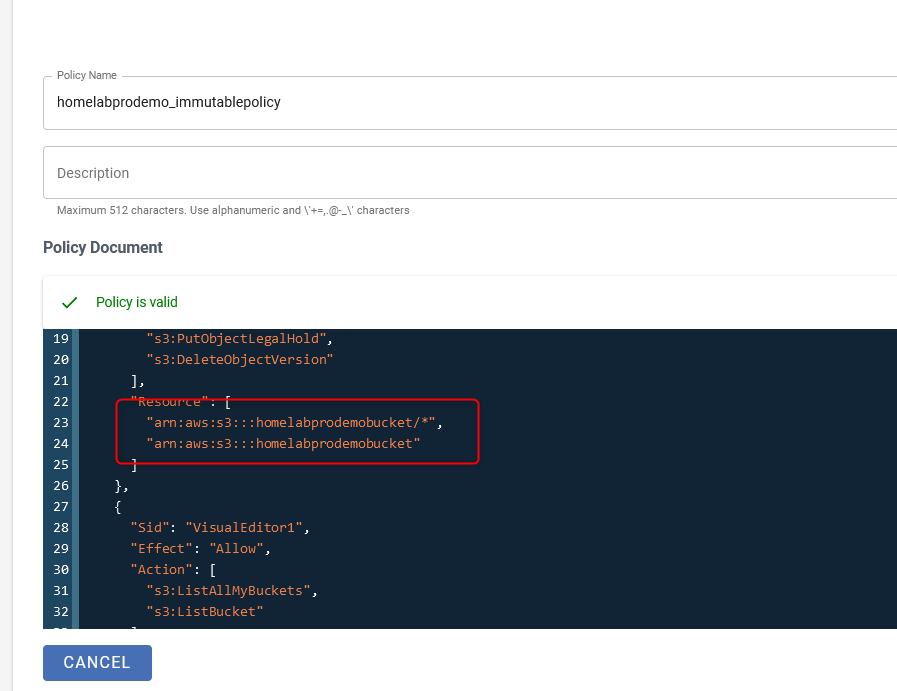
- Browse to the above KB article and navigate to the immutable bucket section, copy the JSON formatted file out and paste it into policy document section in the wasabi console.
remember to replace “yourbucketname” with the name of your bucket (If you copied the code from the article it should be line 23 and 24)
- Browse to the above KB article and navigate to the immutable bucket section, copy the JSON formatted file out and paste it into policy document section in the wasabi console.
- We will use the Veeam KB article linked to create the policy.
Click Create policy to finish the creation.
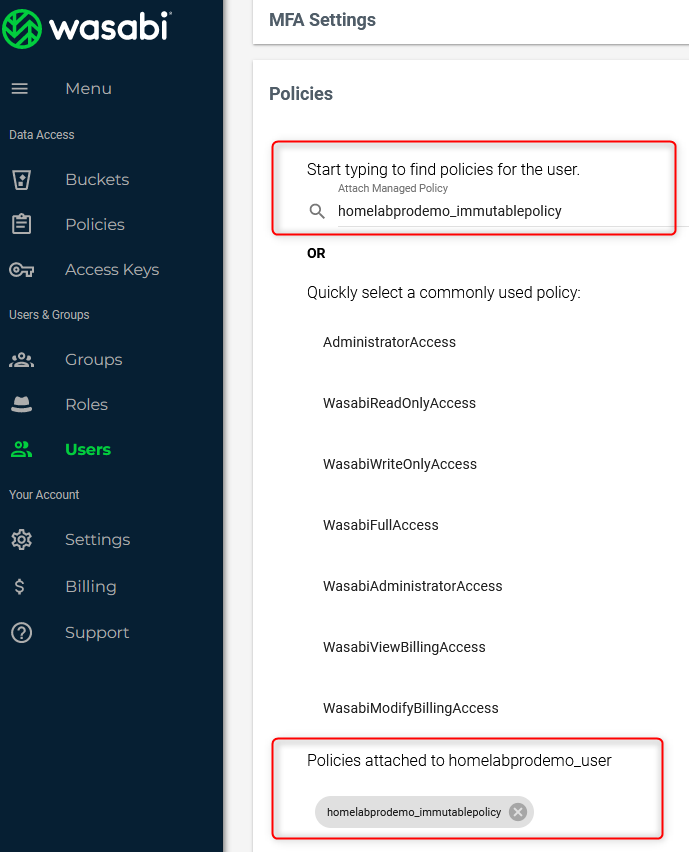
- Navigate back to our user that we created earlier and select edit the user.
- Select policies and assign the policy we created to the user.
Right, now that we have our wasabi configuration done and secured, lets move on to the Veeam console.
- Open the Veeam console and navigate to Backup Infrastructure > Backup repositories.
- Right click > Add Backup Repository.
- Select object Storage > S3 Compatible .
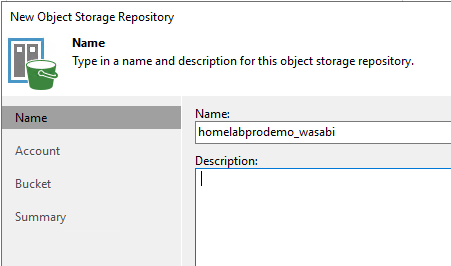
- Provide a suitable name > Next.
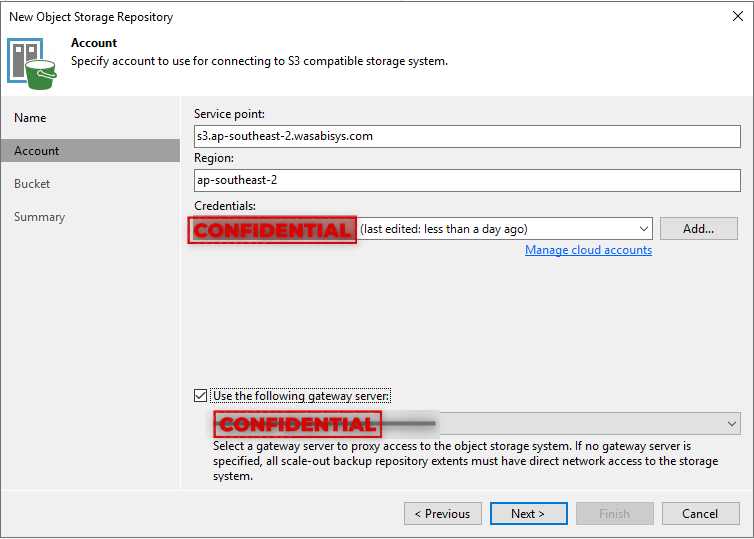
- Under the account section use the service end point and region you got when creating the bucket (in my case it would be Sydney, your mileage may vary).
- Under the bucket section select the bucket you previously created.
- Select folder and create a new folder.
- Tick “Make Recent Backups immutable” and specify the number of days.
- Click apply and finish.
Congratulations you now have an immutable bucket in wasabi, to easy!
Final steps is to add the wasabi s3 bucket to a Veeam scale-out backup repository and test to make sure our backups are indeed immutable.
- Navigate to Backup Infrastructure > Scale-out Backup Repositories.
- Right click > Add new SOBR.
- Provide a suitable name.
- Provide a performance Tier (Can be any non-s3 repo).
- Select Data Locality as the placement policy.
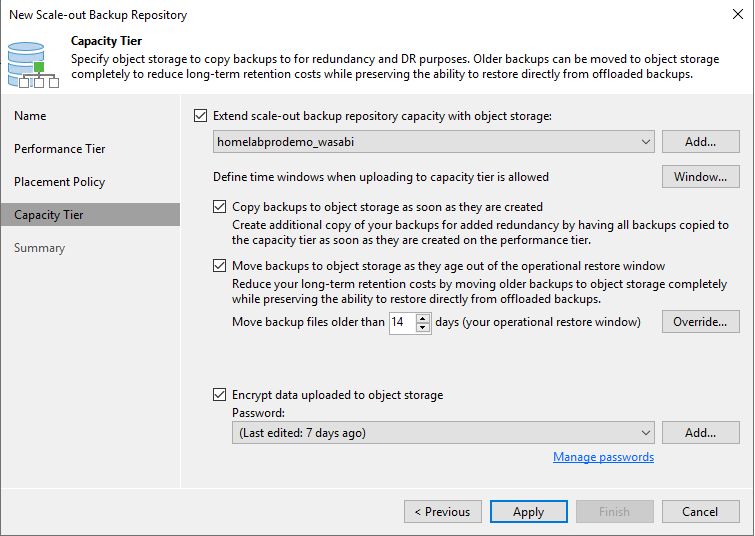
- Under Capacity tier select your newly create Wasabi bucket and configure the settings as you require.
- I personally prefer both copy and move but thats up to you and your design
- As this is across the internet I have chosen to encrypt any data that is uploaded to object.
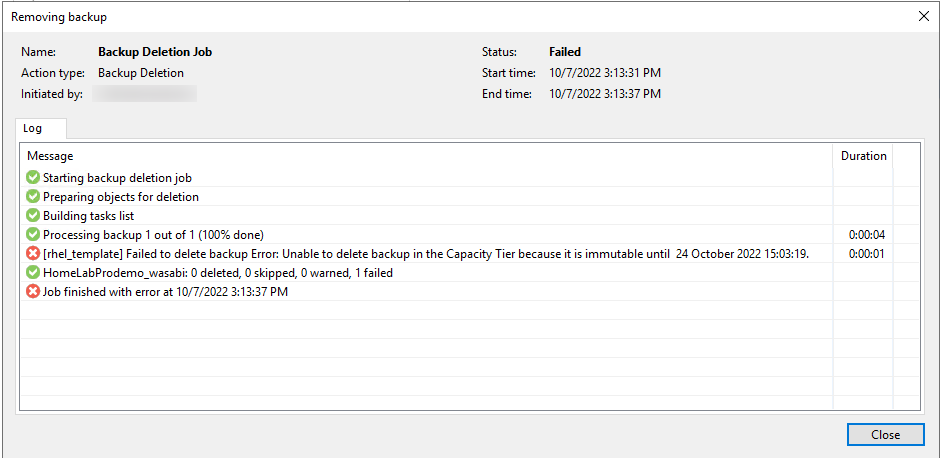
Click Apply to finalize your configuration, you should now have a scale-out backup repository with your Wasabi bucket in it. All that’s left to do is configure a backup and confirm Immutability is working which we can see below is working as expected, when attempting to delete something from my object store it errors out and says its unable to do so due to the immutability settings configured.
Wasabi really does make S3 storage easy to consume and even easier to setup and ticks all my requirements 🙂 I hope this was helpful and as always keep on learning.