Synology DS1621xs+ is an absolute power house
We all love storage and these days even in a home setting we store terabytes worth of data. The new cliché saying is “Data is the new oil” and when you think about it that is very true.
We generate an unreal amount of data each day which must be stored somewhere, what better way to store this data than on your own NAS. In this run through of the new Synology DS1621xs+ we will be taking a look at the NAS unit itself, The new Synology HAT5300-8T HDDs and the new Synology Active Backup for Business suite offered by Synology.
Setup and Hardware
Right, lets get into it. The setup we are using to test is outlined below.
- NAS – DS1621xs+ 8GB
- HDDs – Synology HAT5300-8T 7200k RPM
- SDDs – SNV3400-400G M.2 NVME Drives (SSD Cache drives)
- Switch – 1G managed switch
- Compute – Stand Alone VSPHERE 6.7 U3
Overview of the NAS
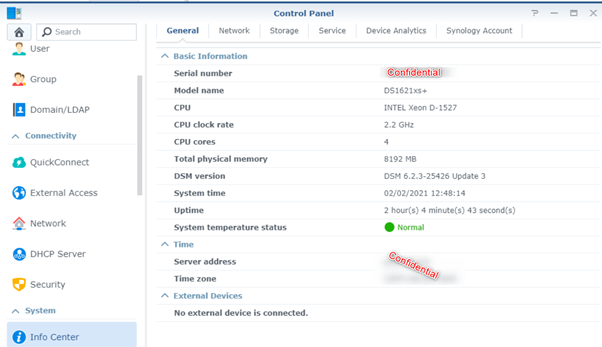
The Synology DS1621xs+ is more focused to towards the business sector or remote sites packing a huge punch in a small form factor. 6 bays for bulk capacity and 2 x M.2 NVME slots for cache means it should easily handle most IO that you throw at it not to mention the built in 10GBase-T port to kick things into high gear.
The NAS is a bit on the expensive side but considering it has got a 2.2GHz quad-core Intel Xeon with 8GB of ram which can be expanded to 32 GB as well as the above-mentioned specs it will most likely meet and exceed your requirements.
Overview and Performance of HDDs
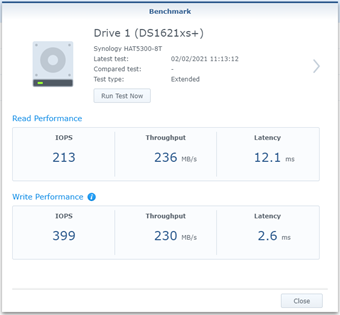
I was luckily enough to get my hands on some Synology HAT5300-8T 3.5-inch SATA drives and can say I am happily impressed with them as they are optimized for Synology deployments. Based on the packaging they look to be re-branded Toshiba drives, so from the looks of it Synology isn’t building the drives from scratch but will be keen to see how they perform against other drives in the future.
These 6Gb/s 7,200RPM drives perform well when paired with the DS1621xs+ hitting up to 236MB/s and 213 IOPS in my testing on a single drive (No raid or Cache)
Synology introducing branded HDDs does not mean that future Synology NAS’s will only support Synology HDDs, most models will still support HDDs from other brands if they are on the compatibility list.
Only a few higher-end models that will mostly likely be deployed in enterprise environments will be limited to Synology branded drives due to optimizations and performance.
Testing
Probably the number one question that gets asked when it comes to data is “What is your data worth to you?” depending on your answer, you are most likely going to want to protect your data by backing it up and storing it safely.
In comes Synology’s Active Backup for Business, an all-in-one business data protection solution, allowing you to protect virtualized environments, physical servers and workstations.
I have been playing with the product for a couple weeks now and its been a blast to learn a new product suite. Today’s blog however will mainly be focusing on protecting my VMware environment and how to get it set up so sit back and relax while we get this all sorted.
- Install Synology Active Backup for Business from the packet manager.
- The first time you open the app it will ask you to activate it using your Synology account.
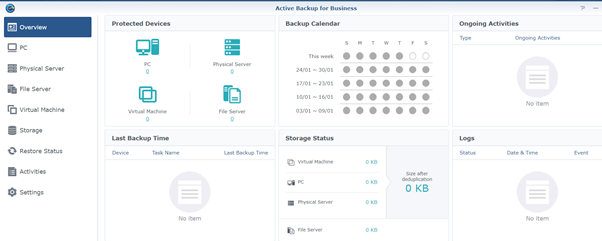
- You will be greeted by the above screen, from here we can go ahead and configure a Hypervisor, in our case VMware vSphere 6.7.
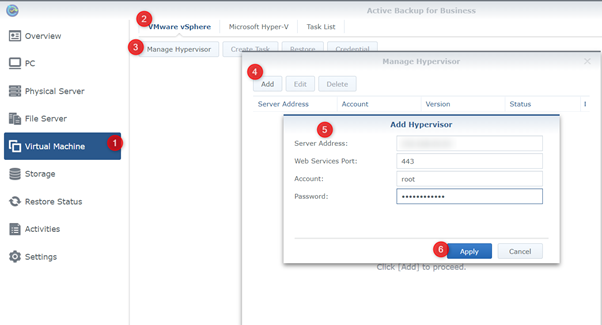
- Navigate to the Virtual Machine tab
- Select VMware vSphere
- Select Manage Hypervisor
- Select Add
- Enter the appropriate details pertaining to your environment.
- Click Apply
Following the above steps, you should now see your vSphere host showing a status of online and the virtual machines on the host should now be listed.

Now to create a protection job for the VM.
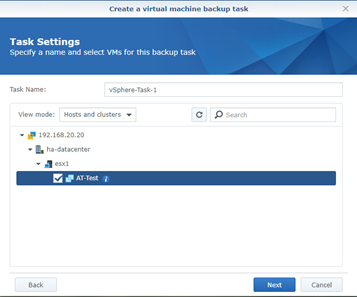
- Select Create Task
- Specify the backup destination.
- Select the VM you wish to protect.
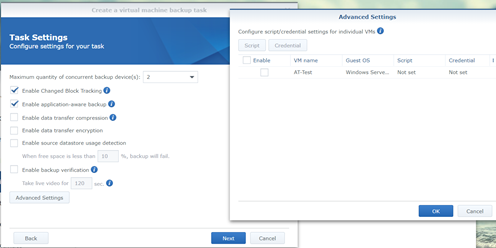
- Specify any additional settings you wish to enable like Change Block Tracking and application aware backups for applications that support VSS.
- Select the advanced tab to set the credentials you wish to use for application aware processing.
- You can also set a Pre-Freeze/Post thaw scripts at this point
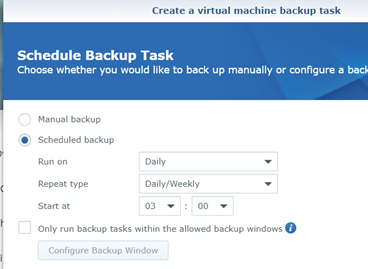
- Configure your chosen backup schedule.
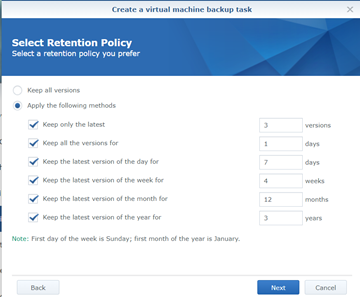
- Specify your retention policy.
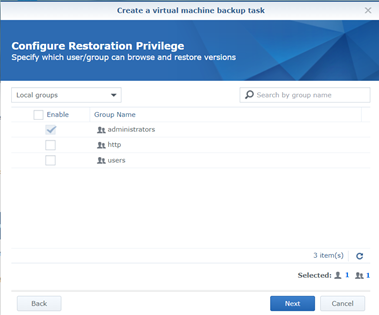
- Configure which users can browse/restore the backup files.
- Recommendation here would be to create a backup admin group.
- Verify that all the options you have select are correct.
- Click Apply to finish the job creation process.
Once you have completed the job creation process you should see your job show up within the task list. You can select to run an ad-hoc backup by clicking the “back up” button to confirm all is working at intended.

Just like that we have a protected VM 😊 but what about restore you ask? No problem we got that covered as well.
- File level recovery
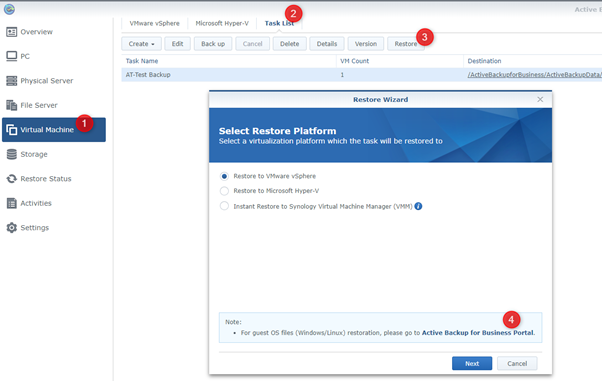
- Navigate to Virtual Machine
- Select Task List
- Select Restore
From here you can either restore the VM or browse the Guest file system (In this case will select the hyperlink at the bottom)
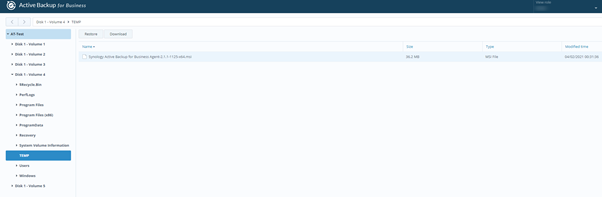
- Open the Active Backup for Business Portal
This will open a separate browser tab with the VM mounted so you can browse the guest file system. You can browse the restore point as if it were mapped to your workstation. Once you find the file you wish to restore you have two options
-
Restore
- Restore the file back to the original VM.
-
Download
- Downloads it to your local machine.
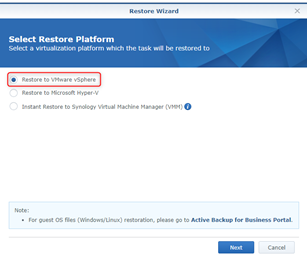
- Restore back to VMware.
- Following the same process as before but instead we will select “Restore to VMware”.
- At this point you have two options
- Instant restore.
- Mounts the VM image directly from the backup file off the NAS.
- Full VM restore
- Restores the VM in its entirety.
- Select the VM you wish to restore.
- Select whether you wish to restore to the original location or a new location.
- For demo purposes we will choose a new location
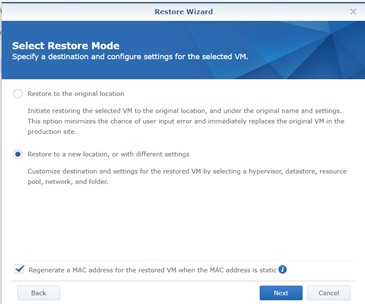
- Specify the new name of the restored VM and its folder location.
- Select the desired Hypervisor and resource pool.
- Select the desired datastore.
- Select the desired Network.
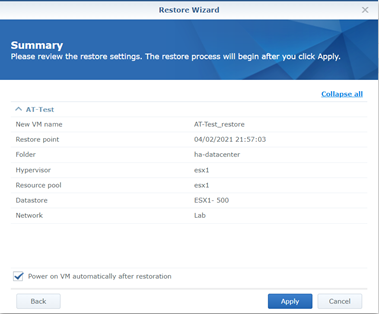
- Confirm your choices and click apply.
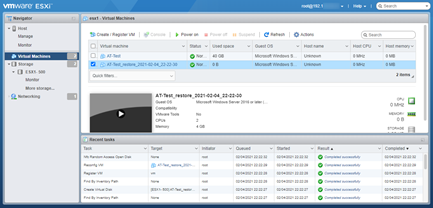
If you flick over to your vSphere server, you should see the process start.
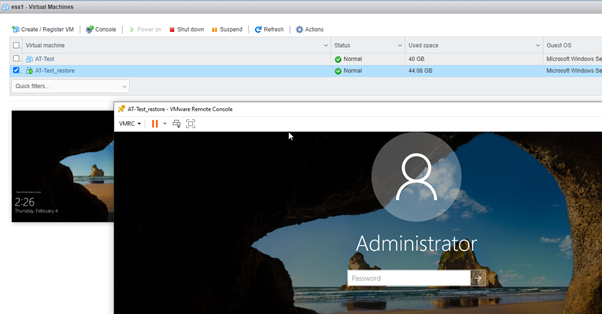
And there you have it folks, a successfully restored windows 2016 server back to VMware vSphere.
Conclusion
Considering Active Backup for Business ships natively with the Synology DS1621xs+ NAS it really holds its own being able to protect virtual and Physical workloads with relative ease. I personally found it very simple to navigate and use, the setup process was straight forward, and you essentially just follow the bouncing ball.