Azure and Back Again – A Veeam Tale – Part 1
We talk a lot about cloud mobility and how it has affected the IT landscape of the past decade. It has disrupted business as we know it as it seems every company is going through a cloud journey of some sort most prominent being the public cloud.
We see customers moving workloads to public cloud in anger and in some cases require the ability to move that particular workload back due to unforeseen issues. This is more common than one would think so today I will being taking you on an adventure to Azure and back again using Veeam.
Setup
The idea of today’s adventure is to run through backing up a server on-premises and “lifting” it into Azure, once there we will reverse the process by backing up the VM in Azure and migrating it back down to our On-Premises
Process
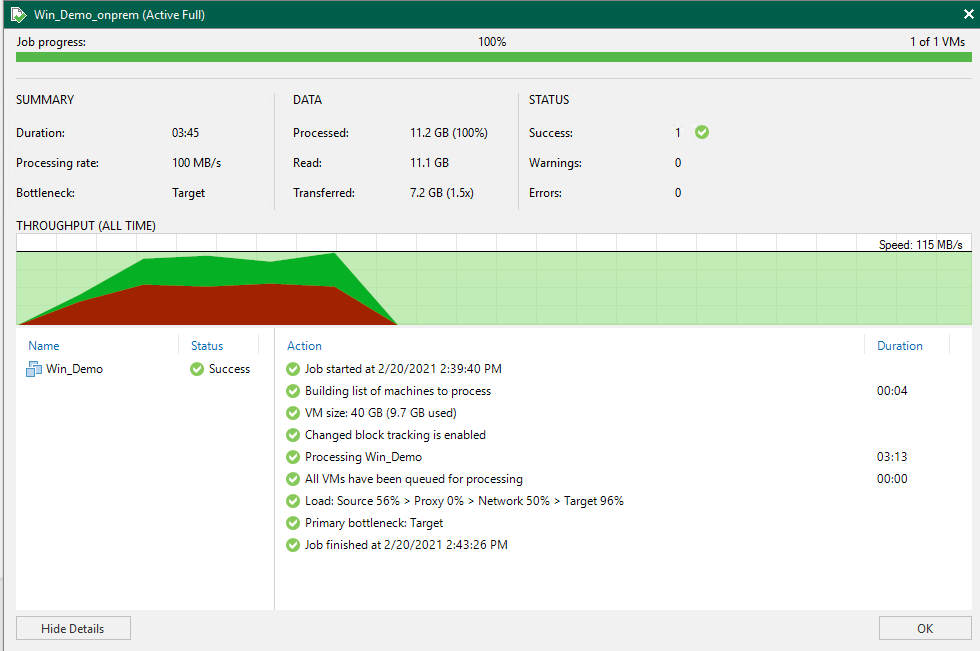
- We will kick this off by completing an active full backup of our Win-Demo VM.
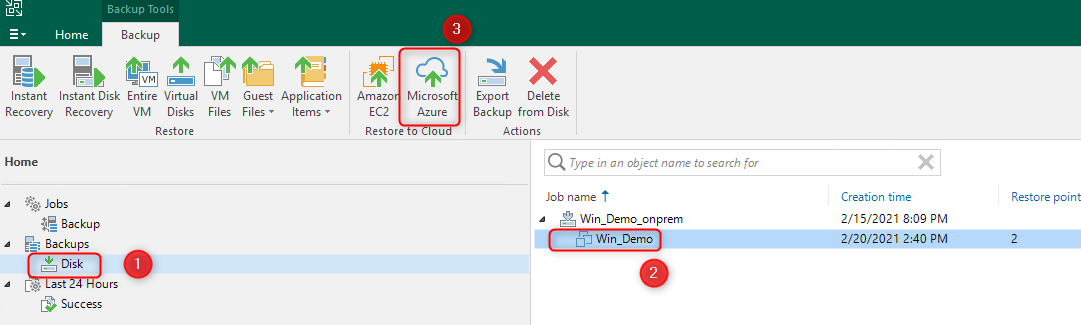
- Restore the VM into Azure using the “Restore to Cloud” option and selecting Azure.
- If you haven’t already added your Azure account yet you will be prompted to do so, If you have mapped an Azure account you will be prompted to select the correct account
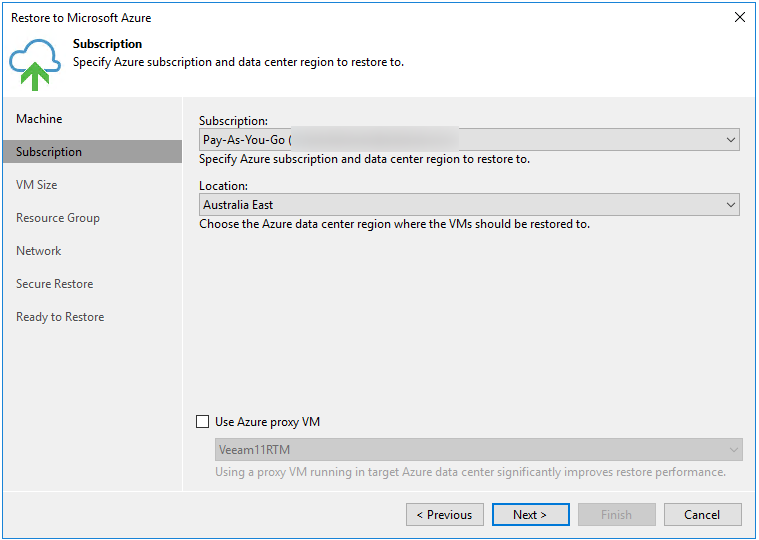
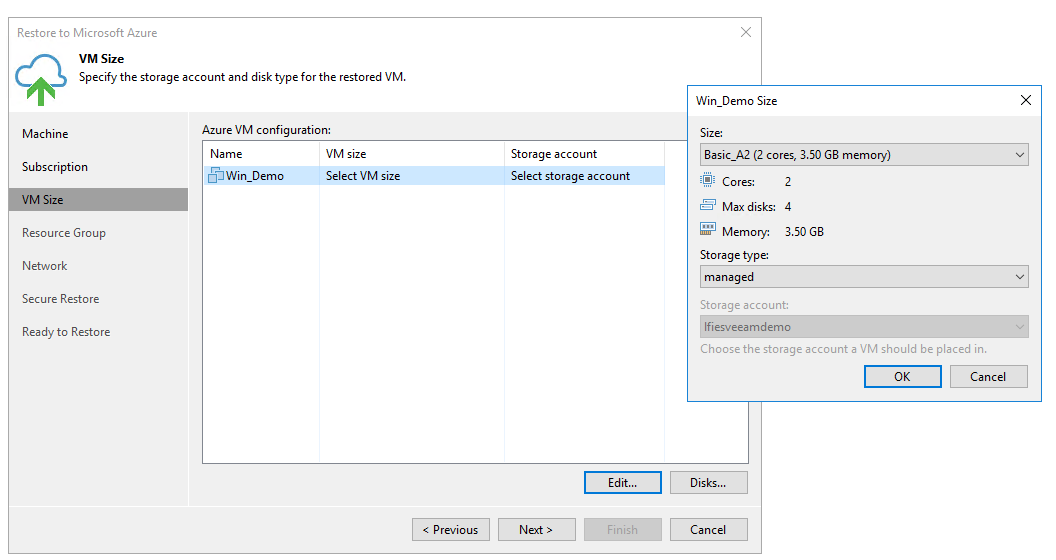
- Select your desired VM configuration
- Select your desired resource pool configuration.
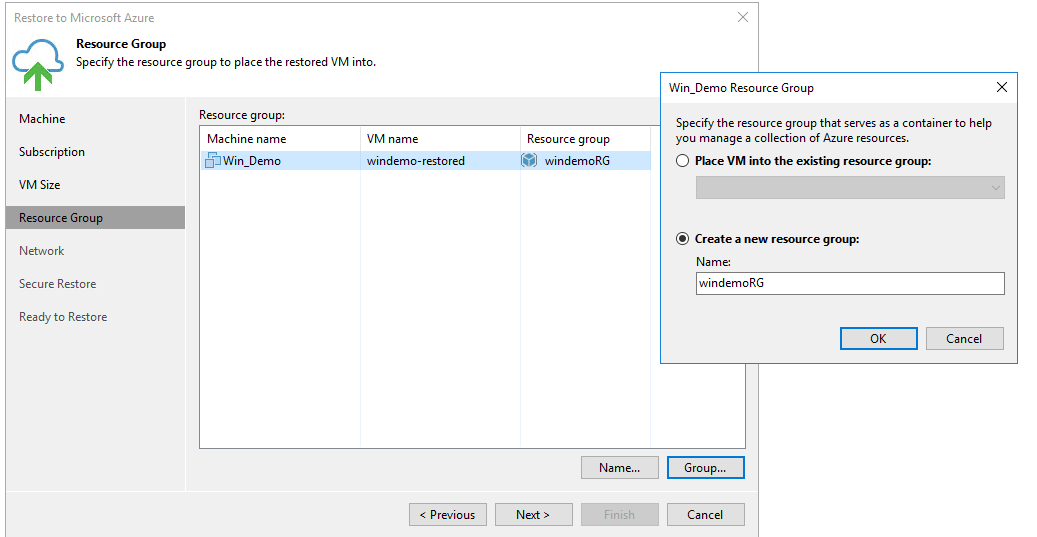
- You can either restore into an existing Resource Group or you can create a new one
- Amend the name of the VM.
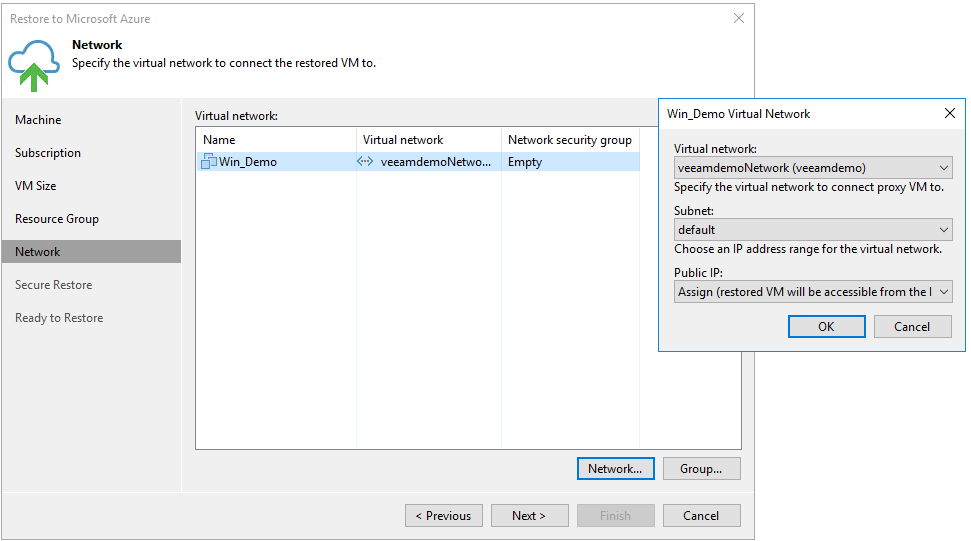
- Specify network configuration
- Specify Secure Restore options if you wish to perform an AV scan of the server before it is completely restored
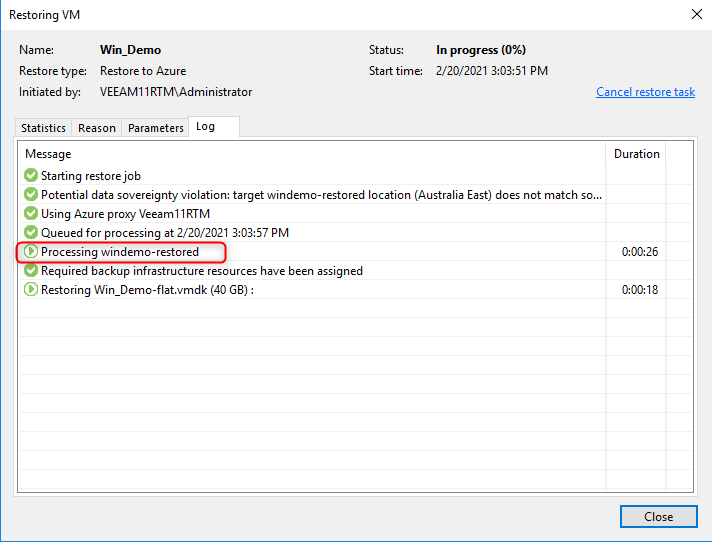
- Confirm the restore details are correct and click Finish to initiate the restore.
You should see your VM successfully restoring into Azure. This can take a while as its dependent on the size of the VM as well as your internet speed.
Whilst we wait for our VM to restore successfully, we will continue deploying the Veeam Backup for Azure suite
Veeam Version 11 has come with a lot of enhancements including tighter integration with their other products. My personal favorite is the ability to deploy the Azure backup solution straight from the VBR console.
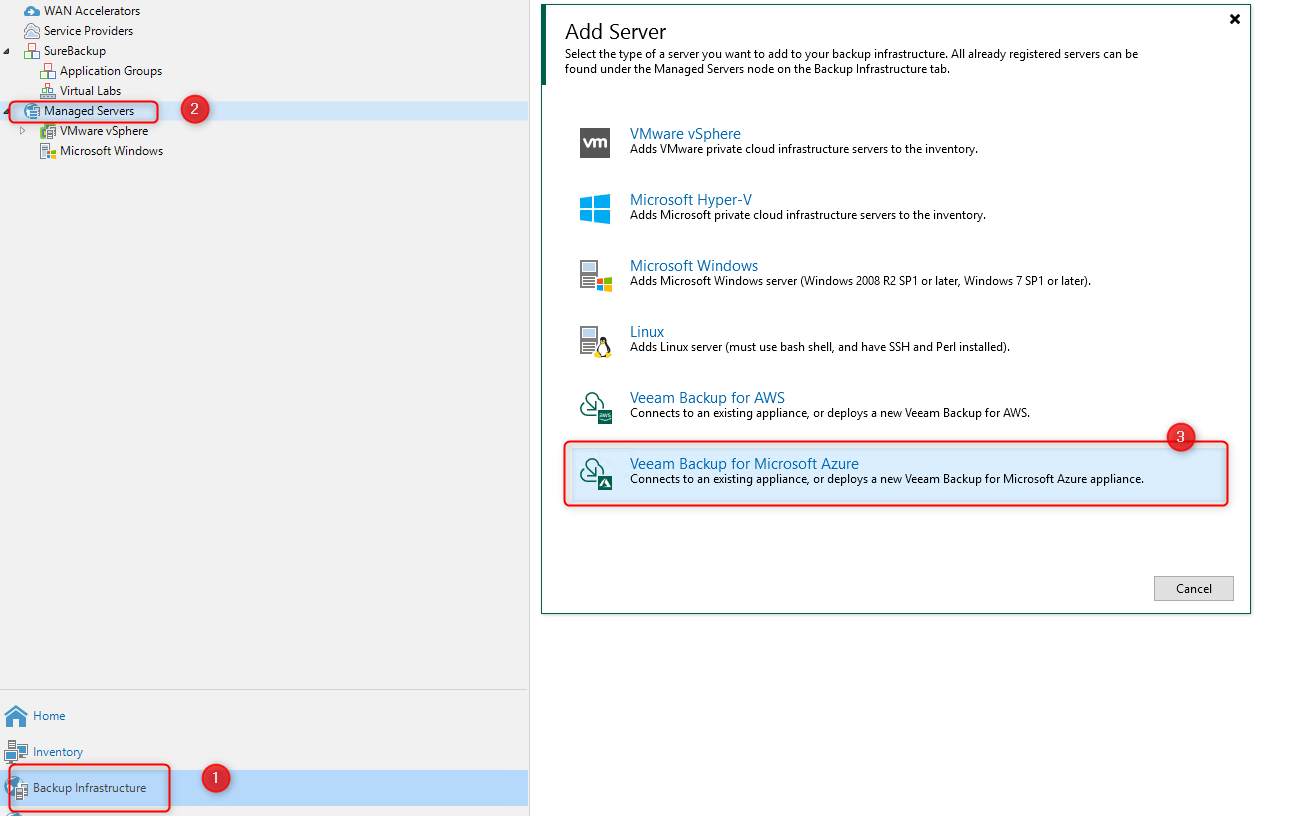
- Navigate to Backup Infrastructure -> Managed Servers
- Click Add Server
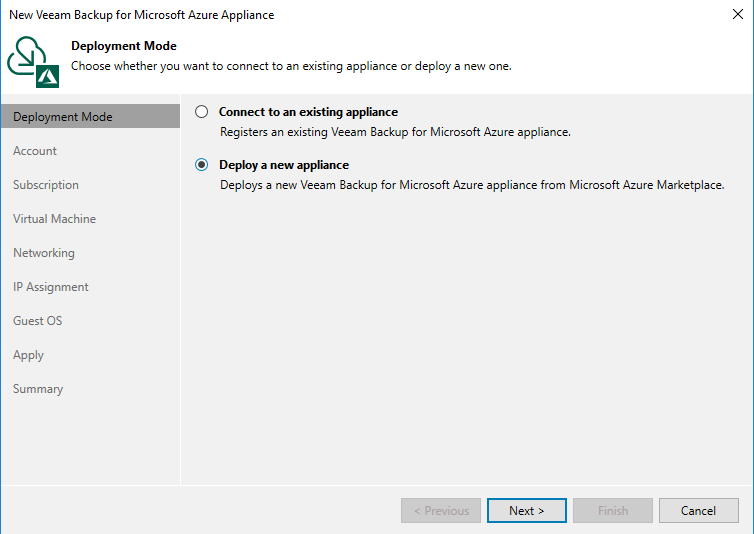
- Select Veeam Backup For Microsoft Azure
- Deploy a new appliance
- You can leverage an existing deployment if you wish
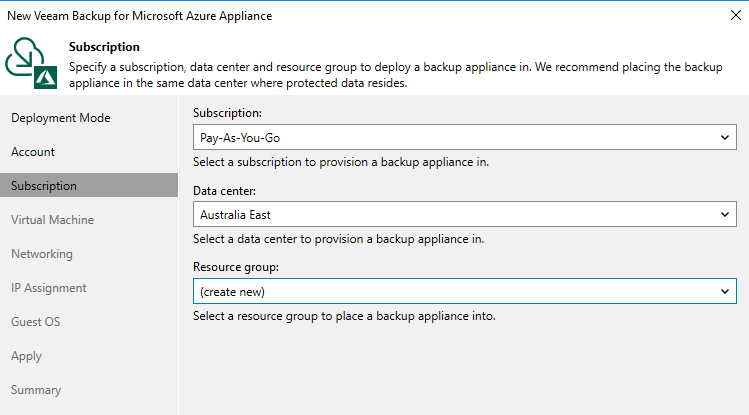
- Select your Azure Account
- Specify your choice of Account and location
- Provide a name for the appliance VM.
- Configure your desired Networking configuration.
- Choose between a Dynamically assigned IP or a static IP.

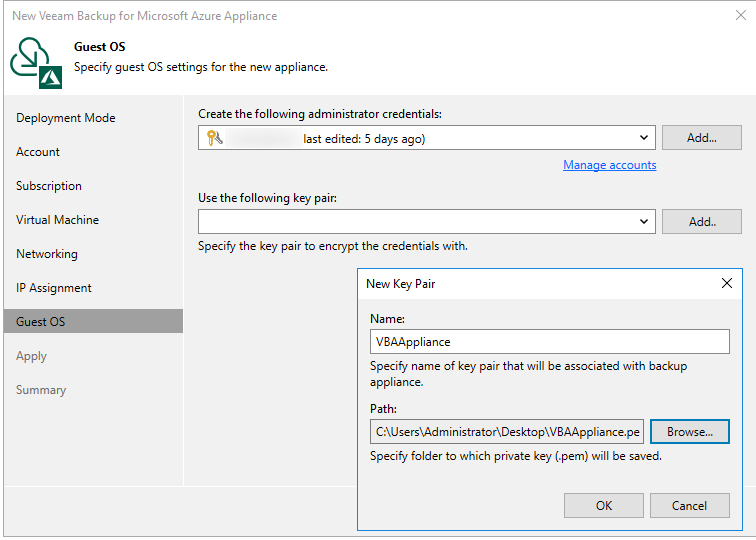
- Provide Administrator details for your server and create a Key Pair.
- Confirm you are happy and deploy the appliance to Azure

Brilliant, appliance deployed. Next step will be to map the external repository.
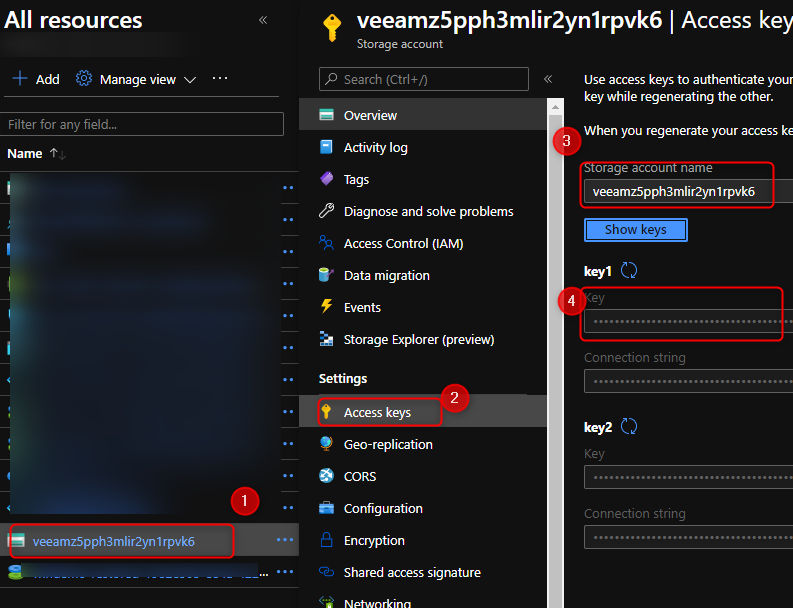
- Navigate to your Azure portal
- Locate the correct Storage Account
- Note down the Access Key
- Navigate to VBR
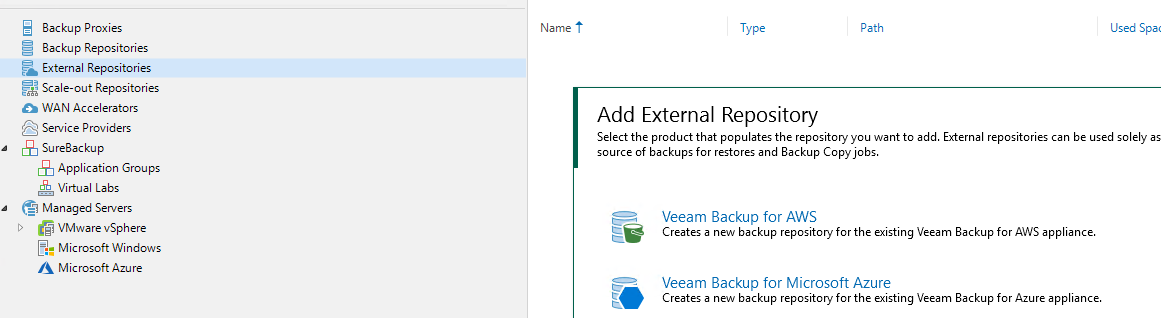
- Navigate to Backup Infrastructure -> External Repositories
- Right click -> add
- Select Veeam Backup For Microsoft Azure
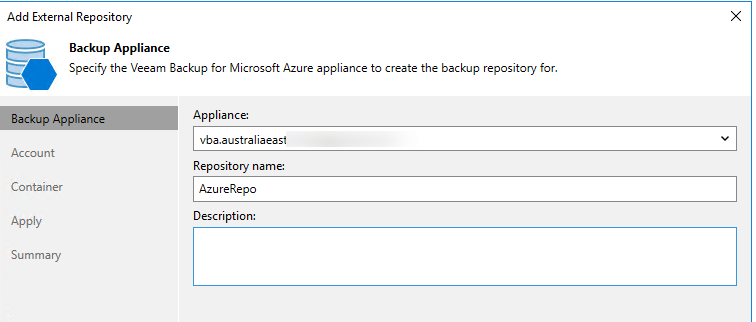
- Provide a repository name
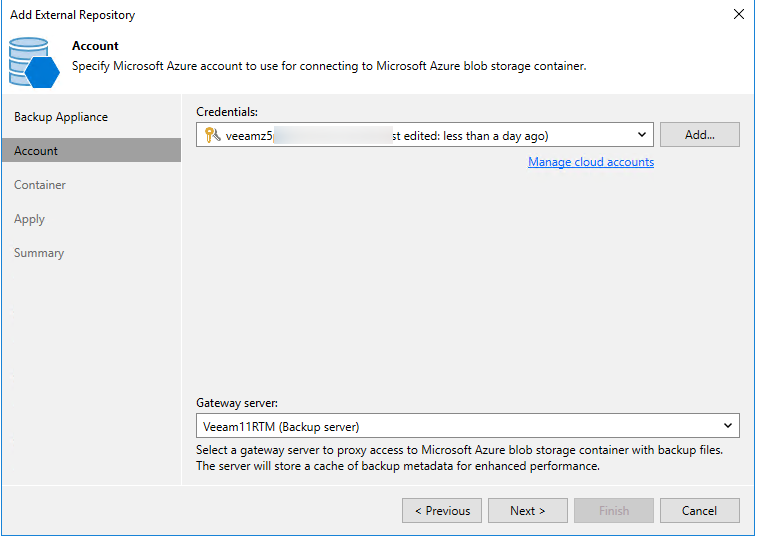
- Add your Azure Storage Account credentials (Access Key collected earlier)
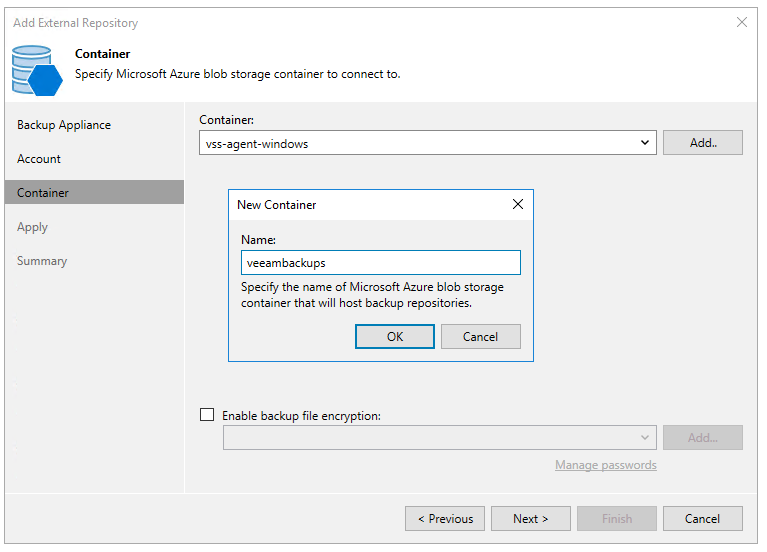
- Create a new container
- optionally encrypt your backups
Fantastic, now we have our VM successfully restored into Azure, we have our Veeam Backup for Azure appliance successfully deployed and operational and we have our external repository mapped and with that we have completed Part 1 of our adventure.
Part 2 will take us back to on-premises so stay tuned.