Veeam Office 365 Modern Authentication Setup
Setting up modern authentication in Veeam for Office 365 recently came up in a conversation so thought I’d write a quick blog post about it because honestly its amazingly easy and makes life a lot easier 🙂
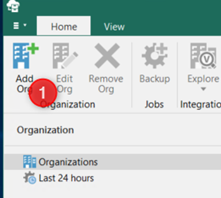
- Log into your Veeam for Office 365 console.
- Select “Add Org”
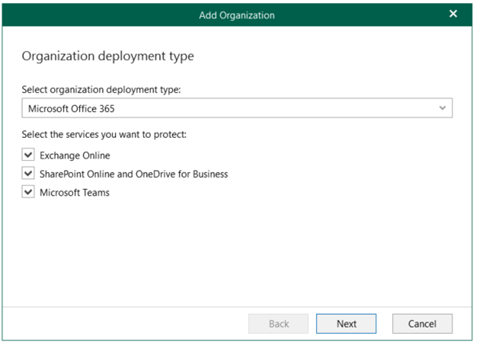
- Specify deployment type.
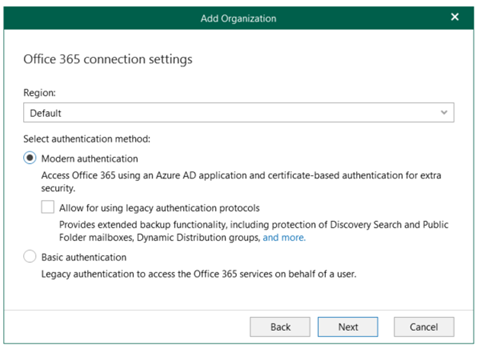
- Select Modern Authentication.
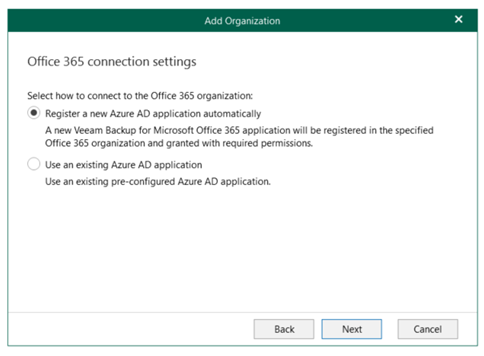
- Register a New Azure AD application automatically.
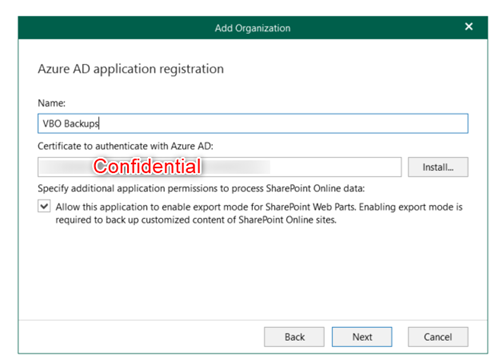
- Select the correct certificate and provide a name for the Azure AD application.
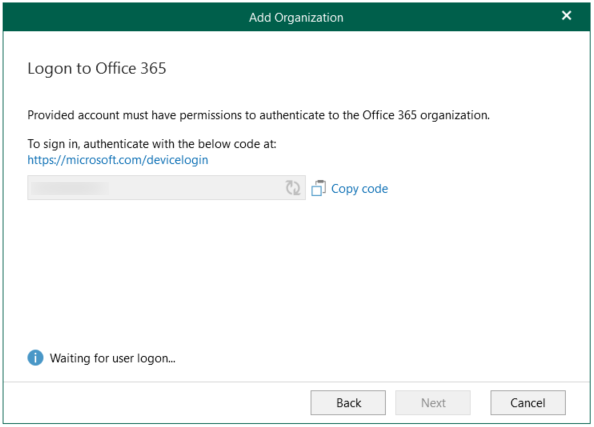
- Use the below code provided to authenticate against your AzureAD.
- Once the code is accepted, the Next button will become available.
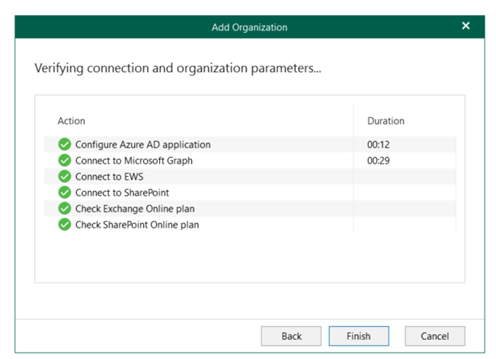
- Confirm all permissions are working as required, Got to love all the green 😉
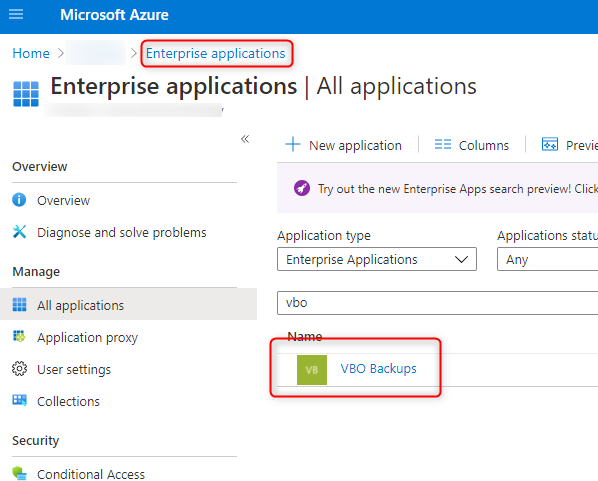
- From the AzureAD side it should look like the below when checking enterprise applications and your app registration.

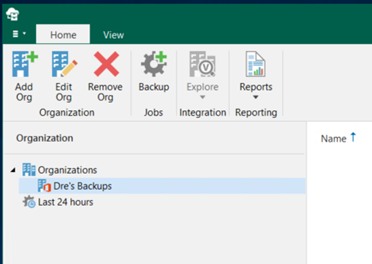
If everything went according to plan you should have your tenancy loaded and ready for some backups as shown below.
Its that simple, like they say with Veeam products “it just works” 🙂